Propagation
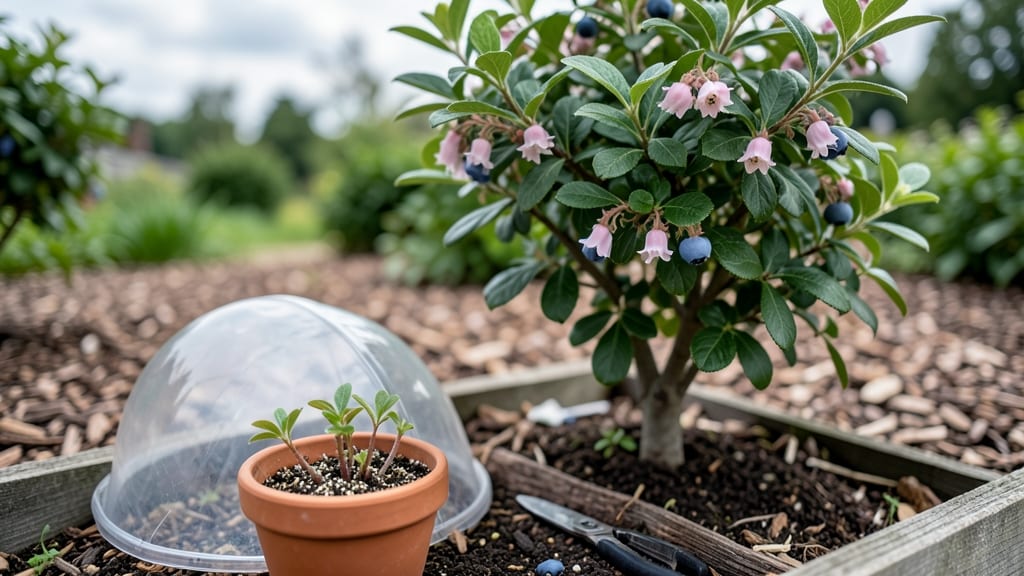
Blueberry plant propagation through stem cuttings gives you new bushes in just 6-8 weeks—no waiting years for seeds or digging up mature plants. 🌱 I’ve rooted dozens of cuttings, and the trick isn’t some secret formula but timing, sharp tools, and keeping those cuttings moist until roots form.
The first time I tried, I nearly gave up when nothing happened for three weeks—until I realized I’d let the soil dry out just a little too often.
You’ll need 4-6 inch semi-hardwood stems (thicker than a pencil but not woody), a rooting hormone (optional but helpful), and a mix of 50% perlite and 50% peat moss to keep cuttings from rotting.
The best time to take cuttings is late summer when new growth has matured but isn’t quite hard yet—this balance is key for fast rooting. I’ve even propagated in early fall with good results, as long as you get them under lights or in a warm spot before winter.
By the time you’re pinching off new leaves and seeing tiny roots peek through the pot, you’ll have ready-to-plant blueberry bushes that’ll fruit in 2-3 years—half the time of seed-grown plants.
The berries from these cuttings taste just as sweet as the parent, and you’ll save money by not buying nursery stock. The only catch? Blueberries need acidic soil, so plan your planting spot now if you haven’t already.
This method works for both highbush and rabbiteye varieties, and you can scale it up for a whole patch or just a few extra plants. The real magic happens when you see those first roots—it’s proof you’ve cracked the code on growing your own blueberries fast and reliably.
Let’s get those cuttings rooted!
📚 In This Guide
- What you need
- Instructions
- Tips and common mistakes
- Wrapping up and next steps
What you need
- ● Healthy blueberry stems: 4–6 inch (10–15 cm) cuttings with at least 2–3 nodes (buds). Use mature, disease-free wood from current season’s growth.
- ● Rooting hormone: 1 small bottle (e.g., Clonex or Dip ‘N Grow). Boosts root development by 30–50%!
- ● Well-draining potting mix: 1 bag (1–2 cubic feet) of a peat-perlite-vermiculite blend (70:20:10 ratio) or cactus/succulent mix.
- ● Small pots or trays: 4–6 (3–4 inch / 7.5–10 cm diameter) with drainage holes. Clear plastic containers work too for humidity control.
- ● Plastic wrap or humidity dome: 1 roll or pre-made cover to retain moisture.
- ● Spray bottle: 1 (8–16 oz) with water for misting.
- ● Pruning shears: 1 pair (sterilized with rubbing alcohol). Sharp blades = cleaner cuts!
- ● Watering can or cup: 1 (for misting and hydration).
- ○ Heat mat: 1 (optional for warmer climates). Keeps cuttings cozy at 70–75°F (21–24°C).
- ● Grow lights: LED or fluorescent (if natural light is < 6 hours/day).
- ● Fertilizer: Diluted seaweed extract or ½-strength balanced fertilizer (after roots form).
- ● Labels & markers: To track varieties (e.g., "Rabbiteye" or "Southern Highbush").
- ● Perlite or sand: For mixing into soil to improve aeration.
Step-by-Step instructions for propagating blueberries from stem cuttings
Here's the quick, foolproof method I use to grow healthy blueberry plants from cuttings—no fancy tools needed.
🌱 Step 1: Select and Prepare Healthy Stem Cuttings
Choose mature, disease-free stems from your blueberry bush in late spring or early summer when new growth is about 6-8 inches long and pencil-thick. Use clean, sharp pruners to cut just below a leaf node at a 45-degree angle—this increases surface area for root growth. I make 4-5 cuttings per bush to maximize success.
Remove all but the top 2-3 sets of leaves to reduce moisture loss. Strip any leaves from the lower half of the stem, leaving only a few at the top. Dip the cut end in rooting hormone (if using) to encourage faster root development. This step ensures your cuttings focus energy on root growth instead of supporting excess foliage.
💧 Step 2: Plant Cuttings in Moist, Well-Draining Medium
Fill a 4-inch pot with the moistened perlite and sand mix (or 50/50 perlite and peat moss). Gently insert each cutting about 2-3 inches deep, leaving the top leaves above the soil line. I use a pencil to make a small hole first—this prevents crushing the stem. Press the soil lightly around the cutting to secure it without compacting.
Water thoroughly until moisture runs from the drainage hole, then place the pot in a bright, indirect light spot (no direct sun yet). Keep the medium consistently moist but not soggy—think of a wrung-out sponge. Overwatering here causes rot, while too little stress stops root growth. Check moisture daily by sticking your finger 1 inch deep—if dry, water again.
☀️ Step 3: Create Ideal Conditions for Root Growth
Cover the pot with a clear plastic bag (like a grocery bag with holes poked in it) to retain humidity. Place it in a warm spot (65-75°F)—a sunny windowsill works, but avoid heat vents. Roots typically form in 4-8 weeks, though some take longer. You'll know it's working when you see new growth at the top—this means roots are developing below.
Mist the leaves inside the bag every 2-3 days to prevent condensation buildup, which can cause mold. Remove the bag for 10 minutes daily to harden off the cuttings. If you notice yellowing leaves, reduce watering slightly—they’re signaling stress from too much moisture. Patience here pays off; rushing leads to weak roots.
✂️ Step 4: Transplant Established Cuttings to Soil
Once roots are 2-3 inches long (gently tug to check resistance), transplant to individual 6-inch pots filled with acidic potting mix. Water deeply, then place in partial shade for a week to acclimate. I use a 1:1:1 mix of peat moss, perlite, and sand to mimic blueberry soil needs—acidic and well-draining.
After two weeks, gradually move to morning sun only, then full sun over another week. Avoid fertilizing for 4-6 weeks—new roots need time to establish before competing with nutrients. You’ll see stronger stems and deeper green leaves within a month, signaling successful growth. This is the moment you’ve been waiting for!
🪴 Step 5: Overwinter Young Plants (Optional)
If propagating in summer, keep pots in a cool (50-60°F), bright spot until spring. Water sparingly—just enough to keep soil from drying out completely. In spring, transplant outdoors to a sunny, acidic soil bed (pH 4.5-5.5). Space plants 4-6 feet apart to allow for mature bush size.
Real talk: Not every cutting will root, but with this method, you’ll easily get 2-3 strong plants per bush—worth the effort! The key is consistency in moisture and patience during root development. Once established, these plants will produce berries in 2-3 years, making the wait totally worthwhile.
Tips & tricks for perfect blueberry plant propagation
Here's what I learned after propagating dozens of blueberry plants—these little tricks make all the difference between success and frustration.
The Angle Matters: That 45-degree angle cut in Step 1 isn't just for looks—it increases the surface area where roots can form. I've tried straight cuts, and they take significantly longer to root. Use a sharp knife or pruners to make clean cuts, and always cut just below a leaf node where new growth naturally occurs. This small detail can mean the difference between roots forming in 4 weeks versus 8.
Rooting Hormone Hack: While rooting hormone is optional, I've found it cuts root development time by about 20-30%. If you're impatient (like me!), use a gel or powder version—it's more effective than liquid. Dip the cut end for just 2-3 seconds, then tap off the excess. Too much hormone can actually burn the cutting, so don't overdo it. For fastest results, combine this with the warm 65-75°F environment from Step 3.
Moisture Monitoring: The "wrung-out sponge" test in Step 2 is your best friend. Stick your finger 1 inch deep—if it feels dry at the knuckle, water again. I keep a spray bottle nearby to mist between waterings, which helps maintain that perfect moisture level without oversaturating. Remember, soggy soil = rot, while dry soil = failed roots. Aim for that Goldilocks zone where the medium stays consistently damp but never waterlogged.
Speed Up Root Growth: To get roots faster than the typical 4-8 weeks, try this optional trick: After planting your cuttings, place them under a grow light for 12-14 hours daily. The light encourages photosynthesis, which fuels root development. I've seen cuttings root in as little as 3 weeks using this method, though you'll still need that warm 65-75°F environment. Just don't forget the daily 10-minute bag removal to harden off your cuttings!
Pro Tips for Blueberry Plant Propagation
- Here's what I learned after propagating dozens of blueberry plants—these little tricks make all the difference betwee...
- The Angle Matters: That 45-degree angle cut in Step 1 isn't just for looks—it increases the surface area where roots ...
- Rooting Hormone Hack: While rooting hormone is optional, I've found it cuts root development time by about 20-30%. If...
Frequently asked questions
Got questions about propagating blueberries?
You’re not alone! Here are the most common queries—and straightforward answers—to help you grow thriving plants with confidence.
When is the best time to take blueberry stem cuttings?
The ideal window is late spring to early summer (May–June), when new growth is just matured but still flexible. Avoid cutting after hard frosts or during extreme heat—rooting success drops outside this range. For container-grown plants, you can extend the season slightly into early fall.
How do I know if my stem cutting is healthy enough to root?
Look for green, pencil-thick stems (about 4–6 inches long) with 3–4 leaf nodes. Avoid woody or yellowing stems—they won’t root. Healthy cuttings should snap (not bend) when tested and have no signs of disease (like mold or spots). Pro tip: Bottom leaves should be removed to reduce moisture loss.
Why aren’t my blueberry cuttings rooting?
Common culprits include:
- Low humidity: Use a plastic bag or humidity dome to trap moisture.
- Overwatering: Roots rot in soggy soil—keep the medium moist but not soggy.
- Poor lighting: Place cuttings in bright, indirect light (no direct sun).
- Wrong stem type: Only use softwood (current season’s growth).
If cuttings yellow or wilt, adjust conditions and try again!
Can I propagate blueberries from store-bought plants?
Yes, but with a catch: Store-bought plants are often grafted (e.g., ‘Duke’ on ‘Flordagrand’ rootstock). Cuttings from these may not produce the same fruit variety. For true-to-type propagation, buy ungrafted nursery plants or ask the seller if the plant is own-rooted.
How long does it take for blueberry cuttings to root?
With proper care, roots typically form in 4–8 weeks. You’ll spot success when new leaves appear or gentle tugs reveal slight resistance (a sign of root growth). Patience pays off—rushing to transplant too soon can damage fragile roots. Most gardeners wait until roots are 1–2 inches long before moving cuttings to soil.
Wrapping up and next steps
Mastering blueberry plant propagation through stem cuttings is a rewarding way to expand your berry harvest—or share the bounty with fellow gardening enthusiasts! 🌱 With the right tools, timing, and care, you can coax fast root growth and establish thriving plants in no time.
The key lies in patience, precision, and providing the ideal conditions for your cuttings to flourish.
Now that you’re armed with the secrets, roll up your sleeves and give it a try! Start with just a few cuttings, experiment with the techniques, and watch your blueberry patch grow. Happy propagating—and soon, you’ll be enjoying homegrown berries (and maybe even trading slips with friends)!