Planting
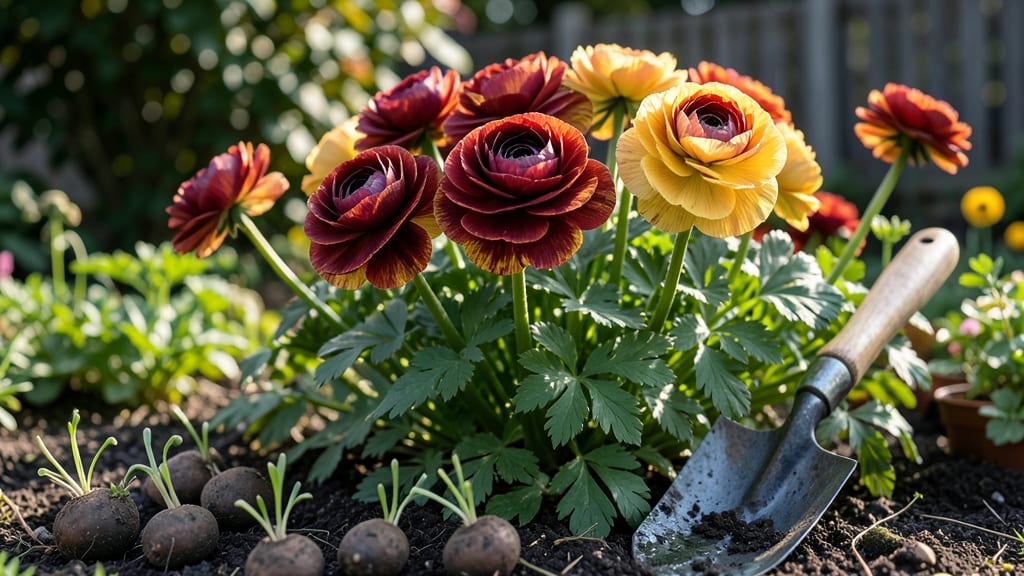
Planting ranunculus bulbs in the fall guarantees a riot of color before most spring flowers even think about waking up. 🌸 I’ve seen these papery-petaled beauties transform a sleepy garden into a showstopper, and the secret starts with timing—get them in the ground 6-8 weeks before frost for roots to establish before winter.
The payoff? Blooms that arrive earlier than tulips or daffodils, often by late March or early April, depending on your zone.
This isn’t just about tossing bulbs into the dirt and hoping for the best. You’ll need well-draining soil (amend with compost if yours is heavy clay), a sunny spot with at least 6 hours of light, and a spot where they won’t get trampled over winter.
In colder zones (5-7), mulch lightly after planting to protect them from freeze-thaw cycles. The key is letting nature handle the heavy lifting—your role is just to set the stage.
By spring, you’ll be rewarded with clusters of delicate blooms in shades of pink, white, red, and purple that last for weeks with proper care. The secret weapon? Deadheading spent flowers keeps them coming, and dividing the tubers every 3-4 years prevents overcrowding.
It’s the kind of garden magic that makes neighbors stop and ask, “What are those?”
Works in containers too—just use a well-draining mix and plant them shallow. Whether you’re in Zone 3 or 9, the principles stay the same. Let’s get those bulbs in the ground before the first frost hits!
📚 In This Guide
- What you need
- Instructions
- Tips and common mistakes
- Wrapping up and next steps
What you need
- ● Ranunculus corms: 50–100 corms (depending on desired coverage; larger corms yield bigger blooms). Choose high-quality, firm corms from reputable suppliers.
- ● Well-draining potting mix or garden soil: A blend of 50% garden soil and 50% compost or perlite works best. Avoid heavy clay soil.
- ● Container or garden bed: Containers: 6–8 inch pots (1–2 corms per pot) or a shallow tray (for bulk planting). Ensure pots have drainage holes.
- ● Garden beds: A sunny spot with at least 6 hours of sunlight daily and loose, amended soil.
- ● Organic fertilizer: A balanced, slow-release fertilizer (e.g., 10-10-10) or compost tea to nourish roots during dormancy.
- ● Mulch: Straw or shredded leaves (2–3 inches thick) to insulate corms over winter.
- ● Garden trowel or bulb planter (for digging planting holes).
- ● Watering can or hose with gentle spray (avoid soaking the corms).
- ● Plant labels (to track varieties if mixing colors/sizes).
- ○ Row cover or frost cloth (optional, for extra winter protection in cold climates).
- ○ Slow-release granular fertilizer (optional, sprinkle lightly at planting time).
Step-by-Step instructions for planting fall ranunculus
Here's the foolproof method I use to get vibrant spring blooms from fall planting.
🌱 Step 1: Select and Prepare the Planting Site
Choose a location with full sun exposure—at least 6 hours of direct sunlight daily. Ranunculus roots need well-draining soil, so avoid low spots where water pools. If your soil is heavy clay, mix in 2-3 inches of compost to improve drainage and fertility.
Loosen the soil to a depth of 12 inches using a garden fork or tiller. This helps roots establish quickly during winter. I like to work in a small amount of bone meal fertilizer (about 1 tablespoon per square foot) at this stage—it provides phosphorus for strong root development.
🪴 Step 2: Plant the Corms at the Right Depth and Spacing
Handle ranunculus corms gently—they're delicate and bruise easily. Plant them 2-3 inches deep in the soil, with the pointed end facing upward. This ensures proper growth direction. Space corms 3-4 inches apart in rows that are 6-8 inches apart.
I like to plant in clusters of 4-5 corms to create a fuller look next spring. After planting, cover the area with 2-3 inches of mulch to protect the corms from freezing temperatures and keep soil moisture consistent. Avoid heavy mulch that could suffocate the corms.
☀️ Step 3: Water and Monitor Through Winter
Give the newly planted corms a thorough watering right after planting to settle the soil around them. After that, water only when the ground feels dry 1-2 inches below the surface. Overwatering in fall can cause rot, so let nature take its course during winter.
Check the mulch occasionally during winter to ensure it hasn't shifted or compacted. If snow covers the area, it provides natural insulation—just brush it off occasionally so you can see the mulch level. You'll know you're doing well when the mulch stays in place and the soil beneath remains frozen but not waterlogged.
⏰ Step 4: Prepare for Spring Growth
In early spring, when you see the first signs of green shoots emerging (usually 4-6 weeks before your last frost date), remove the mulch. This allows the soil to warm up and encourages faster growth. The shoots will be delicate at first, so avoid disturbing them.
Once the shoots reach 2-3 inches tall, add a light application of balanced fertilizer (10-10-10) to support the blooming process. Water at the base of the plants to keep the foliage dry, which helps prevent fungal diseases. You'll see the first buds form in 6-8 weeks, signaling that your fall planting paid off.
Tips & tricks for perfect fall-planted ranunculus
These simple tricks will help you avoid common mistakes and get the most vibrant spring blooms from your fall planting.
Soil Preparation Matters: The 12-inch deep loosening in Step 1 is crucial for root development. I find that adding a handful of coarse sand to heavy clay soil helps break up compaction even more. This creates better air pockets that prevent waterlogging during winter. Don't skip this step—poor drainage is the #1 reason ranunculus fails to thrive.
Corms Need Gentle Handling: Those delicate corms bruise easily, so resist the urge to squeeze them when planting. I like to use a small trowel to create planting holes and then carefully place each corm with the pointed end up. If you accidentally damage a corm, it won't grow properly, so take your time with Step 2.
Mulch Depth is Critical: The 2-3 inches of mulch in Step 2 serves two purposes: insulation and moisture control. Too little mulch won't protect from freezing, while too much can suffocate the corms. I use straw mulch because it breaks down slowly and provides consistent coverage. Check your mulch level occasionally during winter to ensure it hasn't settled or been washed away.
Spring Timing is Everything: Those 4-6 weeks before your last frost date in Step 4 are a critical window. If you remove mulch too early, cold soil can shock the emerging shoots. I set calendar reminders for this date each year—it's easy to forget when spring seems late. The first green shoots are delicate, so avoid walking near them until they reach 2-3 inches tall.
Pro Tips for Fall Planted Ranunculus
- These simple tricks will help you avoid common mistakes and get the most vibrant spring blooms from your fall planting.
- Soil Preparation Matters: The 12-inch deep loosening in Step 1 is crucial for root development. I find that adding a ...
- Corms Need Gentle Handling: Those delicate corms bruise easily, so resist the urge to squeeze them when planting. I l...
Frequently asked questions
Got questions about growing fall-planted ranunculus? You’re not alone! Here are the most common queries—and their answers—to help you cultivate stunning spring blooms with confidence.
When is the best time to plant ranunculus in fall?
Plant 4–6 weeks before your first hard frost—typically late September to early November in most U.S. zones (5–9). Cooler soil temps (below 60°F) prevent premature sprouting. Check your local frost dates for precision!
Can I plant ranunculus bulbs too deep or shallow?
Too deep? No blooms—plant bulbs 3–4 inches deep (shallower in sandy soil). Too shallow? Frost damage or weak stems. Use a ruler for consistency, and space them 4–6 inches apart for lush clusters.
What if my ranunculus doesn’t bloom next spring?
Common culprits: overwatering (rot), poor drainage, or planting too early. Check soil moisture (keep it evenly damp, not soggy), and ensure bulbs are in well-draining beds. If they’re dormant, wait—some varieties bloom late!
Are there low-maintenance ranunculus alternatives?
Yes! Try tulips (hardier, longer-lived) or daffodils (deer-resistant). For poppy-like blooms with less fuss, Iceland poppies or calendulas thrive in similar fall conditions but need less babying.
How do I store leftover ranunculus bulbs for next year?
After foliage yellows, dig, dry, and store in a cool (35–40°F), dark place (like a mesh bag in the fridge). Replant in fall—don’t refrigerate longer than 8 months or they’ll lose vigor.
Still stumped? Drop your question below—we’re happy to help you grow ranunculus magic!
Wrapping up and next steps
Fall-planted ranunculus is your ticket to a burst of early spring color with minimal effort! By following these simple steps—choosing the right tubers, preparing the soil, and timing your planting—you’ll reward yourself with stunning, long-lasting blooms that brighten up your garden before most flowers even think about waking up. 🌸
Ready to dive in? Grab your gloves, mark your calendar for September-October, and get planting! Your future garden will thank you—literally—with a showstopping display that’ll make your neighbors green with envy (and maybe a little jealous).