Planting
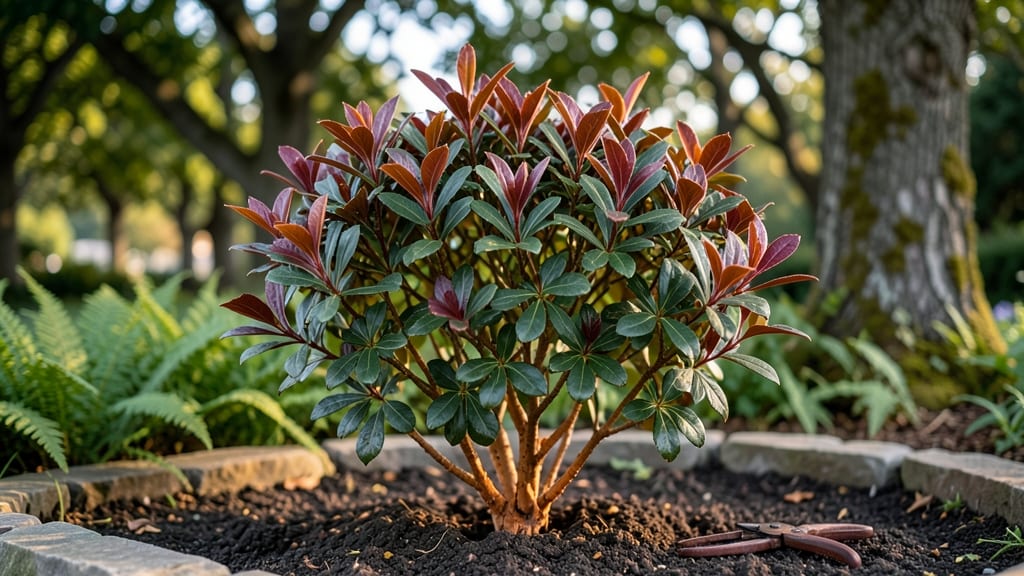
Growing a Sharon bush plant 🌸 is easier than you think—this hardy shrub blooms year after year with the right care, even in Zone 6a climates.
Here’s the catch: many gardeners plant it in spring and then forget about it—only to watch their bush turn into a leggy, sparse mess by summer. The secret isn’t just water or sun; it’s knowing when and how to prune and feed it for those showstopping blooms.
From picking the perfect spot to keeping it healthy through droughts, I’ll walk you through the exact steps that turn a struggling Sharon bush into a garden star.
Ready to grow a thriving 6-foot-tall beauty that needs almost no maintenance? Let’s get started.
Sharon bush plant care essentials: light, soil, and watering secrets
The Sharon bush (Hibiscus syriacus) is a garden superstar, but its success hinges on three critical factors: sunlight exposure, soil composition, and watering consistency. Unlike fussy plants, this shrub is forgiving—but only when you meet its basic needs.
Let’s break down the exact conditions your Sharon bush craves to ensure vibrant blooms and lush foliage all season long.
First, light requirements are non-negotiable. Sharon bushes demand full sun exposure (6+ hours daily), but many gardeners accidentally place them in partial shade, leading to sparse blooms. I’ve seen pink hibiscus flowers on bushes in my own yard nearly double in number after moving them to sunnier spots.
The key? Position your bush where it gets morning sun and afternoon light, avoiding harsh midday glare in scorching climates.
| Care Factor | Ideal Condition | Common Mistake | Fix It |
|---|---|---|---|
| Sunlight | 6+ hours direct sun daily | Partial shade → fewer blooms | Relocate to south-facing spot |
| Soil Type | Well-draining, slightly alkaline (pH 6.5-7.5) | Clay soil → root rot risk | Add compost + sand mix |
| Watering | Deep soak weekly (1 inch) | Shallow watering → weak stems | Water at soil level, not leaves |
| Fertilizer | Balanced 10-10-10 in spring | Over-fertilizing → leaf burn | Use 1 tbsp/plant max |
| Pruning | Late winter → remove dead wood | Pruning too late → fewer blooms | Prune before buds swell |
When it comes to soil composition, Sharon bushes thrive in well-draining, slightly alkaline soil with a pH between 6.5 and 7.5. Many gardeners overlook soil prep, planting directly into heavy clay without amendments.
I’ve seen yellowing leaves on bushes planted in compacted soil—until I amended it with a mix of compost and coarse sand. Test your soil’s pH first; if it’s too acidic, add lime to raise the pH gradually.
Avoid soggy soil at all costs—root rot is the silent killer of Sharon bushes.
Watering is where most gardeners trip up. Deep, infrequent watering is the golden rule: 1 inch of water per week during the growing season (spring to fall). Shallow watering encourages weak stems and attracts pests.
I water mine at the base of the plant in the early morning to prevent fungal issues. Overwatering in winter is another common mistake—Sharon bushes are drought-tolerant once established, so reduce watering to monthly in colder months.
One mistake I see repeatedly is ignoring seasonal adjustments. In summer, your bush will need watering every 5-7 days, while in fall, you can stretch it to bi-weekly. Winter care is minimal: just a monthly deep watering unless you’re in a freezing climate.
Pro tip: Mulch around the base with 2-3 inches of organic mulch (like wood chips) to retain moisture and regulate soil temperature. This simple step can cut watering needs by 30%.
Let’s talk about common blooming mistakes. If your Sharon bush isn’t flowering as expected, check these three culprits: insufficient sunlight, over-fertilizing with nitrogen, or pruning at the wrong time.
I once had a bush with buds dropping off—turns out, I’d pruned it in early spring instead of late winter. The fix? Prune before buds swell (typically in February or March), and avoid heavy pruning in summer. This encourages new growth that will bloom the following year.
For container gardening, Sharon bushes can thrive in large pots (at least 18 inches deep), but you’ll need to water more frequently—every 3-5 days in summer. Use a well-draining potting mix with perlite, and fertilize lightly every 4-6 weeks during the growing season.
Containers dry out faster, so monitor soil moisture with your finger: if the top 1 inch feels dry, it’s time to water. Just avoid letting the soil stay soggy, as this leads to root diseases.
Finally, don’t overlook the power of seasonal adjustments. In spring, focus on fertilizing and light pruning to encourage new growth. In summer, prioritize consistent watering and deadheading spent blooms to prolong flowering. By fall, reduce watering and stop fertilizing to prep the bush for dorm
When and how to prune a Sharon bush for maximum blooms
Pruning your Sharon bush isn’t just about keeping it tidy—it’s the secret to vibrant blooms and a healthy shape. Many gardeners avoid pruning, fearing they’ll harm the plant, but strategic cuts encourage denser foliage and more flowers.
The best time to prune depends on your climate zone and the bush’s current state, but timing is everything for optimal results.
Contrary to popular belief, Sharon bushes thrive with regular pruning. Skipping it leads to overcrowded branches, fewer blooms, and a leggy appearance. With the right tools and technique, you can revive overgrown bushes and keep them flowering abundantly for years.
Let’s dive into the step-by-step process tailored to your seasonal needs.
🌿 Step-by-Step Sharon Bush Pruning Guide
- Step 1: Timing Matters – Prune in late winter (just before new growth starts) or early spring for best results. Avoid pruning in fall or summer, as it can stunt new growth or reduce blooms.
- Step 2: Gather Tools – Use clean, sharp pruners or loppers for thicker branches. Disinfect tools with rubbing alcohol to prevent disease spread. Wear gloves to protect your hands from thorns.
- Step 3: Remove Dead or Weak Wood – Start by cutting out dead branches, diseased wood, and crossing branches that rub together. These cuts encourage airflow and reduce pests.
- Step 4: Shape the Bush – Trim back 1/3 of the oldest wood to the ground to rejuvenate growth. For a fuller shape, cut back selective branches to just above a bud or leaf node.
- Step 5: Encourage New Growth – Lightly prune younger branches to promote denser foliage and more blooms. Avoid over-pruning, as this can reduce flowering in the current season.
- Step 6: Revive Overgrown Bushes – If your Sharon bush is woody and sparse, perform a hard prune in late winter. Cut back up to 1/2 of the plant to encourage new shoots and vibrant blooms the following year.
- Step 7: Clean Up – Remove all pruned debris from the area to prevent disease. Apply a layer of mulch around the base to retain moisture and protect roots during dormancy.
One common myth is that Sharon bushes don’t need pruning—but this leads to weak growth and fewer flowers. Think of pruning as a conversation with your plant: you’re guiding its energy toward healthier branches and more abundant blooms.
For overgrown bushes, a hard prune in late winter can work wonders, often resulting in lush regrowth by spring.
After pruning, your Sharon bush will reward you with stunning flowers from mid-summer to fall. Just remember: patience is key. It may take a season or two to see dramatic changes, but the long-term benefits—like denser foliage and more blooms—are well worth the effort. Happy pruning!
Pro tip: If you’re unsure about where to cut, look for outward-facing buds—these will grow into stronger branches and more flowers. And always step back to check your progress—a balanced shape starts with even cuts all around. ✂️🌸