How To
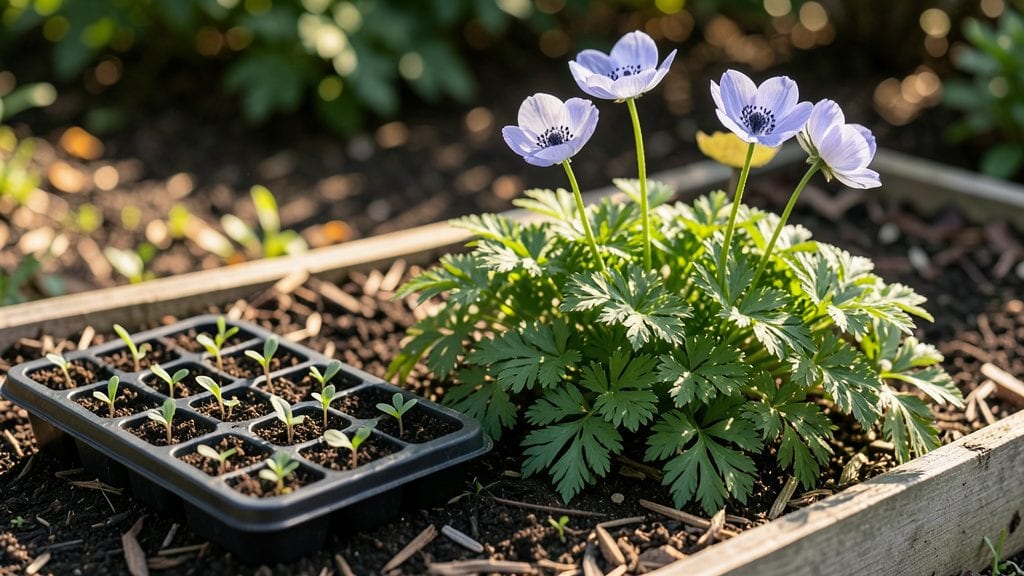
Planting anemone blanda transforms your garden into a carpet of delicate windflowers by early spring. 🌿 I remember the first time I saw them naturalize in a friend’s woodland garden—their deep green foliage and clusters of tiny, star-like blooms made me fall in love instantly.
These bulbs thrive when planted in well-draining soil and partial shade, creating a stunning understory that blooms before most perennials even think about waking up.
The key to success is timing and depth: plant the bulbs 3 inches deep and 3 inches apart in fall, after the soil cools but before frost. This gives the roots time to establish before winter, ensuring strong blooms the following spring.
Most gardeners overlook the importance of spacing, but anemones reward patience with dense, long-lasting displays that multiply over time.
Once planted, anemones are low-maintenance and drought-tolerant once established. Their velvety foliage stays lush all season, even when other early bloomers fade. The secret to keeping them happy is avoiding soggy soil—they hate sitting in water, which leads to bulb rot.
A light mulch in winter helps protect them from freeze-thaw cycles, and by spring, you’ll have a garden that feels like a secret woodland retreat.
Here’s the best part: these bulbs naturalize beautifully, spreading year after year with minimal effort. If you’ve ever wanted a garden that feels magical without constant upkeep, anemone blanda is your answer. Let’s get those bulbs in the ground so you can enjoy their beauty for decades to come.
📚 In This Guide
- What you need
- Instructions
- Tips and common mistakes
- Wrapping up and next steps
What you need
- ● Anemone blanda plants: 3–5 tubers or bare-root plants (depending on desired coverage). Choose healthy, firm tubers with visible buds.
- ● Well-draining soil: Mix of garden soil, compost, and sand or perlite (ratio: 60% soil, 30% compost, 10% sand/perlite). Aim for a pH of 6.0–7.5.
- ● Planting area: Partial to full shade (dappled sunlight is ideal).
- ● Space 6–8 inches apart for clusters or 12 inches apart for single specimens.
- ● Mulch: 2–3 inches of organic mulch (e.g., shredded bark or straw) to retain moisture and suppress weeds.
- ● Watering can or hose: With a gentle spray nozzle for post-planting hydration.
- ● Fertilizer: Slow-release bulb fertilizer (follow package rates) or a balanced 10-10-10 mix.
- ● Edging tools: For clean borders if planting in defined areas.
- ● Plant tags: To track varieties (e.g., ‘Charmer’ or ‘Honorine Jobert’).
- ● Shade cloth: Temporary protection if planting in hot climates.
Step-by-step instructions for planting anemone blanda
Here's how to plant these woodland beauties for stunning spring blooms and lush foliage.
🌱 Step 1: Choose the Right Location and Prepare the Soil
Anemone blanda thrives in partial shade—think dappled sunlight or morning sun with afternoon shade. I always plant mine where they get 4-6 hours of light daily, but never harsh afternoon rays. The soil should be well-draining but moist, so avoid heavy clay without amendment.
Work in 2-3 inches of organic matter (like compost or leaf mold) into the top 6 inches of native soil. These plants hate soggy roots, so if your site drains poorly, mix in sand or perlite to lighten the texture. Test the soil pH—aim for 6.0-7.0, the slightly acidic to neutral range these plants prefer.
🌿 Step 2: Plant the Tubers at the Correct Depth and Spacing
Anemone blanda grows from tubers, not seeds, and they need shallow planting. Dig holes 1-2 inches deep—any deeper and the stems won't reach the surface in spring. Space tubers 6-8 inches apart in rows 12 inches apart for a natural, layered look. I like to plant them in clusters of 3-5 for a more dramatic effect.
Place each tuber with the flat side down and the pointy end up—this ensures proper orientation for upward growth. Cover lightly with soil, then firm gently around the base. Don't pack it down too tightly; the roots need room to spread.
💧 Step 3: Water Thoroughly and Mulch for Moisture Retention
Water deeply right after planting to settle the soil and encourage root contact. Keep the area evenly moist for the first 4-6 weeks—this is critical for establishing roots before dormancy sets in. You'll know it's right when the soil feels damp but not soggy 1 inch below the surface.
Spread a 2-inch layer of mulch (like shredded bark or leaf mold) around the plants, keeping it 2 inches away from the stems to prevent rot. This helps maintain moisture and suppresses weeds. In fall, add another layer to protect the tubers through winter.
☀️ Step 4: Provide Seasonal Care for Year-Round Beauty
Anemone blanda is low-maintenance once established, but it does need consistent moisture during active growth. Water 1-2 times per week in spring and early summer, reducing to once every 2 weeks in late summer as the foliage dies back. The plants go dormant in late summer, so stop watering entirely once the leaves turn brown.
In early spring, before new growth appears, fertilize lightly with a balanced 10-10-10 fertilizer at half strength. This gives them a gentle boost without encouraging too much leafy growth at the expense of blooms. You'll see delicate flowers emerge in late spring to early summer, followed by deep green, fern-like foliage that lasts all season.
✂️ Step 5: Divide and Maintain for Long-Term Growth
These tubers multiply over time, so divide clumps every 3-4 years in early fall or late winter before new growth starts. Lift the entire clump, gently separate the tubers with your hands, and replant the healthiest ones immediately. Discard any that look shriveled or diseased.
Deadhead spent blooms in early summer to encourage more flowers, but leave the foliage until it turns brown naturally—it protects the tubers and adds winter interest. In USDA Zones 3-8, anemone blanda is hardy to -30°F, so no winter protection is needed unless you're in a particularly cold microclimate.
Tips & tricks for perfect anemone blanda planting
A few strategic moves will help you get those dreamy spring blooms and lush foliage without the guesswork.
The Light Factor: When selecting your planting spot, think about how sunlight moves throughout the day. Morning sun with afternoon shade is ideal, but if you only have one option, prioritize afternoon shade. I've learned this the hard way—too much direct afternoon sun can scorch the delicate foliage, especially in hotter climates. 4-6 hours of gentle light is perfect for these woodland natives.
Soil Prep Secret: The 2-3 inches of organic matter you work into the soil doesn't have to be perfect compost—leaf mold, well-rotted manure, or even coffee grounds work beautifully. The key is creating that loose, well-draining texture. I like to mix in a handful of perlite to ensure proper drainage, especially if your native soil tends to compact. This prevents those dreaded soggy roots that can rot the tubers.
Planting Precision: Those 1-2 inch deep holes might seem shallow, but trust me on this—any deeper and you'll struggle to get stems to surface in spring. I mark my planting spots with small sticks before digging to ensure proper spacing. For the 6-8 inch apart arrangement, imagine how they'll look when fully grown—they'll spread and create that stunning layered effect you're after.
Winter Protection: While anemone blanda is hardy to -30°F, I always add an extra 2-inch layer of mulch in late fall as a precaution, especially in colder microclimates. This mulch acts like a cozy blanket, protecting the tubers through winter while still allowing moisture to penetrate. In spring, I remove just enough to reveal the emerging shoots.
Pro Tips for Anemone Blanda Planting
- A few strategic moves will help you get those dreamy spring blooms and lush foliage without the guesswork.
- The Light Factor: When selecting your planting spot, think about how sunlight moves throughout the day.
- Soil Prep Secret: The 2-3 inches of organic matter you work into the soil doesn't have to be perfect compost—leaf mold, well-rotted manure, or even coffee grounds work beautifully.
Frequently asked questions
Got questions about planting Anemone blanda? You’re not alone! Here are some of the most common queries—plus straightforward answers to help you grow these stunning perennials with confidence.
When is the best time to plant Anemone blanda?
Plant Anemone blanda in early fall or late winter (before new growth starts). This timing lets roots establish before summer heat. Avoid planting in mid-summer—the plants may struggle with transplant shock.
How deep and far apart should I space Anemone blanda bulbs?
Dig holes 3–4 inches deep and space bulbs 4–6 inches apart. For a lush, layered look, plant in clusters of 3–5 bulbs. Deeper planting (up to 6 inches) in heavy clay soil helps prevent rot.
Can I plant Anemone blanda in containers or only in the ground?
Yes! They thrive in containers with well-draining soil. Use pots at least 8–10 inches deep with drainage holes. Add a layer of gravel at the bottom to prevent soggy roots. Just keep them in partial shade.
Why aren’t my Anemone blanda blooming?
Common culprits: too much sun (they prefer shade), overcrowding (dig up and divide clumps every 3–4 years), or poor drainage. Ensure they get 6+ hours of light but no scorching afternoon sun.
Are Anemone blanda deer-resistant?
They’re moderately deer-resistant—deer may nibble if other food is scarce. To deter them, plant near deer-deterrent companions like Allium or Fritillaria, or use repellents.
Wrapping up and next steps
Planting Anemone blanda is a rewarding way to add delicate charm and seasonal beauty to your garden! With the right location, soil prep, and care, these early-blooming perennials will thrive and return year after year.
Whether you’re a seasoned gardener or just starting, their low-maintenance nature makes them a perfect choice for colorful, layered landscapes.
Now that you’re armed with the know-how, roll up your sleeves and give your garden a stunning spring upgrade! Start by marking your planting spots, then gather your supplies—soon, you’ll be enjoying their ethereal blooms and lush foliage. Happy planting! 🌸🌿