How To
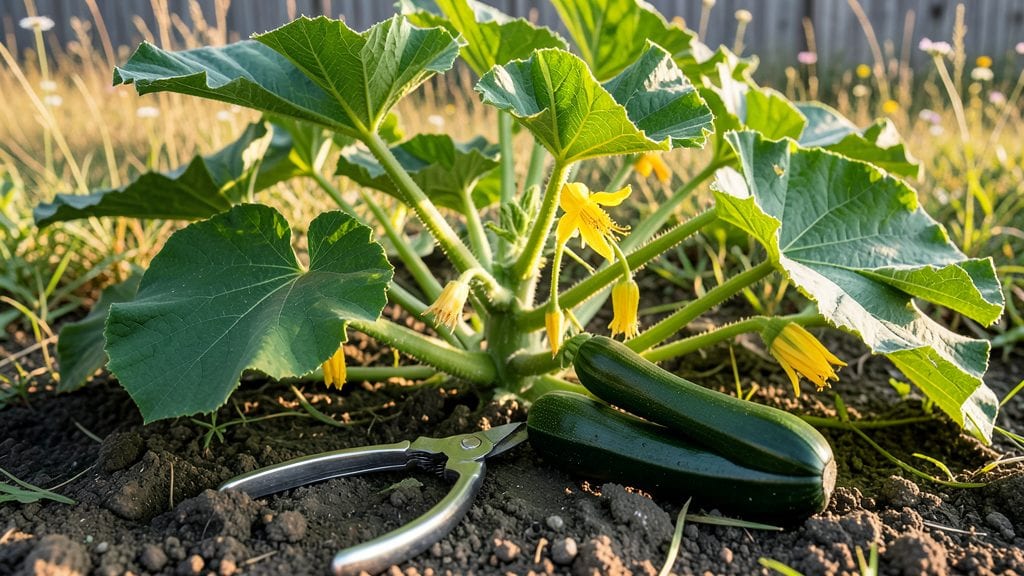
Pruning squash plants might sound intimidating, but those three strategic cuts can double your harvest this season. 🌱 I learned the hard way—skipping pruning meant fewer fruits and more powdery mildew, but after mastering the technique, my zucchini and pumpkins now thrive with less stress and more production.
The key is timing and technique: focus on removing overcrowded vines and yellowed leaves while keeping the main stem strong. Grab sharp pruners, work on a dry morning, and you’ll see healthier plants that produce fruit continuously.
Just avoid cutting into the main stem unless you’re ready for a setback—those vines hold the magic.
📚 In This Guide
- What you need
- Instructions
- Tips and common mistakes
- Wrapping up and next steps
What you need
- ● Pruning shears or sharp bypass pruners – Choose sterilized, sharp tools (4-6 inch blades) to avoid tearing plant tissue or spreading disease. Disinfect with rubbing alcohol or bleach solution (1:9 ratio) between cuts.
- ● Gloves – Heavy-duty gardening gloves (nitrile or leather) to protect hands from thorns (especially on butternut or pumpkin varieties) and blisters.
- ○ Clean garden scissors or loppers – For thicker stems (optional backup if pruners aren’t sharp enough).
- ○ Disinfectant spray (optional but recommended) – A 10% bleach solution or hydrogen peroxide (3%) to sterilize tools between plants.
- ● Compost bin or bag – To collect pruned vines and leaves for nutrient-rich compost.
- ● Watering can or hose – For post-pruning hydration (especially in hot/dry climates).
- ● Hand sanitizer or soap – For quick cleanups between plants.
- ● Plant growth hormone (rooting powder) – If you plan to propagate cuttings (e.g., for new plants).
- ● Markers or flags – To label pruned sections if tracking plant growth stages.
- ● Sun hat and sunscreen – For long pruning sessions in full sun!
Step-by-Step instructions for pruning squash plants
Pruning squash plants isn't just about trimming—it's about directing energy to fruit production. Here's how to do it right.
✂️ Step 1: Remove Weak or Damaged Vines First
Start by inspecting your squash plants for any vines that look weak, yellowed, or diseased. These are the ones to cut first—never leave them to drain energy from healthy growth. Use clean, sharp pruning shears to make a clean cut just above a leaf node where the vine joins the main stem. This prevents tearing and encourages faster healing.
I always prune in the morning when the plants are dry and the cuts will heal faster. If you spot any vines with black spots or mushy stems, those are signs of fungal disease—remove them immediately and discard them in the trash, not the compost.
✂️ Step 2: Thin Out Excess Side Shoots
Next, focus on the side shoots that grow from the main stem. Squash plants produce fruit along these shoots, but too many compete for nutrients. Keep only the strongest, healthiest shoot per node—usually the one closest to the main stem. Cut the others back to the main vine using your pruners, making sure to leave a small stub to prevent infection.
I like to leave about 3-4 strong side shoots per plant—this gives enough fruit production without overcrowding. Watch for shoots that grow toward the center of the plant; these are the ones to remove first, as they block airflow and invite disease.
✂️ Step 3: Prune to Encourage Airflow and Fruit Development
Now, focus on the main vine itself. If it’s growing too long and leggy, cut it back by about one-third to encourage bushier growth and more fruit production. Make your cut just above a leaf node where new growth can sprout. This also improves airflow, which is critical for preventing powdery mildew—a common squash problem.
Here’s the thing—pruning isn’t about making the plant smaller. It’s about redirecting energy. After a prune, you’ll often see new side shoots and flowers within 7-10 days. That’s your signal it’s working. Just avoid pruning when flowers are already forming—you’ll risk losing potential fruit.
⏰ Step 4: Maintain Regular Pruning Through the Season
Squash plants keep growing all season, so pruning isn’t a one-time job. Every 2-3 weeks, repeat the process: remove weak vines, thin out excess shoots, and trim leggy growth. This keeps the plant focused on producing fruit rather than sprawling vines. I also prune any vines that have already produced fruit but are now yellowing—they’re done for the season.
Don’t skip this step, even if the plant looks healthy. Regular pruning prevents overcrowding, reduces disease risk, and extends your harvest. You’ll know you’re doing it right when your plant looks fuller, with more flowers and fewer straggly vines.
🌿 Step 5: Clean Up After Harvest Season
Once your squash plants finish producing, it’s time for a final prune. Cut back all remaining vines to about 6 inches from the base. This makes cleanup easier and reduces overwintering pests. Remove any dead or diseased plant material immediately—don’t leave it in the garden, even as mulch.
I also like to add a 2-inch layer of compost around the base after pruning. This replenishes nutrients in the soil for next season. If you’re growing squash in the same spot again, mark the area so you remember to rotate crops next year—this prevents soil-borne diseases from building up.
Tips & tricks for pruning squash plants
Pruning squash plants might seem intimidating, but these key strategies will help you maximize fruit production and keep your plants healthy all season.
Timing is Everything: Morning is the best time to prune—when plants are dry and cuts heal faster. Avoid pruning in the afternoon, especially during hot weather, as this can stress the plant and slow recovery. I’ve found that pruning right after watering helps too, as the plant is already hydrated and better equipped to handle the stress. This aligns perfectly with Step 1, where you’re focusing on removing weak vines first.
Tool Selection Matters: Never use dull or dirty pruning shears—clean, sharp tools make precise cuts that heal quickly and reduce the risk of infection. I keep a small bottle of rubbing alcohol handy to wipe down my shears between cuts. This is especially important in Step 2 when you’re thinning out side shoots, as clean cuts prevent disease from spreading through the plant.
Visual Cues for Healthy Growth: When deciding which side shoots to keep in Step 2, look for the ones with the most vibrant green leaves and sturdy stems. These are your strongest candidates. Avoid keeping shoots that grow toward the center of the plant—they’ll block sunlight and airflow, creating a perfect environment for powdery mildew. You’ll know you’ve got the right balance when your plant looks fuller with more flowers and fewer straggly vines, just as mentioned in Step 4.
Seasonal Pruning Strategy: The 2-3 week pruning schedule in Step 4 works wonders, but don’t forget to adjust based on your plant’s growth rate. If your squash is growing aggressively, you might need to prune every 2 weeks. If growth slows in cooler weather, stretch it to 3 weeks. The key is to always remove any vines that have already produced fruit but are now yellowing—they’re just taking energy away from new growth.
Pro Tips for Prune Squash Plants
- Pruning squash plants might seem intimidating, but these key strategies will help you maximize fruit production and keep your plants healthy all season.
- Timing is Everything: Morning is the best time to prune—when plants are dry and cuts heal faster.
- Tool Selection Matters: Never use dull or dirty pruning shears—clean, sharp tools make precise cuts that heal quickly and reduce the risk of infection.
Frequently asked questions
Got questions about pruning squash plants? You’re not alone!
Here are answers to the most common concerns—from timing to troubleshooting—so you can keep your vines thriving and your harvests bountiful.
When is the best time to prune squash plants?
Prune squash plants early and often—start when vines are 2–3 feet long and continue every 2–3 weeks. Focus on removing runners that trail the ground (they drain energy) and suckers (small shoots at leaf junctions). Avoid pruning during extreme heat or cold, as plants need time to recover.
Do I really need to prune squash? Can’t I just let them grow wild?
While squash can grow without pruning, pruning boosts yields by directing energy to fruit production instead of sprawling vines. Unpruned plants may produce fewer, smaller squash and are more prone to pests/disease. For bush varieties (like zucchini), light pruning still helps—just focus on removing damaged or overcrowded leaves.
My squash leaves are yellowing after pruning. Did I do it wrong?
Yellowing leaves can happen if you prune too aggressively or cut into the main stem. Always remove no more than ⅓ of the plant’s foliage at once, and avoid cutting into the central vine. If yellowing persists, check for pests (like squash vine borers) or nutrient deficiencies (add compost or balanced fertilizer).
What if I miss the pruning window? Can I still save my squash harvest?
Don’t panic! Even late pruning helps. Remove only dead, diseased, or overly crowded growth to improve airflow. For vining types (like butternut squash), prioritize trimming runners to redirect energy to existing fruit. Just avoid heavy pruning—focus on maintenance until the season ends.
Should I prune winter squash (like pumpkins) the same way?
Winter squash (pumpkins, hubbard) rarely need heavy pruning—their goal is large fruit, not prolific yields. Lightly remove suckers and damaged leaves to prevent disease, but avoid trimming more than 10–15% of the plant. For pumpkins, focus on supporting vines (with trellises or cages) rather than pruning.
How often should I check for new growth after pruning?
Inspect your squash plants weekly for new suckers or runners. Prune them immediately when they’re small (3–6 inches) to avoid wasting energy. Use sharp, clean shears to make cuts at a 45° angle (just above a leaf node) for faster healing. Pro tip: Morning pruning gives plants the day to recover.
Wrapping up and next steps
Pruning your squash plants isn’t just about keeping them tidy—it’s your secret weapon for bigger harvests, healthier vines, and fewer pests. By mastering the three key cuts (removing suckers, thinning runners, and trimming yellowing leaves), you’ll encourage stronger growth and more fruit throughout the season. 🌱✂️
Now that you’re armed with the know-how, roll up your sleeves and give it a try! Start small with one or two plants, observe how they respond, and adjust as needed.
Before you know it, you’ll be reaping the rewards of your pruning efforts—delicious, homegrown squash all year long. Happy gardening! 🎉