Pruning
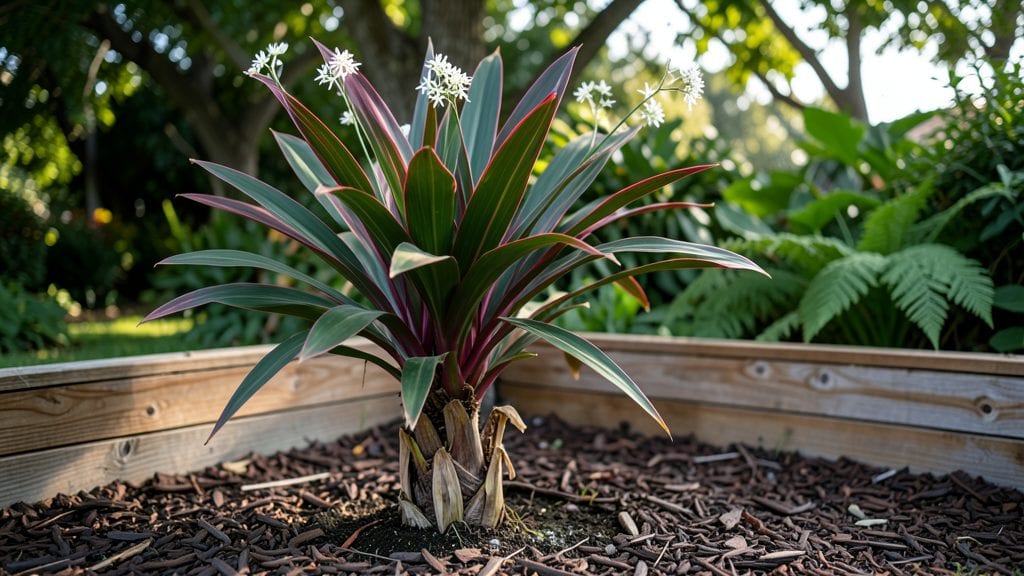
Trimming Cordyline plants keeps their bold foliage vibrant and prevents them from looking like overgrown weeds. ✂️ I’ve learned the hard way that skipping this step turns my showstopper plants into messy clumps—until I discovered the right technique.
The key is timing, sharp tools, and knowing where to cut without harming the plant’s structure.
You’ll need clean pruning shears, rubbing alcohol for sterilizing, and a clear day to assess the plant’s shape. Focus on removing dead leaves, leggy stems, or branches that block sunlight from the center.
Most Cordylines tolerate a hard trim in late winter or early spring, but you can shape them lightly anytime they look unruly.
After trimming, your plant will respond with fresh, compact growth and brighter colors—like a reset button for its foliage. Just avoid cutting into woody stems, as they won’t regrow. The trimmed sections can even root in water if you want to propagate new plants.
Common mistakes include cutting too close to the base or using dull tools, which can introduce disease. Always clean your shears between cuts and dispose of diseased leaves immediately. With the right approach, your Cordylines will stay lush and full of life all year.
📚 In This Guide
- What you need
- Instructions
- Tips and common mistakes
- Wrapping up and next steps
What you need
- ● Sharp pruning shears or bypass pruners – Choose bypass pruners (not anvil-type) for clean cuts. Opt for a size that fits your hand comfortably (e.g., 6-8 inches for medium-sized Cordyline fronds).
- ● Sterilized pruning saw – For thicker stems (over 1 inch in diameter), a pruning saw with a fine-toothed blade prevents tearing. Keep it sharp and clean with 70% isopropyl alcohol or a bleach solution (1 part bleach to 9 parts water).
- ● Gloves – Wear cut-resistant garden gloves (e.g., heavy-duty leather or synthetic blends) to protect your hands from thorns and sap.
- ● Disposable pruning bags or bucket – A 10-20 gallon bucket or pruning bag (with drawstrings) will collect trimmings for composting or disposal.
- ● Rubbing alcohol (70% or higher) – A small bottle for sterilizing tools between cuts to prevent disease spread.
- ● Hose with nozzle or watering can – Keep a spray nozzle or watering can handy to rinse tools and clean sap off leaves.
- ● Loppers – For larger Cordyline varieties with thick stems (e.g., Cordyline fruticosa), bypass loppers (8-12 inches) make heavy-duty cuts easier.
- ● Hand pruners with ratchet mechanism – Reduces hand fatigue during long trimming sessions.
- ○ Pruning sealant – A tree wound sealant (like Tanglefoot Tree Wound Pruning Seal) to coat large cuts and minimize sap oozing (optional but useful for tropical varieties).
- ● Knee pads or stool – If your Cordyline is tall or ground-level trimming is uncomfortable, a foldable garden stool or knee pads help.
- ● Disinfectant spray (e.g., hydrogen peroxide) – Spray cuts lightly to reduce bacterial/fungal risks (dilute to 3% strength).
- ● Safety first! Wear protective eyewear if your Cordyline has sharp leaf edges (e.g., Cordyline australis).
- ● Check the weather – Trim on a dry, overcast day or early morning to avoid stressing the plant with midday sun.
- ● Review your plant’s growth habits – Research your specific Cordyline variety (e.g., C. terminalis, C. indivisa) to identify dormant vs. active growth periods.
Step-by-step instructions for trimming Cordyline plants
Keep your cordylines vibrant and healthy with these simple, effective trimming techniques.
✂️ Step 1: Assess and Gather Your Tools
Start by examining your cordyline for dead, yellowed, or overgrown leaves. I grab my sharp bypass pruners and a clean pair of gardening gloves—cordylines can be prickly, and clean tools prevent spreading disease. Look for leaves that are brown at the tips, completely dried out, or have blackened spots from pests or disease.
Remove any leaves that are clearly dead or damaged first. These won’t recover and will only weigh down the plant. I like to take a step back after this initial assessment to spot what’s left—sometimes a leaf looks questionable until you see it in context with the rest of the plant.
✂️ Step 2: Trim Dead or Damaged Leaves at the Base
Using your pruners, cut dead or damaged leaves off at the base where they meet the stem. Make the cut at a 45-degree angle just above a leaf node or growth point if possible—this encourages new growth from that spot. Avoid cutting into healthy green tissue, as this can stress the plant.
If a leaf is only partially damaged (like brown tips), you can trim just the dead part, leaving the healthy green section intact. This keeps the plant looking neat without sacrificing too much foliage. I always work from the bottom up—removing dead leaves first makes it easier to see what’s left to trim.
✂️ Step 3: Thin Out Crowded or Overgrown Foliage
Now focus on thinning out the plant to improve airflow and light penetration. Cordylines can get leggy, especially if they’re not in ideal light conditions. Look for leaves that are overlapping or growing inward—these are candidates for removal. Cut these back to the stem, but leave at least 2-3 healthy leaves per stem to maintain the plant’s structure.
Real talk: If your cordyline looks bushy but sparse, you might be tempted to go overboard. I promise, less is more here. Trimming too aggressively can shock the plant, so err on the side of caution. After thinning, step back and admire your work—you should see more light reaching the center of the plant.
✂️ Step 4: Shape and Encourage New Growth
For a more polished look, you can gently shape the plant by trimming back the longest or most straggly leaves. Cut these to just above a leaf node, and the plant will respond by sending out new growth from that point. This is where cordylines shine—they bounce back quickly and often produce striking new foliage in vibrant colors.
If your cordyline is flowering, you can also trim back spent flower stalks at the base. This redirects the plant’s energy into growing more leaves rather than seeding. After trimming, give the plant a light misting with water to help it recover, especially if you’ve made deeper cuts.
⏰ Step 5: Clean Up and Monitor Recovery
After trimming, remove all the clippings from the area to keep your space tidy and prevent pests or disease from lingering. I like to compost the healthy trimmings—cordyline leaves break down well and add nutrients to the soil. Finally, give your cordyline a good drink of water to help it recover from the trimming.
Watch your plant over the next few weeks. You should see new leaves emerging from the trimmed areas within 2-4 weeks, depending on the season and growing conditions. If you notice any yellowing or wilting after trimming, it might be a sign of over-trimming or stress—just give it time and keep an eye on its watering needs.
Tips & tricks for perfect Cordyline trimming
Here's what nobody tells you about keeping your cordylines thriving after the trim.
The 45-Degree Angle Secret: That 45-degree cut in Step 2 isn't just for looks—it's about directing water away from the stem. When you make a clean angled cut just above a leaf node, rainwater runs off instead of pooling, which prevents rot and fungal issues. I've seen cordylines develop black spots from poor cuts, so take your time here. Use a ruler or protractor if you're unsure—it makes all the difference for long-term plant health.
Seasonal Timing Matters: While you can trim anytime, I recommend doing it in early spring when new growth naturally begins. This gives your cordyline the best chance to recover and show off vibrant new leaves. In warmer climates, late summer trims work too, but avoid heavy pruning in winter when growth slows. The 2-4 week recovery time mentioned in Step 5 is especially important during cooler months when plants grow slower.
Tool Upgrade: Don't settle for regular scissors—they crush stems and create jagged cuts. Invest in sharp bypass pruners (like Felco or Fiskars) for clean cuts that heal better. For thicker stems, I use a small pruning saw. Sterilize your tools between cuts with rubbing alcohol to prevent spreading disease. Between us, I've ruined perfectly healthy cordylines by using dull tools that caused unnecessary stress.
Light Check Strategy: After thinning in Step 3, test your work with this trick: stand back and look at your plant against a bright window. You should see light reaching all the way to the center—no dark shadows. If you still see dense areas, remove a few more leaves. This light exposure is what keeps cordylines vibrant and prevents those sad, leggy growth patterns. Think of it as creating a natural airbrush effect for your plant.
Pro Tips for Trimming Cordyline Plants
- Here's what nobody tells you about keeping your cordylines thriving after the trim.
- The 45-Degree Angle Secret: That 45-degree cut in Step 2 isn't just for looks—it's about directing water away from the stem.
- Seasonal Timing Matters: While you can trim anytime, I recommend doing it in early spring when new growth naturally begins.
Frequently asked questions
Got questions about keeping your Cordyline plants vibrant and healthy? Here are some of the most common queries—plus straightforward answers to help you trim with confidence!
When is the best time of year to trim Cordyline plants?
Trim Cordyline plants in early spring or late winter to encourage fresh growth before the warmer months. Light pruning for shape can happen anytime, but avoid heavy cuts in fall or winter, as new growth may struggle in cooler weather.
How much can I cut back without harming the plant?
You can safely remove up to one-third of the plant’s height in a single trim. For overgrown stems, cut back to a leaf node or joint—this encourages branching and denser foliage. Avoid cutting into the woody base, as this may stress the plant.
What should I do with the cuttings after trimming?
Use the trimmings for propagation! Dip cuttings in rooting hormone and plant them in well-draining soil. Keep them lightly moist and in bright, indirect light until roots form (usually 4–6 weeks). You’ll soon have new Cordyline plants to expand your garden!
Why are my Cordyline leaves turning brown after trimming?
Brown leaves after trimming are often due to over-pruning or stress. If you’ve cut too aggressively, the plant may shed leaves to redirect energy. To fix it, reduce watering slightly and avoid fertilizing until new growth appears. Yellowing leaves? Check for overwatering or nutrient deficiencies.
Can I trim Cordyline for color instead of just shape?
Trimming Cordyline plants in late summer or early fall can boost vibrant fall/winter colors by stimulating new growth. Focus on removing older, faded leaves and shaping the plant to highlight its striking hues. Just avoid heavy cuts—aim for a light refresh!
Wrapping up and next steps
Trimming your Cordyline plants doesn’t have to be intimidating—with the right tools, timing, and techniques, you can keep them vibrant and thriving year-round! 🌿 Whether you’re shaping for aesthetics, encouraging new growth, or maintaining health, precision trimming ensures your plants stay lush and full of color.
Now that you’re armed with expert tips, grab your shears and get ready to transform your outdoor space with confidence.
Ready to take the next step? Start small—pick one plant to practice your new skills, and soon, your entire garden will reflect your green thumb! 🌟