Shrubs
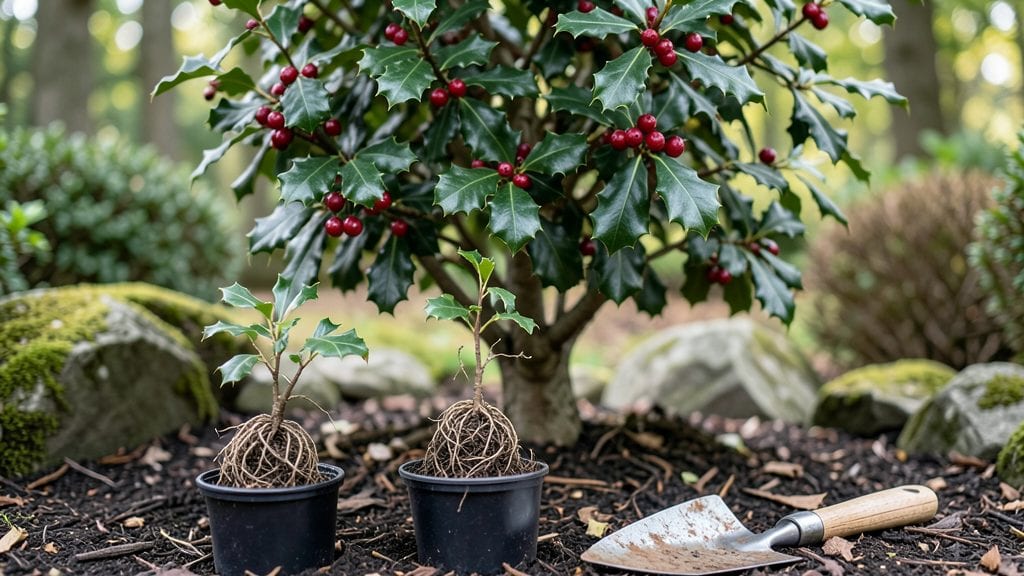
Planting holly bushes transforms your yard into a four-season showstopper with those signature glossy leaves and bright red berries. ✨ I planted my first holly last autumn, and within a year, it became the centerpiece of my landscape—no fuss, just reliable color.
The key is choosing the right variety for your climate and giving it the sunny spot with well-draining soil that keeps it thriving year-round.
You’ll need a few simple supplies: a shovel, compost, mulch, and the holly variety that suits your zone—English holly for milder climates or American holly for tougher conditions.
Dig a hole twice as wide as the root ball but no deeper, then mix in compost to give those roots a nutrient boost right from the start. Planting depth matters too; the top of the root ball should sit just above ground level to prevent rot.
After planting, water deeply to settle the soil and keep it consistently moist for the first few weeks. A 2-inch layer of mulch around the base helps retain moisture and keeps weeds at bay.
By late spring, you’ll see new growth, and within a couple of years, those signature berries will appear—just be patient, as female bushes need a male pollinator nearby to produce fruit.
Holly bushes handle pruning well, so you can shape them as they grow. The best time to plant is early spring or fall, when temperatures are mild and the soil isn’t frozen.
With the right care, your holly will reward you with vibrant color and structure for decades—no other shrub delivers this kind of year-round drama.
📚 In This Guide
- What you need
- Instructions
- Tips and common mistakes
- Wrapping up and next steps
What you need
- ● Holly bushes: 2-5 plants (depending on desired spacing—typically 4-6 feet apart for mature size). Choose between Ilex opaca (American holly) or other varieties like Ilex crenata (Japanese holly) for smaller spaces.
- ● Shovel or trowel: A sturdy garden shovel (for digging holes) or a hand trowel (for smaller plants).
- ● Garden gloves: Heavy-duty gloves to protect your hands from thorns and soil.
- ● Mulch: 2-3 inches of organic mulch (e.g., pine straw, wood chips, or shredded bark) to retain moisture and suppress weeds.
- ● Watering can or hose: With a gentle spray nozzle for post-planting hydration.
- ○ Soil amendment (optional but helpful): Compost or well-rotted manure (1-2 gallons per plant) to enrich the soil.
- ● Slow-release fertilizer (10-10-10 or similar) to kickstart growth.
- ● Soil pH test kit: Holly prefers slightly acidic soil (pH 5.0-6.0). Adjust with sulfur if needed.
- ● Pruning shears: For trimming any damaged branches after planting.
- ● Plant tags or markers: To label varieties and planting dates.
- ● Epsom salt: A handful mixed into the planting hole can boost magnesium levels for lush foliage.
- ● Plant protector (e.g., tree guard): To shield young holly from pests or lawnmowers.
Step-by-Step instructions for planting holly bushes
Here's how to plant four holly bushes for vibrant color and berries all year long.
🪴 Step 1: Choose the Right Location and Prepare the Soil
Holly bushes thrive in full sun to partial shade, so pick a spot that gets at least 4-6 hours of sunlight daily. They tolerate a range of soil types, but well-draining soil prevents root rot. If your soil is heavy clay, mix in 2-3 inches of compost to improve drainage.
Dig a hole that's twice as wide as the root ball and just as deep. This gives roots room to spread without crowding. Loosen the sides of the hole with a shovel to encourage root growth into the surrounding soil. Holly bushes don’t like soggy feet, so avoid low spots where water pools after rain.
🌱 Step 2: Plant Each Bush at the Correct Depth
Gently remove each holly bush from its container and loosen the roots if they're circling tightly. Place the plant in the hole so the top of the root ball sits 1-2 inches above the surrounding soil level. Holly bushes planted too deep struggle to establish properly.
Fill the hole halfway with soil and water it lightly to settle the roots. Then add more soil, pressing down gently to remove air pockets. Leave a 2-inch gap at the soil surface—this prevents water from splashing onto the stem and causing rot. Space your bushes 6-10 feet apart for mature size, depending on the variety.
💧 Step 3: Water Deeply and Mulch for Retention
Water each newly planted holly bush with 1-2 gallons of water to help the soil settle around the roots. Water deeply but avoid soaking the soil—holly bushes prefer slightly dry conditions once established. Let the top inch of soil dry between waterings to prevent root rot.
Spread a 2-3 inch layer of mulch around the base of each bush, keeping it 3 inches away from the stem. Organic mulch like wood chips or pine straw helps retain moisture and regulates soil temperature. Replenish mulch as it breaks down to maintain coverage.
☀️ Step 4: Provide Care for the First Growing Season
Holly bushes are low-maintenance once established, but the first year is critical. Keep the soil consistently moist but not soggy, especially during the first 6-8 weeks after planting. Young bushes need extra care to develop strong roots before winter.
Fertilize lightly in early spring with a balanced, slow-release fertilizer to support new growth. Avoid heavy feeding, which can encourage tender shoots vulnerable to cold. Prune only to shape the bush in late winter or early spring—never prune in fall, as it reduces winter hardiness.
Tips & tricks for perfect holly bush planting
Here's what I've learned after planting holly bushes for years—these little details make all the difference for healthy, thriving plants.
The Sunlight Secret: That 4-6 hours of sunlight is non-negotiable for berry production. If your yard gets less, choose a partial shade variety like 'Sky Pencil' holly, which handles lower light better. I've seen holly bushes in full sun produce berries by autumn, while shade-only plants often skip fruiting entirely.
Root Ball Prep: Before planting, gently tease apart any circling roots you find in Step 2—this encourages outward growth instead of root bound circles. Don't worry about making them look perfect, just break up any tight spirals. I also soak the root balls for 10 minutes before planting to ensure they're hydrated when they go into the ground.
Soil Depth Matters: That 1-2 inch gap above soil level in Step 2 is crucial—it prevents water from sitting against the stem, which causes rot. I use a small stick to mark the correct depth before planting, so I don't accidentally bury the root ball too deep. Remember, holly bushes hate having their stems buried.
Mulch Magic: The 2-3 inch layer of mulch in Step 3 should be your best friend. I use pine straw because it breaks down slowly and naturally acidifies the soil slightly, which holly bushes love. Just keep it 3 inches away from the stem to prevent moisture buildup that can rot the base.
Pro Tips for Planting Holly Bushes
- Here's what I've learned after planting holly bushes for years—these little details make all the difference for healthy, thriving plants.
- The Sunlight Secret: That 4-6 hours of sunlight is non-negotiable for berry production.
- Root Ball Prep: Before planting, gently tease apart any circling roots you find in Step 2—this encourages outward growth instead of root bound circles.
Frequently asked questions
Got questions about planting holly bushes? You’re not alone—these evergreen beauties are full of surprises! Here are answers to the most common queries to help you grow holly with confidence.
When is the best time to plant holly bushes?
The ideal time is early spring or fall, when soil is workable but not frozen. Spring planting gives roots time to establish before summer heat, while fall allows them to settle before winter dormancy. Avoid planting in extreme heat or cold—holly thrives in moderate conditions!
Do holly bushes need full sun, or can they grow in shade?
Most holly varieties tolerate partial shade, especially in hot climates, but they prefer 4–6 hours of sunlight daily for optimal berry production. Dwarf hollies (like ‘Dwarf Burford’) adapt well to shadier spots, while larger types (e.g., American holly) may need more light for vibrant foliage and berries.
How do I protect my holly bushes from pests or diseases?
Holly bushes are generally tough, but watch for scale insects, spider mites, or holly leaf miner. Spray with horticultural oil or insecticidal soap for pests. For fungal issues (like powdery mildew), improve airflow and avoid overhead watering. Prevention tip: Keep soil moist but not soggy and mulch to deter pests!
Will my holly bushes produce berries every year?
Berries appear only on female plants (male bushes are needed for pollination!). If you see no berries, check for a male holly nearby (or plant one). Even then, cold winters or drought can reduce fruit. Pro tip: Plant at least one male for every 5–6 females for consistent berries!
Can I grow holly bushes in containers, or do they need to be planted in the ground?
Yes! Dwarf varieties (like ‘Sky Pencil’ or ‘Little Gem’) thrive in large containers (15+ gallons) with well-draining soil. Use a mix of potting soil and perlite, and repot every 2–3 years. Just ensure the pot has drainage holes and you water regularly—container hollies dry out faster than in-ground plants.
Wrapping up and next steps
Planting holly bushes is a rewarding way to add year-round beauty and texture to your landscape—whether you crave vibrant red berries in winter or lush, evergreen foliage in summer.
With the right location, soil prep, and care, these resilient shrubs will thrive for decades, offering low-maintenance charm and wildlife appeal. 🌿
Ready to get started? Mark your calendar for the best planting window (early spring or fall), gather your supplies, and dig in! Your future self—and curious birds—will thank you.