Picking
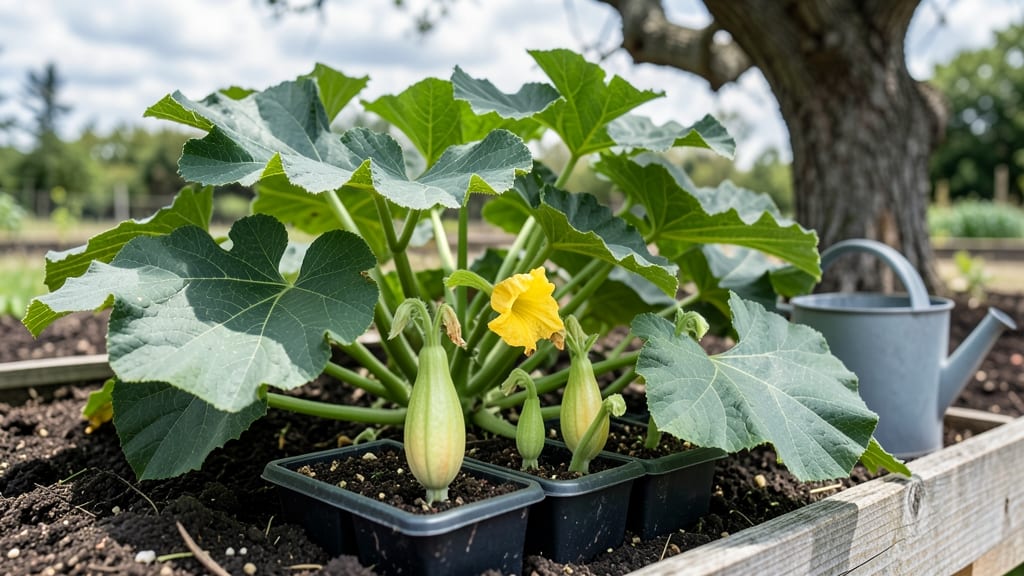
Planting crookneck squash in rich, well-draining soil transforms your garden into a summer bounty factory. ✨ I learned the hard way that these vines demand warmth and space—my first attempt in cool, compact soil left me with stunted plants and bitter fruit.
The secret lies in timing, sunlight, and a little extra room to sprawl.
Start seeds indoors 4-6 weeks before your last frost, or buy sturdy transplants when soil reaches 60°F. Crookneck squash thrives in full sun (6+ hours daily) and needs 3-4 feet of diameter per plant—think of them as sun-loving loungers, not cramped apartment dwellers.
Amend your soil with compost before planting, and avoid fresh manure, which can burn delicate roots.
By mid-summer, you’ll watch 3-4 inch tendrils unfurl into 10-foot vines, each producing 3-5 squash at a time. The first harvest arrives in 50-60 days—imagine the joy of slicing into golden, sweet flesh straight from your garden.
Just be ready to stake or trellis those vines if space is tight.
Here’s the kicker: crookneck squash hates cold, so protect seedlings with row covers if late frosts linger. And if your squash start looking lopsided or bitter?
You’re either watering inconsistently or crowding the plants. Trust me, spacing matters—my neighbor’s 20-foot vines produced 50 pounds of squash while mine struggled in half the room.
📚 In This Guide
- What you need
- Instructions
- Tips and common mistakes
- Wrapping up and next steps
What you need
- ● Crookneck squash seeds: 3–5 seeds per plant (or 1–2 seeds per hill if direct-sowing). Choose a variety like Early Prolific Straightneck or Butternut for reliability.
- ● Well-draining potting mix or garden soil: 1–2 cubic yards (enough to amend a 10’x10’ bed). Aim for a pH of 6.0–6.8.
- ● Compost or aged manure: 2–3 gallons per 10 sq ft to enrich soil with nitrogen and organic matter.
- ○ Balanced fertilizer (10-10-10 or 5-5-5): 1–2 tbsp per plant at planting time (optional but recommended for poor soil).
- ● Garden trowel or transplanting spade (for digging holes or transplanting starts).
- ● Watering can or hose with a gentle spray nozzle (avoid blasting seeds!).
- ● Mulch (straw or black plastic): 2–3 inches thick to retain moisture and suppress weeds.
- ○ Garden twine and stakes (optional): For trellising if growing vining varieties (e.g., Waltham Butternut).
- ● Full sun (6–8+ hours daily)—pick a spot with minimal shade from trees or structures.
- ● Warm soil (60°F+)—wait until after the last frost date in your zone (Zone 4+).
- ● Space: 2–3 feet between plants; 3–4 feet between rows.
Step-by-Step instructions for planting crookneck squash
Here’s the foolproof method I’ve used for years to grow vigorous, productive vines—no guesswork involved.
🌱 Step 1: Prepare the Soil for Maximum Growth
Crookneck squash thrives in loose, nutrient-rich soil with excellent drainage. Before planting, work in 3-4 inches of compost into the top 12 inches of soil to improve fertility and structure. This warm-weather crop demands 60-70°F soil temperatures to germinate properly, so wait until all frost risk has passed in your zone.
If your garden soil is heavy clay, mix in 1-2 inches of coarse sand or perlite to prevent waterlogging. The ideal planting spot should receive full sun (6-8 hours daily)—squash vines sprawl aggressively, so choose a location where they can spread without competing for light. I always test soil pH first; crooknecks prefer 6.0-6.8—amend with lime if your soil runs acidic.
☀️ Step 2: Plant Seeds at the Right Depth and Spacing
Sow seeds 1 inch deep, spacing them 2-3 feet apart in rows 4-5 feet apart to allow for sprawling vines. Plant 3-4 seeds per hill (a small mound of soil) to ensure at least one strong seedling emerges—squash seeds often struggle with uneven germination. Thin to the strongest seedling per hill once they reach 3 inches tall, using clean scissors to avoid damaging roots.
Here’s the thing—warm soil is non-negotiable. If nighttime temperatures dip below 55°F, cover seedlings with floating row covers until the ground warms. You’ll know germination is underway when tiny loops of vine appear above soil level—this usually takes 7-14 days depending on your climate. Avoid transplanting seedlings; squash roots resent disturbance and may rot.
💧 Step 3: Water Deeply and Maintain Consistent Moisture
After planting, water deeply (1-2 inches) to settle the soil around seeds. Keep the planting area evenly moist but not soggy—squash roots need consistent hydration, but waterlogged soil breeds fungal diseases like powdery mildew. I water at the base of plants in the morning to allow foliage to dry before evening, reducing disease risk.
Once vines start running, increase water to 1.5-2 inches per week, splitting applications between morning and late afternoon. You’ll notice yellowing leaves if underwatered or wilting in heat if thirsty—both are quick fixes with proper irrigation. Mulch heavily with straw or grass clippings to retain moisture and suppress weeds, which compete aggressively with squash vines.
✂️ Step 4: Train Vines and Prune for Better Yields
Crookneck squash vines can sprawl 10-15 feet, so I install trellises or wire cages early to save space and improve airflow. Gently guide the main vine up the support, trimming side shoots that form at leaf junctions to direct energy into fruit production. Prune with clean shears, cutting just above a leaf node to encourage bushier growth.
Watch for male flowers (long stems, no swelling at the base) and female flowers (tiny squash forming at the base). Remove male flowers if you notice an excess—this redirects the plant’s energy toward developing larger, sweeter female fruit. Harvest when squash reach 6-8 inches long and feel firm to the touch; leaving them too long makes the neck tough and seedy.
🌿 Step 5: Monitor for Pests and Diseases Proactively
Squash bugs and cucumber beetles are the biggest threats—scout leaves daily for eggs (tiny yellow clusters on undersides) or adult beetles. Handpick adults and drop them in soapy water; for eggs, spray with neem oil at dusk. I also interplant with nasturtiums to repel pests naturally. Powdery mildew appears as white, powdery patches on leaves—treat immediately with baking soda spray (1 tsp baking soda + 1 quart water + a drop of dish soap).
Rotate crops next season—never plant squash in the same spot two years in a row—to break disease cycles. If you notice wilting or yellowing leaves, check for squash vine borers (look for sawdust-like frass near the stem). Wrap lower stems with aluminum foil early in the season to deter egg-laying moths. A healthy, pest-free vine will produce 4-6 squash per plant with proper care.
Tips & tricks for perfect crookneck squash planting
These battle-tested strategies will help you avoid the most common pitfalls and maximize your harvest—no guesswork required.
Soil Temperature Secret: The 60-70°F soil temperature range in Step 1 is critical because squash seeds won't germinate below 55°F. I've seen seeds sit for weeks in cooler soil—don't let that happen! Use a soil thermometer to confirm warmth before planting. If you're in doubt, wait until nighttime temperatures consistently stay above 55°F, even if that means delaying planting by a week. Patience here prevents wasted effort later.
Planting Depth and Spacing: The 1-inch planting depth in Step 2 might seem shallow, but it's perfect for allowing those tiny loops of vine to emerge easily. Planting too deep can suffocate seedlings. When spacing your 3-4 seeds per hill, remember that squash vines spread aggressively—those 2-3 feet between plants and 4-5 feet between rows give them room to sprawl without competing for nutrients. Trust me on this: crowded plants produce smaller, less flavorful squash.
Watering Wisdom: The 1.5-2 inches of water per week in Step 3 might seem like a lot, but squash roots run deep and need consistent moisture. I've learned the hard way that letting the soil dry out leads to bitter-tasting squash. Use a rain gauge or tuna can to measure your watering—eyeballing it often results in either underwatering or overwatering. The key is maintaining that "evenly moist but not soggy" balance mentioned in the instructions.
Pruning and Training: When you're pruning side shoots in Step 4, focus on removing those that form at leaf junctions—these are the ones that drain energy from fruit production. I like to prune in the morning when the plants are dry, using clean shears to avoid spreading disease. And here's what nobody tells you: The main vine should be your priority—let it climb your trellis or wire cage while you trim everything else. This simple technique can double your yield per plant.
Pro Tips for Crookneck Squash Planting
- These battle-tested strategies will help you avoid the most common pitfalls and maximize your harvest—no guesswork required.
- Soil Temperature Secret: The 60-70°F soil temperature range in Step 1 is critical because squash seeds won't germinate below 55°F.
- Planting Depth and Spacing: The 1-inch planting depth in Step 2 might seem shallow, but it's perfect for allowing those tiny loops of vine to emerge easily.
Frequently asked questions
Got questions about growing crookneck squash?
You’re not alone! Here are answers to the most common queries—from timing to troubleshooting—to help you grow a thriving harvest.
When is the best time to plant crookneck squash?
Plant seeds after the last frost when soil temperatures reach at least 60°F (15°C). For warm climates, start in early spring (March–April). In cooler zones, wait until late spring to early summer (May–June). Crooknecks thrive in warmth, so avoid planting too early—cold soil can stunt growth.
How long does it take for crookneck squash to mature?
Expect 50–60 days from planting to harvest, depending on the variety. Check for ready-to-pick signs: firm skin, a slight curve (the "crook"), and a dull rind. Overripe squash turns tough and loses flavor—so harvest promptly!
Can I grow crookneck squash in containers or small spaces?
Yes! Choose compact varieties like ‘Early Prolific Straightneck’ and use large containers (12+ inches deep) with well-draining soil. Place them in full sun (6+ hours/day) and provide trellis support if needed—vines can sprawl 3–5 feet. Just ensure containers warm up quickly in spring!
What should I do if my crookneck squash plants get pests or diseases?
Common issues include:
- Squash bugs/vine borers: Handpick eggs or use row covers early.
- Powdery mildew: Space plants for airflow and spray with neem oil.
- Blossom end rot: Ensure consistent watering and add calcium-rich compost.
Can I plant crookneck squash in the same spot as last year?
Nope! Squash are heavy feeders and prone to soil-borne diseases like fusarium wilt. Wait 3+ years before replanting in the same spot. Instead, rotate with beans, peas, or herbs to refresh the soil.
Wrapping up and next steps
Growing crookneck squash is a rewarding journey that starts with the right sunny spots and soil secrets—and you’ve got all the tools to succeed! 🌱 Whether you’re a first-time gardener or a seasoned green thumb, these tips will help you cultivate a thriving harvest.
Now that you’re armed with knowledge, there’s only one step left: roll up your sleeves and plant!
Once your squash starts sprouting, keep an eye on their progress and enjoy the sweet taste of your homegrown bounty. Happy gardening! 🌞