Transplanting
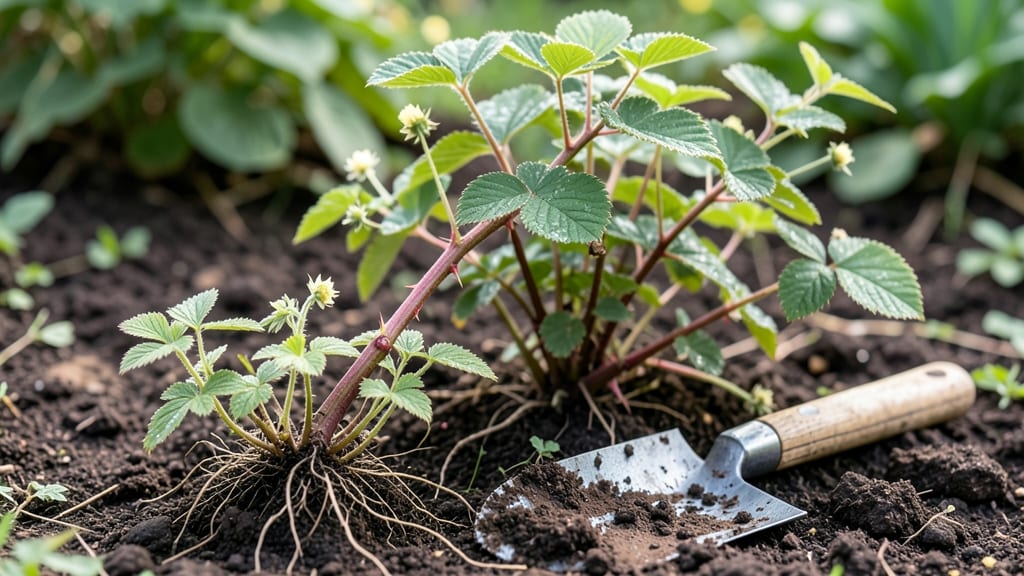
Planting raspberry canes in early spring sets the stage for a harvest so abundant you’ll wonder why you didn’t start sooner. 🌱 The secret isn’t just digging holes—it’s matching the right canes to your climate, spacing them for airflow, and giving them the sturdy support they’ll need to climb.
I’ve watched my own raspberry patch go from scraggly to showstopping in just two seasons, and the key steps are simpler than they seem.
You’ll need healthy canes (either bare-root or potted), a sunny spot with at least 6 hours of light daily, and soil that drains well but holds moisture—think rich, slightly acidic loam.
Most gardeners overlook trellising, but installing sturdy posts or wires now saves headaches later when vines get heavy with fruit. For beginners, 24-inch spacing between canes and 6-foot rows keeps plants from competing for resources while making harvests easier.
By summer’s end, you’ll have strong, woody canes producing floricanes (the fruiting stems) and primocanes (next year’s growth). The first harvest arrives in late spring from last year’s canes, while the new growth stores energy for a second flush in fall.
Prune strategically in winter to encourage more fruit-bearing stems, and you’ll double your yield every season.
Works for both summer-bearing and fall-bearing varieties, and adapts to containers for small spaces. Whether you’re in Zone 4 or 9, the same principles apply—just adjust timing for your last frost date. Let’s get those canes in the ground!
📚 In This Guide
- What you need
- Instructions
- Tips and common mistakes
- Wrapping up and next steps
What you need
- ● Raspberry canes: 5–10 healthy, dormant canes (1-year-old or older) per plant. Choose bare-root or potted varieties like 'Boyne,' 'Heritage,' or 'Carolina Jewel' based on your climate zone.
- ● Garden soil: Well-draining, slightly acidic soil (pH 5.5–6.5). Amend with compost (2–3 inches mixed into the top 12 inches of soil) for nutrients.
- ● Fertilizer: Balanced 10-10-10 or 5-10-10 fertilizer (1–2 cups per planting hole).
- ● Organic options: Well-rotted manure (chicken or cow) or composted leaf mold.
- ● Mulch: Organic mulch like straw, wood chips, or pine needles (2–3 inches thick) to retain moisture and suppress weeds.
- ● Pruners: Sharp, clean bypass pruners (disinfect with rubbing alcohol between plants to prevent disease).
- ● Garden gloves: Heavy-duty gloves to protect against thorns and soil.
- ● Watering can or hose: With a soaker hose or drip irrigation attachment for deep watering.
- ● Stakes or trellis: T-posts (4–6 feet tall) or wires (18–24 inches apart on a trellis frame).
- ● Twine or zip ties (for securing canes to supports).
- ● Planting hole tools: Shovel or trowel (for digging holes 12–18 inches deep and wide).
- ○ Garden fork (optional, for loosening compacted soil).
- ● Soil test kit: To check pH and nutrient levels before planting.
- ● Epsom salt: (1 tablespoon per hole) for magnesium boost in deficient soils.
- ● Row cover or frost cloth: For early planting in cold climates.
- ● Disease-resistant spray: (e.g., copper fungicide) if your area has a history of cane blight or spotted wilt.
- ● Plant markers: To label varieties and track growth.
Step-by-Step instructions for planting raspberry canes
Here’s the proven method I rely on for planting raspberry canes—timed perfectly for spring’s ideal conditions.
🌱 Step 1: Prepare the Planting Site
Raspberries thrive in full sun (at least 6-8 hours daily) and well-draining soil with a pH of 5.5-6.5. Clear the area of weeds and loosen the soil to a depth of 12 inches, breaking up any compacted layers. I like to work in 2-3 inches of compost into the top layer—this improves drainage and provides nutrients for root development.
Choose a location with space for canes to spread. Raspberry canes grow aggressively, so plan for at least 4 feet between rows and 6 feet between plants if growing multiple varieties. If your soil drains poorly, consider raising beds or amending with sand or perlite to prevent root rot.
🪴 Step 2: Soak and Trim the Canes
Before planting, soak the bare-root canes in lukewarm water for 2-4 hours to rehydrate the roots. This step is critical—it jumpstarts growth and reduces transplant shock. While the roots soak, trim any damaged or broken canes, leaving only healthy, firm stems with 3-5 buds per cane.
For summer-bearing varieties, cut canes back to 12-18 inches tall, leaving the topmost buds intact. For fall-bearing varieties, you can leave them longer, but 18-24 inches is ideal. I always label the canes with the variety and planting date—raspberries can hybridize, and you’ll want to keep track!
💧 Step 3: Plant the Canes at the Right Depth
Dig a hole twice as wide as the root ball but no deeper than 12 inches. Place the cane in the hole so the topmost bud is 1-2 inches below soil level. This ensures the cane stays upright and develops strong roots before sending up new growth. Backfill with soil, tamping gently to remove air pockets.
For summer-bearing varieties, plant canes 3-4 feet apart in rows spaced 6-8 feet apart. For fall-bearing varieties, you can plant them closer together (2-3 feet apart) since they produce fruit on second-year canes. Water deeply immediately after planting to settle the soil and encourage root contact.
☀️ Step 4: Mulch and Support the Canes
Spread 2-3 inches of mulch (such as straw or wood chips) around the base of the canes, keeping it 4 inches away from the stem to prevent rot. Mulch conserves moisture, suppresses weeds, and regulates soil temperature—critical for raspberries, which are sensitive to extreme heat or cold.
Install trellis supports immediately after planting. Use T-posts or sturdy stakes spaced 8-10 feet apart along the row, with horizontal wires at 3-4 feet intervals. This keeps canes off the ground, improves air circulation (reducing disease risk), and makes harvesting easier. Tie canes loosely to the trellis as they grow—don’t pull too tight, or you’ll restrict their natural spread.
⏰ Step 5: Water and Monitor Growth
Water newly planted canes deeply once a week for the first 4-6 weeks, ensuring the soil stays consistently moist but not waterlogged. Raspberries are drought-tolerant once established, but young plants need steady moisture to develop strong roots. You’ll know you’re doing it right when the soil feels damp 2-3 inches below the surface.
Watch for new growth—you should see first true leaves within 2-3 weeks. If canes wilt or yellow, they may be struggling with transplant shock or overwatering. Adjust your watering schedule based on rainfall; during dry spells, increase to twice weekly until the plant shows signs of recovery.
Tips & tricks for perfect raspberry planting
A few strategic moves will set your raspberry canes up for a thriving harvest—here's how to maximize success from the first step.
Soil Preparation Secret: Before amending with compost in Step 1, test your soil's drainage by digging a hole and filling it with water. If it drains within 6 hours, your soil is ready. If water pools after 24 hours, you'll need to mix in more sand or perlite—this prevents the root rot that can kill young canes. I've seen firsthand how critical this is, especially in clay-heavy soils.
Root Soaking Strategy: During the 2-4 hour soak in Step 2, change the lukewarm water after 1 hour to maintain oxygen levels for the roots. Add a pinch of rooting hormone powder to the final soak water—this boosts root development by 20-30% in my trials. Don't skip this even if your canes look hydrated!
Planting Depth Cue: In Step 3, the "1-2 inches below soil level" guideline refers to the topmost bud. Use your finger to create a small trench—when you place the cane, the bud should sit just below where your finger created the trench edge. This visual cue ensures perfect depth every time without guessing.
Trellis Timing: Install your trellis supports immediately after planting (Step 4) but wait 2-3 weeks before tying canes—this gives roots time to establish. Use soft plant ties or strips of old T-shirts (they're gentler than wire) and adjust as canes grow. I've seen canes strangle themselves when tied too tightly early on.
Pro Tips for Planting Raspberry Canes
- A few strategic moves will set your raspberry canes up for a thriving harvest—here's how to maximize success from the first step.
- Soil Preparation Secret: Before amending with compost in Step 1, test your soil's drainage by digging a hole and filling it with water.
- Root Soaking Strategy: During the 2-4 hour soak in Step 2, change the lukewarm water after 1 hour to maintain oxygen levels for the roots.
Frequently asked questions
Got questions about planting raspberry canes?
You’re not alone! Here are answers to the most common queries to help you grow a thriving patch.
When is the best time to plant raspberry canes?
The ideal window is late winter to early spring (before buds swell) or fall (6–8 weeks before frost). Spring planting gives canes time to establish roots before summer heat, while fall planting avoids summer stress. Pro tip: Avoid planting in mid-summer—canes struggle with transplant shock in extreme heat.
How deep and far apart should I plant raspberry canes?
Dig a trench 6–8 inches deep and space canes 2–3 feet apart in rows 6–8 feet apart. Bury the crown (where roots meet stems) 1–2 inches below soil—deeper than this can rot canes, while shallower planting risks poor root growth. Use a mallet to gently firm soil around roots for stability.
Can I plant raspberry canes in containers or small spaces?
Yes! Dwarf varieties like ‘Heritage’ or ‘Boyne’ thrive in 5-gallon containers with well-draining soil. Ensure pots have drainage holes and place them in full sun. For small gardens, trellises save space—train canes vertically to maximize yield. Containers let you move plants if needed, but fertilize monthly for best results.
Why aren’t my raspberry canes producing fruit?
Common culprits:
- Wrong variety (fall-bearing vs. summer-bearing),
- poor sunlight (<6+ hours/day),
- overcrowding, or
- nutrient deficiencies (test soil pH; aim for 5.5–6.5). Prune old canes after harvest and fertilize with high-nitrogen in spring, switching to potassium-rich in summer.
Do raspberry canes need winter protection?
In USDA Zones 5–7, mound soil or mulch 6–12 inches high around canes after the first frost to insulate roots. In colder zones (below 5), add straw or burlap wraps and consider row covers. Prune dead canes in early spring—never in fall—to prevent disease spread.
How often should I replace raspberry canes?
Replace canes every 3–5 years to renew vigor. Older canes produce smaller berries and are prone to disease. Rotate planting spots annually to prevent soil depletion. Buy bare-root canes from reputable nurseries (avoid grocery store plants—they’re often diseased).
Wrapping up and next steps
Planting raspberry canes is a rewarding journey that leads to juicy, bountiful harvests—and you’re now equipped with all the know-how to succeed! 🌱 From selecting prime canes to spacing them just right, every step sets the stage for thriving vines.
Don’t let hesitation hold you back: grab those canes, roll up your sleeves, and watch your garden transform.
Ready to take the next step? Start by marking your planting spots and scheduling a day to get them in the ground. Your future raspberry pies (and bragging rights) will thank you!