Pruning
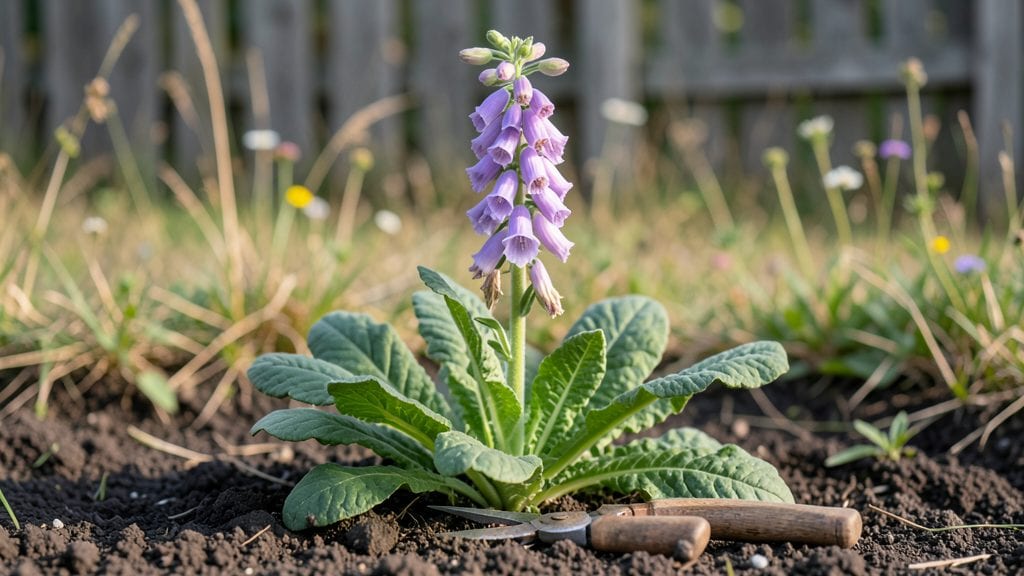
Deadheading foxglove plants keeps those tall spikes blooming for weeks longer than most gardeners expect. ✨ I learned the hard way that skipping this step means wilted flowers by July—until I started snipping just right.
The secret isn't aggressive pruning but precise timing and technique that redirects energy back into fresh blooms.
You only need two things: sharp pruners and a clear day. Cut just above the next set of buds when the lower flowers fade, never below the leaf nodes.
This simple act tells the plant to focus on new growth instead of seed production. Most gardeners overthink it—foxgloves respond to confidence, not perfection.
What you'll get is a second flush of blooms that lasts into early fall, with plants that stay sturdy and healthy. The flowers remain vibrant, and you avoid the sad, leggy look of overgrown stems. Plus, you're not wasting energy on seeds you'll never collect anyway.
Works for both biennial and perennial varieties, though biennials appreciate a lighter touch. Here's how to do it without turning your garden into a snipping marathon—because even I can't spend all summer with pruners in hand.
📚 In This Guide
- What you need
- Instructions
- Tips and common mistakes
- Wrapping up and next steps
What you need
- ● Pruning shears or sharp scissors – Choose bypass-style pruners (clean cuts prevent damage!)
- ○ Gloves (optional but recommended) – Protect your hands from foxglove’s milky sap (can irritate skin). Nitrile or leather gloves work best.
- ● Disinfectant (70% isopropyl alcohol or bleach solution) – Clean tools before and after to avoid spreading disease (1 part bleach to 9 parts water).
- ● Trash bag or bucket – For discarded spent blooms (foxglove is toxic—keep pets/kids away!).
- ○ Garden twine or labels (optional) – Mark deadheaded stems if tracking regrowth.
- ● Mature foxglove plants – Deadheading works best on well-established plants (1–2 years old) with visible spent blooms.
- ● Dry, calm weather – Avoid deadheading after rain or in windy conditions (prevents sap splatter and ensures clean cuts).
- ● Patience – Foxglove blooms sequentially; don’t rush—wait until all flowers on a spike are faded.
Step-by-Step instructions for deadheading foxglove plants
Here’s how to keep your foxglove blooms vibrant all season with the right timing and technique.
✂️ Step 1: Identify the Right Blooms to Snip
Focus on spent flowers—the ones that have faded from their signature purple, pink, or white to a dull, brownish hue. These are the blooms that have already released their seeds and won’t produce new flowers. I like to grab a handful of stems at once and scan for the first signs of wilting or seed pods forming. This ensures I’m only removing what’s truly done blooming.
Leave the fresh, fully open blooms alone—they’re still putting on a show and haven’t finished their reproductive cycle. The goal here is to redirect the plant’s energy from seed production to new flower growth. If you’re unsure, pinch the bloom gently: if it crumbles easily, it’s ready to go.
✂️ Step 2: Use Clean, Sharp Pruners for a Precision Cut
Grab your pruners and give the blade a quick wipe with rubbing alcohol to sterilize it. This prevents spreading any potential diseases from plant to plant. I angle my cut just above a set of healthy leaves or a leaf node—this is where new growth will sprout. A clean cut at a 45-degree angle helps water run off instead of pooling at the stem, which can cause rot.
Don’t snip too close to the leaf node, or you risk damaging the growing point. Aim for about ½ inch above where the bloom stem meets the main stalk. This gives the plant enough energy to push out new side shoots and keep flowering strong. If you’re dealing with a particularly large cluster, you can trim back the entire stem to just above a lower set of leaves for a bushier look.
✂️ Step 3: Time Your Deadheading for Maximum Impact
Deadhead foxglove in the early morning when the blooms are still cool and turgid. This reduces stress on the plant and gives it the whole day to recover before the heat of afternoon sets in. I’ve found that deadheading every 7-10 days keeps the blooms coming nonstop from early summer until fall. If you wait too long, the plant will start diverting energy to seed production, and you’ll see fewer flowers overall.
Watch for new buds forming at the base of the stem—these are your signal that the plant is responding well to your pruning. If you notice the stems getting woody or the leaves yellowing, it’s a sign you’ve been too aggressive with the cuts. Foxglove is forgiving, but like most perennials, it prefers a gentle hand over heavy pruning.
🌿 Step 4: Encourage Bushier Growth with Strategic Trimming
After deadheading, take a moment to assess the overall shape of your foxglove. If the plant is looking leggy or sparse, it’s time to give it a little structural trim. I like to cut back the tallest stems by about ⅓ of their height to encourage branching. This isn’t just about looks—it also helps the plant stay sturdy in wind or rain.
Focus on the lower third of the plant where new growth is most likely to emerge. Avoid cutting into old, bare stems, as these won’t regenerate. Instead, target stems with at least a few leaves still attached. This ensures the plant has the energy to produce fresh foliage and more blooms. A little strategic trimming now means a fuller, more vibrant foxglove next season.
⏰ Step 5: Monitor and Adjust Your Approach
Keep an eye on your foxglove over the next few weeks. If you notice blooms slowing down or the plant looking tired, it might be time to cut back even more aggressively. I’ve had seasons where foxglove needs a mid-summer reset—just trim back all the stems to 4-6 inches tall and watch as new growth and flowers burst out within weeks.
If your foxglove is in a shady spot, expect fewer blooms overall, but the same deadheading rules apply. The key is consistency: regular snipping keeps the plant focused on flowering instead of seeding. By late summer, you’ll likely see a second wave of blooms if you’ve been diligent. And remember, foxglove thrives on neglect too—if a season gets busy, even skipping a few deadheadings won’t kill the plant, but it will cut your bloom time short.
Tips & tricks for perfect foxglove deadheading
These little tricks will help you extend your foxglove's bloom time and keep your garden looking its best all season long.
Precision Cutting Technique: When you make that 45-degree angle cut in Step 2, think of it like making a perfect slice of pie—clean and intentional. The angle isn't just for looks; it creates a larger surface area for water runoff, which prevents those nasty fungal issues that can creep in after pruning. I always make my cuts just above a leaf node, where new growth will emerge. If you're unsure where the node is, look for the tiny bump where leaves attach to the stem—this is your target zone.
Seasonal Timing Adjustments: The 7-10 day deadheading schedule in Step 3 works beautifully during peak summer, but I adjust my timing in early fall. As days get shorter and cooler, I extend the interval to every 12-14 days. Foxglove responds well to this seasonal rhythm—it gives the plant time to recover while still maintaining that continuous bloom display. The key is watching the plant's response rather than sticking rigidly to the schedule.
Strategic Trimming for Bushier Growth: In Step 4, when you're cutting back those leggy stems by ⅓, here's a pro move: focus on the oldest, tallest stems first. These are the ones that have already put out their flowers and are now just taking up space. By removing them, you're encouraging the younger, more vigorous stems to take center stage. I've found that this approach gives me a fuller, more compact foxglove plant that's less likely to flop in wind or rain.
Mid-Season Reset Secret: That mid-summer reset mentioned in Step 5 is my absolute favorite trick. When foxglove starts looking tired around late July, I give it a complete haircut—trimming all stems back to 4-6 inches. It might look dramatic at first, but within 2-3 weeks, you'll see a burst of fresh growth and a second wave of blooms that often lasts right through fall. This works especially well if your foxglove has been in the same spot for several years and needs rejuvenating.
Pro Tips for Deadheading Foxglove Plants
- These little tricks will help you extend your foxglove's bloom time and keep your garden looking its best all season long.
- Precision Cutting Technique: When you make that 45-degree angle cut in Step 2, think of it like making a perfect slice of pie—clean and intentional.
- Seasonal Timing Adjustments: The 7-10 day deadheading schedule in Step 3 works beautifully during peak summer, but I adjust my timing in early fall.
Frequently asked questions
about deadheading foxglove plants can help you avoid common pitfalls and maximize your garden’s beauty. Here are answers to the most pressing queries:When is the best time to deadhead foxglove?
Deadhead foxglove after the blooms fade but before seed pods form—typically in late spring to early summer for the first flush, and again in late summer for biennials. Cut spent spikes 1/3 of the way down to encourage new growth. Avoid pruning in fall, as foxglove stores energy in its roots for next year’s blooms.
Do I need special tools to deadhead foxglove?
Nope! A sharp pair of bypass pruners or even clean scissors work perfectly. Just sterilize them with rubbing alcohol between cuts to prevent disease spread. For large patches, shears with a smooth blade (not serrated) reduce tearing. Pro tip: Wear gloves—foxglove sap can irritate skin!
Will deadheading foxglove encourage more flowers?
Removing spent blooms redirects the plant’s energy toward new growth and flowers instead of seed production. Biennial foxglove may produce a second flush of blooms in late summer if deadheaded early. For perennials, consistent deadheading keeps them blooming longer and healthier.
What if I miss deadheading and seed pods form?
No stress! If seed pods develop, you can still prune them off—just cut the entire spike at the base. Foxglove self-seeds easily, so save some pods for natural propagation if you’d like more plants. Just monitor for volunteers (unplanned seedlings) in spring—they’re easy to transplant!
Are there alternatives to deadheading foxglove?
Yes! If you dislike pruning, let the plant go to seed—it’ll still bloom next year (for biennials). For a neater look, shear the entire plant back by half in early fall to tidy up. Just avoid heavy pruning in late fall, as foxglove needs foliage to photosynthesize until winter.
Wrapping up and next steps
Deadheading foxglove plants is a simple yet powerful way to keep your garden vibrant and encourage more blooms!
By removing spent flowers, you redirect the plant’s energy toward growth and future blossoms—plus, it keeps your garden looking tidy. 🌸 Whether you’re a seasoned gardener or just starting out, this easy task takes just minutes and makes a big difference.
Now that you’re armed with the how-to, grab your pruners and give your foxgloves some love. Ready to see those tall, striking spikes bursting with color all season long? Happy gardening!