Pruning
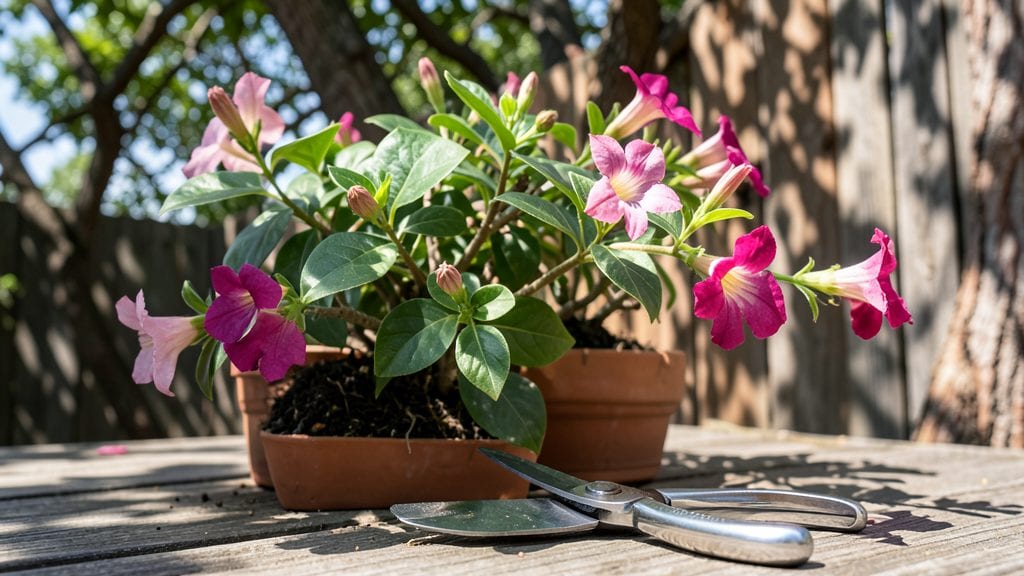
Dipladenia pruning transforms a leggy, sparse plant into a bursting cascade of trumpet-shaped blooms—if you time it right. I’ve turned my once-bare Mandevilla into a year-round showpiece by mastering just three key cuts, and the secret isn’t aggressive trimming but strategic shaping.
The right snips encourage new growth while preserving the plant’s natural shape, and doing it at the wrong time? You’ll end up with a sad, woody skeleton by summer.
You’ll need only three tools: sharp bypass pruners for clean cuts, rubbing alcohol to sterilize them between plants, and a small notepad to mark growth nodes (those little bumps where leaves and stems meet).
Timing matters most: prune lightly in late winter to shape the plant before spring growth, then again in early summer after blooming to encourage a second flush. Over-pruning in fall? That’s how you kill next year’s flowers before they even start.
The payoff comes in 6-8 weeks: thick, dark green foliage fills in gaps, and new stems sprout from those nodes you preserved. By midsummer, you’ll have longer stems with more blooms than before, and the plant will stay compact enough to train on trellises or spill over pots.
The key is cutting just above a leaf node at a 45-degree angle—never leaving stubs—and never taking more than one-third of the plant’s growth at once.
This method works for both container and in-ground Mandevillas, and even revives neglected plants. The only rule? Start small, observe how your plant responds, and adjust. Next time you see those leggy stems, grab your pruners—you’re about to unlock a whole new season of blooms.
📚 In This Guide
- What you need
- Instructions
- Tips and common mistakes
- Wrapping up and next steps
What you need
- ● Bypass pruners – Sharp, clean, and sterilized (1 pair, 5–7-inch blades for precision).
- ● Hand pruners (felco or similar) – For smaller stems (1 pair, ergonomic grip).
- ● Loppers – For thicker branches (½–1.5 inches) (1 pair, 18–24-inch reach).
- ● Garden gloves – Cut-resistant, breathable (1 pair, medium/large size).
- ● Rubbing alcohol (70% or higher) – For sterilizing tools (small bottle, 4–8 oz).
- ○ Pruning saw (optional) – For stubborn, woody stems (1, 8–10-inch blade).
- ● Disposable pruning bags or bucket – For collecting clippings (1–2, 5-gallon size).
- ○ Horticultural sealant (optional) – For large cuts (¼-inch or wider) (small tube, like Tree Seal Tape).
- ● Sharpie or permanent marker – To mark cuts if needed (1, fine tip).
- ● Ladder or step stool – For potted or tall Dipladenia (1, stable, 4–6 ft height).
- ● Water spray bottle – To clean tools between cuts (small, 8–16 oz).
- ● Choose the right time – Prune after blooming (late spring/early summer) or in early spring for potted plants.
- ● Check plant health – Remove dead, diseased, or crossing branches first.
- ● Gather inspiration – Sketch or take photos of your plant’s shape before cutting!
Step-by-step guide to dipladenia plant pruning
Here’s how I transform a single dipladenia plant into a lush, blooming cascade year after year.
Assess Growth and Identify Key Areas
Start by examining your dipladenia in early spring, before new growth begins. Look for overcrowded stems, dead or yellowed leaves, and stems that have lost their vigor. Healthy growth should have firm, green stems with buds forming at the tips. I always prune on a dry, overcast day—this reduces stress on the plant and minimizes sap loss.
Use clean, sharp pruning shears to avoid crushing stems. Cut just above a leaf node (the small bump where leaves attach) at a 45-degree angle. This encourages new growth from that node. If you’re unsure where to cut, err on the side of leaving slightly more stem—dipladenias are forgiving and will regrow quickly.
Prune for Shape and Airflow
Dipladenias thrive when they receive good air circulation, so prune to create an open, balanced shape. Focus on thinning out congested areas by removing 1-2 older stems per cluster. This prevents disease and allows sunlight to reach the inner growth. I aim for a pyramidal or cascading shape, depending on whether the plant is in a hanging basket or upright pot.
Never cut more than one-third of the plant’s total foliage in a single session. This ensures the dipladenia retains enough energy to recover and produce new blooms. If you’re pruning after a heavy bloom cycle, wait until new growth appears before trimming—this signals the plant is ready for another round of shaping.
Encourage Blooming with Strategic Cuts
To maximize flowers, prune back spent blooms and leggy stems throughout the growing season. Cut just above the next set of healthy leaves or buds. This redirecting of energy often results in fuller, more abundant blooms in the next cycle. I make these cuts every 4-6 weeks during the active growing months (spring through early fall).
If your dipladenia hasn’t bloomed well, try a harder prune in early spring—cut back half of the oldest stems to the base. This drastic approach forces the plant to focus its energy on new, vigorous growth. Water deeply after pruning to help the plant recover and reduce shock.
Prepare for Winter Dormancy
As temperatures drop in late fall, dipladenias enter dormancy. Before the first frost, give your plant a light pruning to remove any weak, damaged, or diseased stems. This keeps the plant healthy and reduces the risk of rot during winter. I also reduce watering significantly, allowing the soil to dry out slightly between waterings.
Move potted dipladenias to a cool, bright location (around 50-60°F) with indirect light for the winter. Avoid drafts or freezing temperatures, as these can kill the plant. In warmer climates, dipladenias may stay outdoors year-round, but a light trim in late fall still helps maintain shape and health.
Post-Pruning Care for Recovery
After pruning, dipladenias need consistent care to bounce back strong. Water deeply but infrequently—aim to keep the soil evenly moist but not soggy. A slow-release fertilizer applied in early spring and again after pruning encourages robust growth. I also monitor for pests like aphids or spider mites, which are more likely to attack stressed plants.
Within 2-4 weeks, you should see new growth emerging from the nodes where you pruned. This is your signal that the plant is recovering well. If growth stalls or yellowing appears, adjust your watering or light conditions—dipladenias thrive in bright, indirect light and well-draining soil. With the right care, your pruned dipladenia will reward you with vibrant blooms all season long.
Tips & tricks for perfect dipladenia plant pruning
These seasonal pruning secrets will transform your dipladenia into a thriving, bloom-filled beauty with minimal stress on the plant.
Timing is Everything: Early spring is the ideal time to assess and prune your dipladenia, but don't wait too long—once new growth appears, it's time to act. I've found that pruning on a dry, overcast day reduces stress and minimizes sap loss, giving your plant the best chance to recover. This timing aligns perfectly with the plant's natural growth cycle, ensuring it has plenty of energy for new blooms ahead.
Precision Cutting Technique: When making cuts, always aim just above a leaf node at a 45-degree angle. This angle prevents water from pooling on the cut, which could lead to rot. I've learned the hard way that leaving slightly more stem than you think necessary is better—dipladenias are remarkably resilient and will regrow quickly from those nodes. For stubborn stems, a clean cut with sharp shears is crucial to avoid crushing the plant tissue.
Seasonal Pruning Strategy: The instructions mention pruning every 4-6 weeks during the growing season, but I've found that consistency is key. For winter preparation, focus on removing only weak or damaged stems—never more than one-third of the foliage. In warmer climates where frost isn't a concern, a light trim in late fall still helps maintain shape and health. This approach keeps your dipladenia looking its best year-round while preventing shock during colder months.
Recovery Care Essentials: After pruning, the 2-4 week recovery period is critical. I've noticed that dipladenias respond best to deep but infrequent watering—this prevents soggy soil while keeping roots hydrated. Applying a slow-release fertilizer during this time provides the nutrients needed for robust regrowth. Watch for new growth emerging from the nodes where you pruned; this is your clear signal that the plant is recovering well and ready for continued care.
Pro Tips for Dipladenia Plant Pruning
- These seasonal pruning secrets will transform your dipladenia into a thriving, bloom-filled beauty with minimal stress on the plant.
- Timing is Everything: Early spring is the ideal time to assess and prune your dipladenia, but don't wait too long—once new growth appears, it's time to act.
- Precision Cutting Technique: When making cuts, always aim just above a leaf node at a 45-degree angle.
Frequently asked questions
Got questions about keeping your dipladenia thriving with the perfect prune? Here are some of the most common concerns—and their answers—to help you grow a bushier, bloomier plant with confidence!
When is the best time to prune dipladenia for maximum blooms?
The ideal time to prune dipladenia is right after flowering (late spring to early summer) to encourage new growth and more blooms. You can also do a light trim in early spring to shape the plant, but avoid heavy pruning in fall or winter, as it may stress the plant before dormancy. Pro tip: If you live in a warm climate, you can prune lightly year-round!
How much can I trim back my dipladenia without harming it?
Dipladenia is surprisingly resilient! You can safely trim back up to one-third of the plant’s height in one session, especially if it’s leggy or overgrown. For bushier growth, cut just above a leaf node (where leaves meet the stem) to encourage branching. Warning: Avoid over-pruning—too much at once can shock the plant and reduce flowering.
What should I do if my dipladenia stops blooming after pruning?
If your dipladenia skips blooms post-prune, it might need a few adjustments:
- Check light: Dipladenia loves bright, indirect sunlight—move it closer to a window if it’s in a shady spot.
- Fertilize: Use a balanced, water-soluble fertilizer (like 10-10-10) every 4–6 weeks during growing season.
- Prune strategically: Cut back only spent blooms (deadheading) to redirect energy to new flowers.
Give it 4–6 weeks to recover—patience is key!
Can I prune dipladenia in winter, or should I wait for spring?
Winter pruning is not recommended unless you’re in a frost-free zone. In colder climates, wait until early spring (when new growth appears) to prune. If you must trim in winter, do it lightly to avoid stress. Bonus tip: If your dipladenia is indoors, reduce watering in winter and prune only to remove dead or yellowing stems.
What’s the difference between pruning for shape vs. pruning for more flowers?
| Pruning for Shape | Pruning for More Flowers |
|---|---|
| Trim evenly to maintain a balanced look, cutting back outer growth to open up the center. | Focus on removing spent blooms and long, leggy stems to encourage bushier growth. |
| Best done in early spring or after a flowering cycle. | Do this throughout the growing season, especially after blooms fade. |
Remember: A little of both keeps your dipladenia both beautiful and blooming!
Wrapping up and next steps
Mastering the art of dipladenia plant pruning is your ticket to a vibrant, long-blooming beauty that steals the show! 🌸 With the right timing, tools, and techniques—like seasonal trimming and deadheading—you’ll encourage lush growth and nonstop flowers.
Don’t let pruning intimidate you; embrace it as your secret weapon for a thriving dipladenia.
Ready to put your new skills to the test? Grab those shears and give your plant the TLC it deserves! 🌿 Watch it reward you with stunning blooms all season long.