Plants
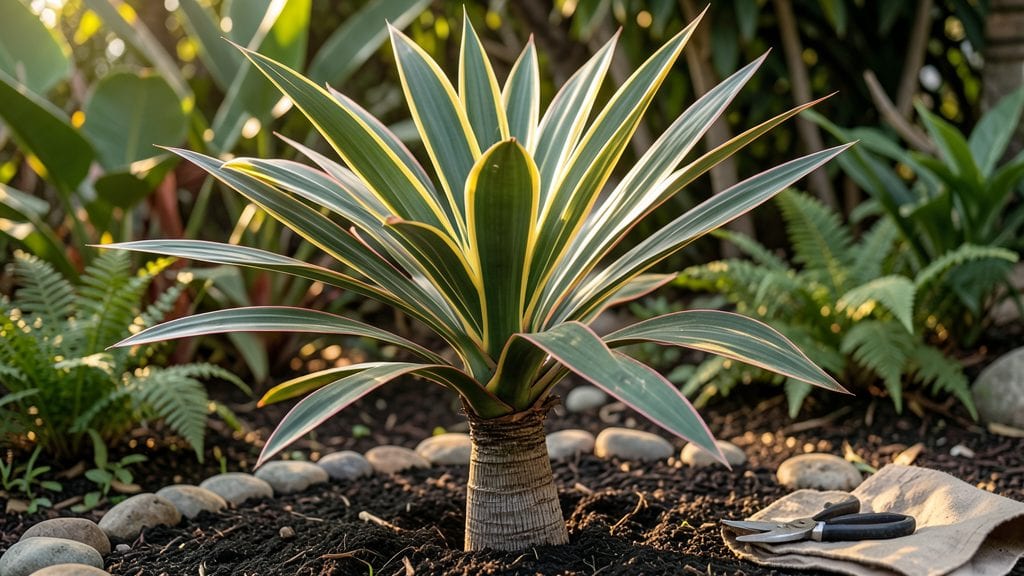
Growing a Hawaiian ti plant transforms any space into a taste of the tropics with its bold, velvety leaves. 🌿 I’ve watched mine go from a small pot to a statement plant in just two years, and the secret isn’t complicated—it’s about mimicking its natural island home.
These plants thrive where others struggle, making them perfect for sunny patios, coastal gardens, or even indoor bright spots.
The key is simple: well-draining soil, bright indirect light, and occasional watering—never soggy roots. They’re tougher than they look, handling heat and humidity like a pro, but they’ll reward you with glossy, sword-like foliage that stays vibrant all year.
Even pruning is easy—just snip back leggy growth, and it bounces back faster than you’d expect.
Beyond the beauty, Hawaiian ti has deep cultural roots in Polynesia, used traditionally for clothing, medicine, and even as a symbol of protection. Your plant can do double duty as a living centerpiece or a conversation starter.
Plus, it’s one of those rare plants that looks great without much fuss—ideal for busy gardeners who still want drama.
Whether you’re in a warm coastal zone or a container on a city balcony, this guide covers everything from soil prep to propagation tricks so you can grow one that’s as resilient as it is stunning. Let’s get those leaves growing!
📚 In This Guide
- What you need
- Instructions
- Tips and common mistakes
- Wrapping up and next steps
What you need
- ● Hawaiian ti plant: 1 nursery-grown plant (ensure it’s disease-free and healthy).
- ● Well-draining potting mix: 5–10 gallons (depending on pot size). Opt for a mix with perlite or sand for aeration.
- ● Container or garden bed: For pots: 15–20 gallon container with drainage holes (minimum 12" diameter).
- ● For in-ground planting: A sunny, sheltered spot with loose, fertile soil.
- ● Slow-release fertilizer: 1 balanced, organic fertilizer (e.g., 10-10-10 or compost).
- ● Watering can or hose with a gentle nozzle.
- ● Gloves: 1 pair (to protect hands from thorns and soil).
- ● Trowel or shovel: 1 (for planting and soil prep).
- ● Pruning shears: 1 pair (for shaping or removing dead leaves).
- ○ Mulch (optional): 2–3 inches of organic mulch (e.g., bark or straw) to retain moisture.
- ○ Support stake (optional): 1–2 stakes (if growing in windy areas).
- ○ pH testing kit (optional): To check soil acidity (ideal range: 6.0–7.0).
Step-by-Step instructions for growing Hawaiian ti plants
Here's how to cultivate these striking tropical plants with minimal fuss—just follow these straightforward steps.
🌱 Step 1: Select the Right Location and Prepare the Soil
Hawaiian ti thrives in bright, indirect light—think filtered sunlight through sheer curtains or a shaded patio. Direct sun can scorch its broad leaves, while too little light causes leggy growth. I always test the spot by placing a plant there for a day first; if leaves look stressed, it's too harsh.
Use well-draining, slightly acidic soil (pH 5.5-6.5). Amend heavy garden soil with 20% perlite or sand to prevent root rot. Ti plants hate soggy roots, so if your soil drains slowly, raise the pot or mound soil in a container to improve airflow. The root system is fibrous but shallow, so a 6-8 inch deep planting area suffices.
🪴 Step 2: Plant the Ti Plant Properly
Dig a hole twice as wide as the root ball but only as deep as the container it came in. Ti plants resent being buried too deeply, which can cause crown rot. Gently loosen the roots if they're pot-bound, then place the plant so the top of the root ball sits level with the surrounding soil. This ensures the crown stays above ground where it belongs.
Backfill with the amended soil, pressing lightly to remove air pockets but not compacting too firmly. Water deeply right after planting to settle the soil and encourage root spread. You'll know it's right when water drains freely from the bottom—no puddles or soggy spots. Mulch with 2-3 inches of organic mulch (like pine bark) to retain moisture and keep roots cool.
☀️ Step 3: Water and Maintain Ideal Growing Conditions
Water when the top 1-2 inches of soil feel dry to the touch. Ti plants are drought-tolerant once established but appreciate consistent moisture during active growth. I water mine every 5-7 days in summer, adjusting for humidity—more often in dry air, less in damp climates. Overwatering is the biggest mistake; yellowing leaves often signal root stress from too much moisture.
Keep temperatures between 65-85°F—ti plants are tropical and won't tolerate frost or cold drafts. If you're growing indoors, a humidifier or pebble tray helps mimic their native environment. Fertilize lightly every 6-8 weeks with a balanced liquid fertilizer (10-10-10) diluted to half strength. Too much fertilizer causes weak growth and fewer striking variegated leaves.
✂️ Step 4: Prune for Shape and Encourage New Growth
Pruning is minimal but keeps your ti plant looking its best. Remove yellow or damaged leaves at the base with clean pruners to redirect energy. I also trim back any leggy stems that stretch too far—this encourages bushier growth. Cut just above a leaf node (the bump where new leaves emerge) to promote branching.
If your plant outgrows its space, divide it every 2-3 years in spring. Dig up the clump, separate the sections with a sharp knife, and replant immediately. Each division should have 3-4 healthy leaves and a portion of the root system. Ti plants spread easily, so division keeps them vibrant and prevents overcrowding.
🌿 Step 5: Protect and Enjoy Year-Round Growth
Ti plants are low-maintenance but benefit from seasonal check-ins. In winter, reduce watering slightly since growth slows, but never let the soil dry out completely. If growing outdoors in colder zones, bring potted plants indoors before temperatures drop below 50°F. They’ll survive brief dips but thrive best in warmth.
Watch for scale insects or spider mites, which love the broad leaves. Wipe leaves with a damp cloth weekly to remove dust and deter pests. With proper care, your ti plant will reward you with bold, architectural foliage that adds tropical drama to any space—indoors or out.
Tips & tricks for perfect Hawaiian ti plant cultivation
A few key insights that'll help your ti plant thrive with minimal effort—and avoid the common pitfalls that turn vibrant foliage into sad, leggy shadows.
Lighting Strategy: The bright, indirect light mentioned in Step 1 is non-negotiable, but here's the trick: if you're using artificial grow lights, position them 12-18 inches above the plant and run them for 12-14 hours daily. Ti plants won't tolerate dim corners—leggy growth is your first warning sign. I've seen plants stretch toward windows like sunflowers when light was insufficient.
Soil Science: That 20% perlite or sand amendment in Step 1 is crucial for preventing root rot, but don't stop there. For container growing, mix in 10% orchid bark to improve aeration further. The fibrous root system needs oxygen as much as water. I've had ti plants thrive in pure cactus/succulent mix when planted in containers—just ensure drainage holes are present.
Watering Wisdom: The "top 1-2 inches dry" rule in Step 3 is perfect, but here's how to test it: stick your finger in the soil—if it feels like a slightly damp sponge, hold off. Ti plants are surprisingly drought-tolerant once established. In winter, I reduce watering to every 10-14 days since growth slows dramatically. The key is consistency: better to underwater slightly than drown the roots.
Temperature Transition: That 50°F threshold in Step 5 is critical when bringing plants indoors. I recommend moving potted ti plants gradually over 3-4 days to avoid shock. Place them near a sunny window first, then gradually increase light exposure. Sudden temperature drops below 65°F can cause leaf drop—something I learned after losing a prized specimen to a cold snap.
Pro Tips for Hawaiian Ti Plant
- A few key insights that'll help your ti plant thrive with minimal effort—and avoid the common pitfalls that turn vibrant foliage into sad, leggy shadows.
- Ti plants won't tolerate dim corners—leggy growth is your first warning sign.
- Soil Science: That 20% perlite or sand amendment in Step 1 is crucial for preventing root rot, but don't stop there.
Frequently asked questions
Got questions about growing and caring for your Hawaiian ti plant? Here are some of the most common ones—plus straightforward answers to help you keep your tropical beauty thriving with ease!
How often should I water my Hawaiian ti plant?
The Hawaiian ti plant thrives on consistent moisture but hates soggy roots. Water it when the top 1–2 inches of soil feel dry—typically 1–2 times per week, depending on your climate. In hot, dry conditions, it may need more frequent watering. Pro tip: Ensure the pot has drainage holes to prevent root rot!
Can Hawaiian ti plants survive cold weather?
While Hawaiian ti plants are tropical, they can tolerate brief dips to 30–35°F (–1 to 2°C) if kept dry. However, prolonged cold (<30°F) or frost will damage or kill the plant. If you live in a colder zone, grow it in containers and bring it indoors during winter or protect it with frost cloth.
Why are the leaves turning yellow?
Yellowing leaves usually signal overwatering or poor drainage. Check the soil—if it’s soggy, let it dry out before watering again. Yellowing can also be caused by nutrient deficiency (try a balanced fertilizer) or sunburn (move it to partial shade). Pro tip: Trim yellowed leaves to encourage new growth!
Is Hawaiian ti plant safe for pets?
The Hawaiian ti plant is non-toxic to pets, including cats and dogs, according to the ASPCA. However, some pets may still avoid it due to its fibrous texture. If your furry friend is curious, monitor them to prevent over-chewing, which could cause mild stomach upset.
Can I grow Hawaiian ti plant indoors?
Hawaiian ti plants adapt well to bright, indirect light indoors, like near an east- or west-facing window. Keep humidity moderate (a pebble tray helps) and avoid drafts. If growth slows, supplement with grow lights for 12–14 hours daily. Pro tip: Rotate the pot occasionally for even growth!
Wrapping up and next steps
The Hawaiian ti plant is a stunning, low-maintenance addition to any tropical garden or indoor space—perfect for those who love lush greenery without the fuss! 🌿 With just the right balance of sunlight, well-draining soil, and occasional watering, you’ll enjoy its striking foliage and resilience for years to come.
Ready to bring a piece of Hawaii into your home? Start by gathering your supplies, then plant your ti leaf with confidence—your green thumb (or even your beginner skills!) will thank you. Happy growing! 🌱