Propagation
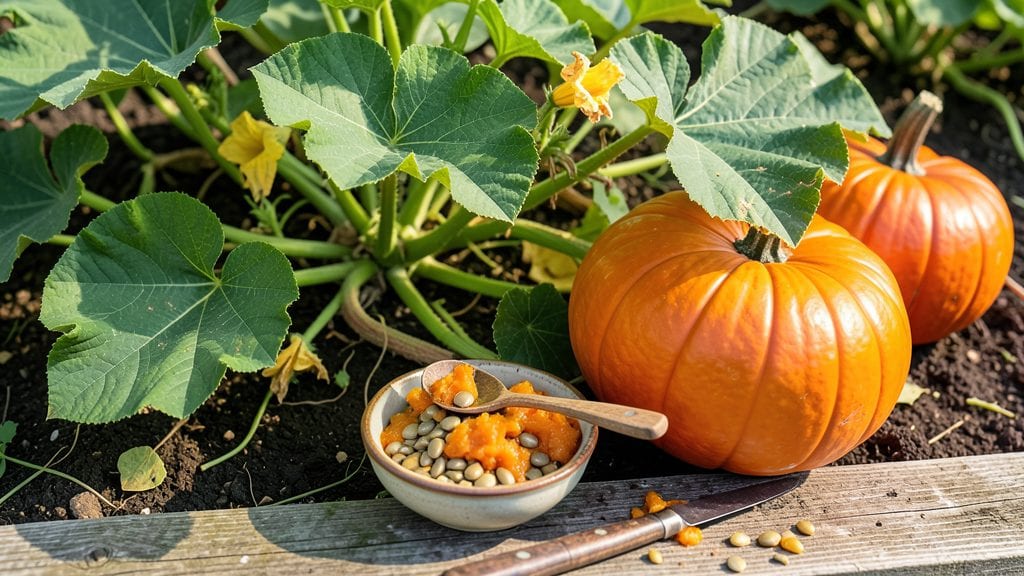
Cleaning pumpkin seeds for planting starts with a simple soak that removes every last bit of stringy pulp. I’ve saved seeds from store-bought pumpkins for years, and this foolproof method ensures only the best seeds make it to your garden—no slimy surprises.
The key is patience: let them soak until the gunk dissolves completely, then rinse until the water runs clear. You’ll end up with seeds that look fresh, smell clean, and are ready for testing or direct planting.
You only need a few basic supplies: a bowl big enough for your seeds, warm water, and a fine-mesh strainer or colander. Some gardeners swear by a tablespoon of bleach in the rinse water to prevent mold, but I’ve never needed it—just thorough drying does the trick.
The process takes about 30 minutes of active time, plus drying overnight, so it’s perfect for a lazy Sunday afternoon while you watch football or binge your favorite show.
Once clean, spread the seeds on a paper towel in a single layer and let them dry for 24-48 hours in a warm, dark spot.
Properly dried seeds store beautifully in an airtight container for up to 5 years, though I’ve had great luck planting them fresh the same season. The first time I grew pumpkins from store-bought seeds, I ended up with 12-foot vines—proof that clean seeds make all the difference.
Here’s the bonus: test a few seeds in a damp paper towel before planting to check germination rates. If they sprout within 7-10 days, you’re golden. If not, try soaking them longer next time—sometimes the extra step saves an entire season of waiting.
Now grab that pumpkin and let’s get those seeds ready for spring!
📚 In This Guide
- What you need
- Instructions
- Tips and common mistakes
- Wrapping up and next steps
What you need
- ● Fresh pumpkin seeds: Harvest seeds from a healthy, organic pumpkin (avoid store-bought or treated varieties). Aim for 1–2 cups of seeds, depending on your planting goals.
- ● Water: Enough to fill a bowl or basin for soaking (about 2–3 cups). Use room-temperature or lukewarm water.
- ● Colander or fine-mesh strainer: A stainless steel or plastic strainer with small holes (about 1/8-inch or finer) to rinse seeds thoroughly.
- ● Paper towels or clean kitchen towel: At least 2–3 sheets for drying seeds.
- ● Small bowl or plate: For spreading seeds to dry (preferably non-porous to avoid moisture absorption).
- ○ Optional drying surface: A wire rack or cooling rack (if you prefer airflow for faster drying).
- ● Bleach solution: Mix 1 part unscented bleach with 9 parts water for a 5–10 minute soak to disinfect seeds (prevents mold). Rinse thoroughly afterward!
- ● Hydrogen peroxide (3%): Add 1 tablespoon to the soaking water for natural disinfection and faster drying.
- ● Labeling tags: Small paper or plastic tags and a permanent marker to label seed varieties (if saving multiple types).
- ● Air-tight container: A glass jar or resealable bag with a paper towel inside to store dried seeds in a cool, dark place.
Step-by-Step instructions for preparing pumpkin seeds for planting
Here's how to transform store-bought pumpkin seeds into healthy, ready-to-plant starters in just minutes.
Scoop and Rinse the Seeds
Start by cutting open your pumpkin and scooping out the seeds with a spoon. I like to use a butter knife to gently scrape along the inner walls—this catches even the smallest seeds. Transfer them to a large bowl and cover them with cool water. Let them soak for about 5 minutes while you scrape any remaining pulp or stringy bits from the seeds.
After soaking, drain the water and give the seeds a thorough rinse under running water. This removes any lingering flesh that might rot during planting. Rub the seeds gently between your fingers or with a paper towel to remove any last traces of pulp. You'll notice the clean seeds have a smooth, slightly shiny appearance compared to the sticky, fibrous ones.
Dry the Seeds Completely
Spread the rinsed seeds out on a clean kitchen towel or paper towels in a single layer. Make sure they aren’t touching each other—this prevents mold from forming. Let them air-dry at room temperature for about 24 hours. I usually place them near a fan or in a warm, dry spot to speed up the process.
You'll know they're fully dry when they feel light and make a rattling sound when shaken in their container. If any seeds still feel damp after 24 hours, give them another hour or two. Overly moist seeds won’t store well and may develop mold, so this step is critical. Once dry, transfer them to a paper envelope or airtight container for storage.
Test for Viability Before Planting
Before planting, test the seeds to ensure they’ll germinate. Fill a small glass with water and add about 10 seeds. Let them soak overnight. The next morning, check for any seeds that have sunk to the bottom—they’re viable and ready to plant. Discard any that float, as they won’t sprout.
For extra assurance, you can also perform a simple germination test by placing a damp paper towel in a sealed plastic bag with a few seeds. Keep it in a warm spot for 3-5 days. If the seeds sprout within this time, they’re good to go. This step saves you from planting dozens of seeds only to have them fail to grow.
Store Until Planting Season
If you’re not planting right away, store the dried seeds in a cool, dark place like a pantry or fridge. I like to keep them in a small paper envelope labeled with the pumpkin variety and the year. Seeds stored this way can last for 3-5 years, though their germination rate may decrease over time.
When planting season arrives, simply follow standard pumpkin seed planting instructions. Plant 1 inch deep in well-draining soil, spacing seeds 2-3 feet apart for vining varieties. Water gently after planting, and keep the soil consistently moist until germination, which typically occurs in 7-14 days.
Tips & tricks for perfect pumpkin seed preparation
These simple strategies will ensure your pumpkin seeds are perfectly cleaned and ready for planting with minimal effort.
The Soaking Secret: During the 5-minute soak in Step 1, don't skip the pulp scraping—even small bits of stringy flesh can trap moisture and cause mold later. I like to use a colander under running water to rinse while scraping with my fingers, which catches all the debris. This extra step makes a noticeable difference in how clean your seeds look and feel after drying.
Drying Efficiency: The 24-hour drying time in Step 2 is ideal, but if you're short on time, place your seeds on a baking sheet in a warm, dry spot like a sunny windowsill or near a space heater. Just be sure to check them every few hours to prevent over-drying, which can crack the seed coats. You'll know they're ready when they rattle when shaken in their container.
Viability Test Shortcut: For the overnight water test in Step 3, use a clear glass so you can easily see which seeds sink. I've found that seeds with a slightly rough texture tend to be more viable than perfectly smooth ones. If you're impatient, you can check them after just 4 hours—though you may need to wait longer for some varieties to fully sink.
Storage Wisdom: When storing your seeds for 3-5 years as mentioned in Step 4, add a small packet of silica gel or a slice of bread to your storage container. The bread absorbs excess moisture, while the silica gel helps maintain dry conditions. Label your container with the date and pumpkin variety to keep track of how long they've been stored.
Pro Tips for Clean Pumpkin Seeds For Planting
- These simple strategies will ensure your pumpkin seeds are perfectly cleaned and ready for planting with minimal effort.
- The Soaking Secret: During the 5-minute soak in Step 1, don't skip the pulp scraping—even small bits of stringy flesh can trap moisture and cause mold later.
- Drying Efficiency: The 24-hour drying time in Step 2 is ideal, but if you're short on time, place your seeds on a baking sheet in a warm, dry spot like a sunny windowsill or near a space heater.
Frequently asked questions
Got questions about cleaning pumpkin seeds for planting? You’re not alone—here are some of the most common ones to help you grow strong, healthy pumpkins!
Can I plant pumpkin seeds straight from a store-bought pumpkin?
Yes! Store-bought pumpkin seeds are safe to plant as long as they’re organic and untreated. Just make sure to clean them thoroughly to remove any traces of preservatives or coatings that could inhibit germination. Avoid seeds from non-organic pumpkins, as they may contain pesticides.
How long do cleaned pumpkin seeds last before planting?
Cleaned pumpkin seeds stay viable for 2–4 weeks if stored in a cool, dry place (like a sealed container in the fridge). For longer storage, dry them completely and keep them in a paper bag in a dark, cool spot—they can last up to 6 months this way. Plant them as soon as possible for the best germination rates!
Do I need to soak pumpkin seeds before planting?
Soaking isn’t required, but it can speed up germination. If you choose to soak, place the cleaned seeds in warm water for 4–6 hours before planting. This helps soften the seed coat, encouraging faster sprouting. Just be sure to drain and plant them immediately after soaking to avoid mold.
What if my pumpkin seeds don’t sprout after cleaning?
If seeds aren’t sprouting, check these common issues: old seeds (plant fresh ones), improper planting depth (1–2 inches deep), or poor soil conditions (use well-draining, warm soil). Try scratching the seed coat lightly with sandpaper to help water penetrate, or test a few seeds in a damp paper towel to see if they’re still viable.
Can I reuse pumpkin seed shells for compost or mulch?
After cleaning, the fibrous pumpkin seed shells are great for compost or mulch. They break down slowly, adding organic matter to your soil. Just chop them into smaller pieces first to speed up decomposition. Avoid using seeds that haven’t been cleaned—pests might be hiding in the shells!
Wrapping up and next steps
Cleaning pumpkin seeds for planting is simpler than you think—and the rewards are worth every minute! 🌱 With just a few tools and a little patience, you’ll have soil-ready seeds that’ll sprout into healthy, vibrant plants. Now that you’ve mastered the process, it’s time to get growing!
Ready to take the next step? Plant your seeds in well-draining soil, give them sunlight, and watch your pumpkin patch flourish. Happy gardening!