Pruning
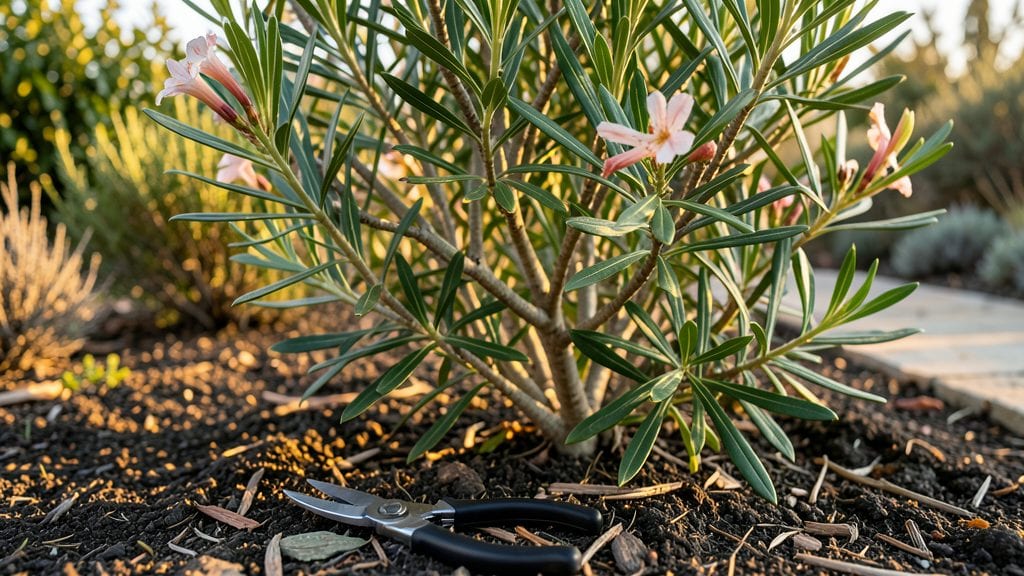
Pruning oleander plants isn't just about shaping—it's about unlocking their full potential year-round. 🌿 I've learned that three strategic cuts a year transform my oleanders from scraggly shrubs into dense, flowering powerhouses that bloom reliably.
The key isn't just when to cut, but how to cut to encourage that bushy growth everyone admires.
Start with the right tools: sharp bypass pruners for clean cuts and thick gloves to protect against the toxic sap. Most people wait until spring, but I've found that late winter and early summer trims actually give you more control over shape and flowering.
Each cut should remove about a third of the plant's growth, focusing on removing dead or crossing branches first.
After pruning, you'll notice something magical—better air circulation that prevents fungal diseases and those vibrant pink or white blooms appearing earlier and lasting longer. My plants now produce flowers from late spring through fall, with minimal effort. The secret is patience: let new growth establish before pruning again.
This method works for both small patio oleanders and large landscape specimens. The same principles apply whether you're dealing with a single plant or a hedge. Ready to give your oleanders the care they deserve? Let's get started with the right technique.
📚 In This Guide
- What you need
- Instructions
- Tips and common mistakes
- Wrapping up and next steps
What you need
- ● Pruning shears: Bypass pruners (for clean cuts on small stems, 4-6 inches long). Anvil pruners (for thicker branches, 6-8 inches long). Quantity: 1-2 of each.
- ● Loppers: Bypass loppers (for medium-sized branches, 12-18 inches long). Quantity: 1 pair.
- ● Pruning saw: Curved-tooth pruning saw (for thick, woody branches, 12-16 inches long). Quantity: 1.
- ● Gloves: Heavy-duty, cut-resistant gloves (to protect against oleander’s sap and thorns). Quantity: 1 pair.
- ● Disinfectant: Rubbing alcohol (70% isopropyl) or bleach solution (1 part bleach to 9 parts water) (to sterilize tools between cuts). Quantity: Small bottle or spray bottle.
- ● Trash bags: Heavy-duty bags (for collecting pruned branches). Quantity: 2-3.
- ○ Pruning sealant (optional): Tree wound paint or pruning sealant (to prevent disease in larger cuts). Quantity: Small bottle.
- ● Safety goggles: (to protect eyes from debris). Quantity: 1 pair.
- ● Long sleeves & pants: (to protect skin from oleander sap and thorns).
- ● Ladder or step stool: (if pruning tall oleanders, ensure it’s stable and rated for your weight).
- ● Hose or water spray bottle: (to rinse tools and clean sap off skin).
- ● Sharpie or marker: (for labeling branches if propagating cuttings).
Instructions for pruning oleander plants seasonally
Keep your oleander lush and blooming year-round with these three simple seasonal trims.
✂️ Step 1: Light Pruning After Spring Blooms
Once your oleander finishes flowering in late spring, it's time for the first trim. Use clean, sharp pruning shears to remove about one-third of the oldest, leggiest stems at the base. These are the branches that grew last year and have lost their vigor. You'll know them by their thinner, woody texture compared to newer growth.
Make cuts just above a leaf node or a side branch—never leave stubs. This encourages new growth from below and keeps the plant fuller. I like to step back and shape the plant into a natural rounded form, but you can also leave it more informal if you prefer. After pruning, give the plant a good drink of water to help it recover.
☀️ Step 2: Mid-Summer Maintenance Trim
In mid-summer, focus on removing any dead, diseased, or crossing branches. Oleanders can get crowded quickly, and crossing branches rub against each other, creating wounds that invite pests. Look for stems that are brown, mushy, or have blackened spots—these should be cut back to healthy wood immediately.
Also trim back any overly long shoots that are growing toward the center of the plant. These compete for light and weaken the overall structure. Make cuts at a 45-degree angle just above a leaf node to promote faster healing. This trim keeps air circulating well and prevents fungal issues. Afterward, I often apply a light layer of mulch around the base to retain moisture during the heat.
✂️ Step 3: Late Fall or Early Winter Renewal Cut
In late fall or early winter, give your oleander a more dramatic shape-up. This is the time to remove any remaining dead wood and thin out the center to improve airflow. I like to cut back about one-quarter of the oldest stems again, but this time I focus on the very top growth. This encourages fresh, bushier growth in spring.
Be careful not to over-prune—oleanders are tough but not indestructible. If you see any weak or spindly growth, you can trim those back by half to encourage stronger regrowth. After this trim, reduce watering slightly since the plant is entering dormancy. A light mulch layer helps protect the roots from winter cold.
⏰ Step 4: Optional Light Trim After Heavy Blooms
If your oleander has an especially heavy bloom cycle, you might notice some spent flower clusters and leggy growth after flowering. Use this time to do a quick tidy-up trim. Simply snip off any dead flower heads and any stems that are stretching too far out of shape. This keeps the plant looking neat and encourages more blooms next season.
I always carry a small pair of pruning shears with me when I'm outside—it only takes a few minutes to keep oleanders looking their best. Just remember, oleanders are forgiving, so don't stress over minor imperfections. A little regular care goes a long way in keeping these plants healthy and beautiful all year.
Tips & tricks for perfect oleander plant pruning
Here's what nobody tells you about keeping your oleander thriving through every season.
Tool Selection: Never use dull pruning shears—they crush stems instead of making clean cuts. I invest in high-quality bypass pruning shears for the cleanest cuts that heal faster. For thicker branches, use loppers with a 45-degree cutting angle, just like in Step 2. Always disinfect your tools with rubbing alcohol between cuts to prevent spreading disease from any infected branches you might encounter.
Seasonal Timing Secret: The one-third removal in Step 1 after spring blooms is crucial because it removes last year's growth that's already expended energy. I've seen oleanders that weren't pruned properly after blooming become leggy and sparse within a year. Timing matters—wait until all flowers have completely fallen before pruning. This gives you visual confirmation that the plant has finished its bloom cycle for the season.
Visual Cues for Pruning: When trimming in Step 3, look for stems that have a hollow center when you cut them open—these are dead and should be removed completely. Healthy stems will have green pith inside. Also watch for the "V" shape where branches meet the main stem—this is your leaf node target for making cuts. Making cuts at these nodes encourages new growth exactly where you want it, creating a fuller, bushier plant over time.
Mulching Strategy: After your mid-summer trim (Step 2) and fall renewal cut (Step 3), apply a 2-3 inch layer of organic mulch like wood chips or shredded bark. This helps retain moisture during summer heat and protects roots from winter cold. I always create a slight mound of mulch around the base but keep it about 6 inches away from the trunk to prevent rot. This simple step makes a noticeable difference in plant health during extreme weather.
Pro Tips for Oleander Plant Pruning
- Here's what nobody tells you about keeping your oleander thriving through every season.
- Tool Selection: Never use dull pruning shears—they crush stems instead of making clean cuts.
- Seasonal Timing Secret: The one-third removal in Step 1 after spring blooms is crucial because it removes last year's growth that's already expended energy.
Frequently asked questions
Got questions about pruning your oleander? You’re not alone! Here are answers to the most common concerns—from timing to tools and troubleshooting—so you can keep your plant thriving year-round.
When is the best time to prune oleander?
The ideal times are early spring (before blooming), late summer (after flowering), and light pruning in late fall. Avoid heavy pruning in winter, as cold stress can harm the plant. Spring and summer trims encourage bushier growth and more blooms!
Can I prune oleander in winter?
Light pruning in mild winter climates (zones 9-11) is fine, but avoid heavy cuts when temps drop below 40°F (4°C). Winter pruning can stress the plant, making it vulnerable to frost damage or pests. Stick to shaping or removing dead branches only.
What if my oleander doesn’t bloom after pruning?
If blooms are missing, check your pruning timing—over-pruning in late fall or winter can delay flowers. Ensure you’re cutting just above a leaf node (not bare stems) and fertilizing lightly in spring. Oleanders need 6+ hours of sunlight daily too!
Do I need special tools for oleander pruning?
Nope! Use clean, sharp bypass pruners (for small branches) and loppers (for thicker stems). Disinfect tools with rubbing alcohol between cuts to prevent disease. Avoid hedge trimmers—they can tear leaves and leave jagged cuts that heal poorly.
How do I fix over-pruned oleander?
If you’ve trimmed too much, don’t panic! Stop pruning immediately and focus on care: water deeply, fertilize lightly (balanced 10-10-10), and protect from harsh sun. New growth should sprout from nodes in 4-6 weeks. Over time, the plant will recover!
Are oleander cuttings toxic?
Yes—all parts of oleander (leaves, stems, sap) are highly toxic if ingested
. Wear gloves when pruning, and never compost clippings. Dispose of trimmings in sealed bags with household trash. Keep pets and kids away from pruned areas!
Wrapping up and next steps
Pruning your oleander plant isn’t just about aesthetics—it’s a year-round ritual that keeps it thriving, blooming, and resistant to pests. By mastering the three seasonal trims (spring, summer, and late fall), you’ll encourage lush growth, vibrant flowers, and a healthier plant for years to come. 🌿✨
Ready to roll up your sleeves? Start small: pick one season to practice, gather your tools, and observe how your oleander responds. Before you know it, you’ll be a pruning pro—and your plant will thank you with stunning blooms and robust foliage!