Watering
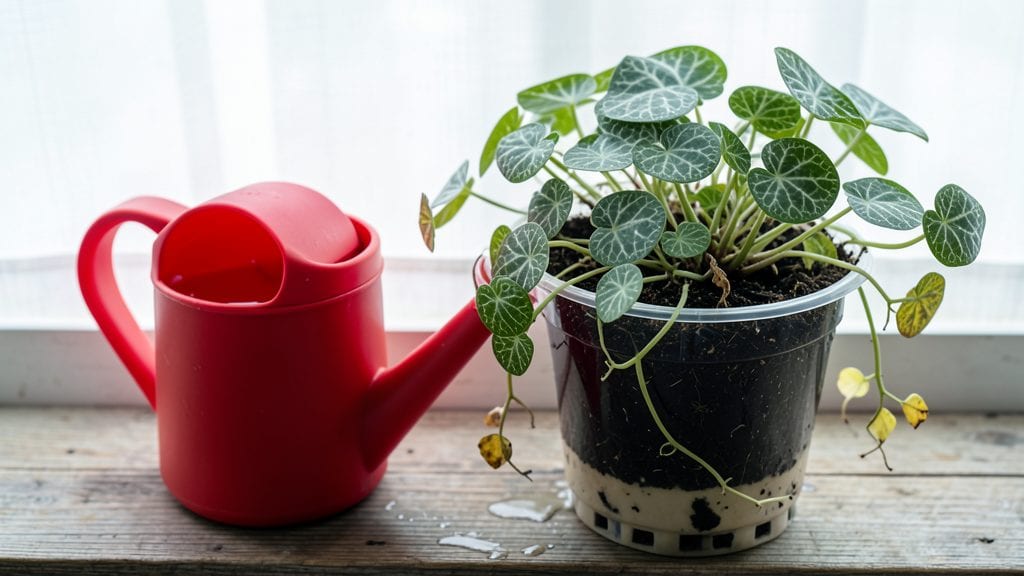
An overwatered nerve plant with yellow leaves and mushy stems signals root rot—but there’s still time to save it. ✨ I’ve nursed back dozens of these plants using a simple hydrogen peroxide soak, and the results speak for themselves: firm roots, vibrant new growth, and a plant that thrives for months afterward.
The first step is identifying the damage: blackened roots, a foul odor, or leaves that collapse when touched. Once confirmed, repot in fresh, well-draining soil mix and trim away the affected roots with sterilized scissors.
The hydrogen peroxide solution—just 1 tablespoon per quart of water—disinfects the roots while you let the plant dry out completely for 3-5 days before watering again.
What you’ll end up with is a revitalized nerve plant that recovers faster than you’d expect. Within 2-4 weeks, new leaves emerge with their signature velvety texture, and the plant regains its upright, lush appearance.
The key is adjusting your routine: water only when the top inch of soil feels dry, and always use a pot with drainage holes.
This method works for any overwatered houseplant, but nerve plants respond particularly well because they’re naturally resilient. For long-term care, keep humidity moderate and light bright but indirect—no more soggy soil, no more drooping leaves. Your plant will thank you with steady, healthy growth.
Root Rot’s Silent Invaders
When your Fittonia albivenis (commonly called the nerve plant) starts looking more like a soggy mess than its usual vibrant self, overwatering is often the culprit.
But why does this happen? Let’s break down the science—and the sneaky mistakes—behind why waterlogged roots turn your plant’s lush foliage into a sad, droopy sight.
Nerve plants thrive in consistently moist but well-draining soil. When you water them on a rigid schedule—or worse, let them sit in standing water—roots suffocate. Here’s the science:
- Oxygen deprivation: Roots need oxygen to respire (yes, they "breathe"!). Too much water displaces oxygen in soil pores, forcing roots to switch to anaerobic respiration—a process that produces ethanol (alcohol) and toxic byproducts like lactic acid. This damages cell membranes, leading to root rot.
- Fungal feast: Waterlogged soil creates the perfect environment for Phytophthora and Pythium fungi. These pathogens thrive in saturated conditions, burrowing into roots and blocking nutrient uptake. Within days, your plant’s roots turn mushy and brown.
- Salt buildup: Overwatering flushes nutrients but also traps dissolved salts in the soil. High salt concentrations dehydrate root cells osmotically, even if the soil looks wet. Think of it like drinking saltwater—your plant can’t absorb what it needs.
Actionable fix: Let the top 1–2 inches of soil dry out between waterings. Stick your finger in—if it’s damp past your first knuckle, wait another day.
Not all potting mixes are created equal. If your nerve plant’s container lacks drainage holes or the soil is too dense (like pure peat or clay), water pools at the bottom instead of draining away. Here’s how it backfires:
| Problem | Why It Matters |
|---|---|
| Compacted soil | Reduces air pockets, trapping water and cutting off oxygen to roots. |
| No drainage holes | Water sits stagnant, accelerating fungal growth and root suffocation. |
| Heavy clay or peat | Holds moisture like a sponge, preventing excess water from escaping. |
Actionable fix: Repot in a well-aerated mix (50% peat-free potting soil + 30% perlite/pumice + 20% orchid bark). Add a layer of hydroton (expanded clay pellets) at the bottom to boost drainage.
Nerve plants love humidity (60–70% is ideal), but too much ambient moisture without airflow turns their leaves into a fungus buffet. Here’s the breakdown:
- Stagnant air: High humidity + poor ventilation = Botrytis (gray mold) or Erysiphe (powdery mildew) spores floating in the air. These land on wet foliage and roots, causing rot.
- Transpiration traffic jam: When air is too humid, your plant’s leaves struggle to release excess water vapor. This forces roots to work overtime, leading to hydraulic stress and waterlogging.
Actionable fix: Increase airflow with a small fan (set to low) or open windows. If humidity exceeds 70%, use a dehumidifier or reduce watering frequency.
A pot that’s too large for your nerve plant’s root system is a one-way ticket to overwatering. Here’s why:
- Excess soil volume: Big pots stay wet longer because they hold more water. Roots in a 6-inch pot won’t reach the edges for weeks, leaving soil soggy in the center.
- Slow evaporation: Larger pots have less surface area relative to volume, meaning water evaporates 30–50% slower than in smaller containers.
Actionable fix: Choose a pot only 1–2 inches larger in diameter than the root ball. If repotting, select a terracotta or fabric pot—they dry out faster than plastic.
Unsure if your soil is too wet? Grab a handful near the roots and squeeze gently:
- Drips water: Overwatered—wait 2–3 more days.
- Holds shape but crumbles: Perfect—water next time.
- Powdery/dusty: Underwatered—soak lightly.
This simple trick beats guessing—and saves your nerve plant from root rot!
Revive Your Plant With These Fixes
Now that you know the signs and causes of an overwatered nerve plant (🌿💦), it’s time to turn things around! The good news? With the right steps, your plant can bounce back—even if it looks sad now.
Below are practical, step-by-step solutions tailored to the most common causes of overwatering, plus tips to keep your nerve plant thriving long-term.
First things first—halt all watering until you’ve assessed the damage. Overwatering is often a slow-motion disaster, and giving your plant time to dry out is the first critical fix.
- Check the soil: Stick your finger 1-2 inches deep into the soil.
If it’s soggy or smells musty, your plant is still too wet. - Move to a drier spot: Place your plant in a bright, indirect light area (like an east-facing window) but away from direct sunlight while it recovers. - Skip the watering can: No more water until further notice—this gives roots a chance to heal.
> 💡 Pro Tip: If your plant is in a decorative pot without drainage, repot it ASAP into a container with holes. No drainage = no recovery.
Healthy roots are firm, white, and slightly fibrous. Rotten roots, on the other hand, are mushy, brown, or black and smell foul. Here’s how to check:
- Gently remove the plant from its pot and shake off excess soil.
- Inspect the roots: - Good roots: Keep them—trim any green or firm white roots. - Bad roots: Use sterilized scissors to snip off all mushy, discolored roots.
- Rinse the roots (if needed) with room-temperature water to remove old soil and debris.
> ✂️ Quick Fix: If you’re squeamish about cutting roots, soak the entire plant in hydrogen peroxide (see next step) to disinfect without handling.
Hydrogen peroxide (3% solution) is a natural antifungal and antibacterial agent that can kill root rot bacteria while oxygenating the roots. Here’s how to do it:
- Fill a clean container (like a bowl or bucket) with room-temperature water.
- Add 1 part hydrogen peroxide to 4 parts water (e.g., ¼ cup peroxide per gallon of water).
- Submerge the roots for 10-15 minutes—let the plant soak while you monitor.
- Rinse gently with fresh water to remove residue, then plant it back in fresh, dry soil.
> 🔥 Emergency Hack: If you don’t have hydrogen peroxide, cinnamon powder (sprinkled on roots) or activated charcoal can help prevent further rot.
Once the roots are clean and healthy, it’s time for a fresh start with the right soil mix:
- Use a well-draining mix: Combine cactus/succulent soil (50%) with perlite or orchid bark (30%) and a bit of worm castings (20%) for nutrients.
- Choose the right pot: Opt for a terracotta or ceramic pot with drainage holes—these materials wick away excess moisture.
- Plant at the same depth: Bury the roots no deeper than they were before to avoid suffocation.
> 🌡️ Temperature Check: Wait 24 hours before watering to let any remaining moisture evaporate.
Prevention is key! Overwatering is usually a habit, so change your routine to avoid repeating mistakes:
| Old Habit | New Habit |
|---|---|
| Watering on a schedule | Water only when the top 1-2 inches of soil are dry (stick your finger in!) |
| Using tap water | Let tap water sit for 24 hours to reduce chlorine, or use rainwater/distilled water |
| Keeping soil constantly moist | Let the soil dry out completely between waterings (nerve plants are drought-tolerant!) |
| Ignoring humidity | Mist lightly 1-2x/week (but avoid soggy leaves) or use a pebble tray for humidity |
> 🎯 Golden Rule: "When in doubt, don’t water!" Nerve plants store water in their leaves—they’d rather be underwatered than overwatered.
Once your nerve plant is back on track, maintain its health with these easy tips:
- Light: Bright, indirect light (like a north or east window).
Avoid harsh afternoon sun. - Humidity: 40-60% is ideal—use a humidifier or group plants together. - Fertilizer: Diluted liquid fertilizer (half-strength) once every 2-3 months in spring/summer. - Pruning: Trim yellow or damaged leaves with clean scissors to encourage new growth.
With these steps, your nerve plant should start recovering within 2-4 weeks—just be patient! 🌱 If the damage is severe (like blackened stems or no new growth after a month), it may not survive, but most cases are salvageable with quick action.
Frequently asked questions
How do I know if my nerve plant is overwatered?
Check for yellowing leaves, mushy stems, or leaves that collapse when touched. The soil may smell foul, and roots will appear brown or black instead of firm and white. If the pot feels heavy when lifted, it’s likely waterlogged.
Can I save a nerve plant with root rot?
Yes! First, trim away all mushy, black roots with sterilized scissors. Soak the remaining roots in a hydrogen peroxide solution (1 tbsp per quart of water) for 10-15 minutes to kill bacteria. Repot in fresh, well-draining soil and hold off on watering for 3-5 days to let roots recover.
Why does my nerve plant droop after watering?
This usually means the roots are suffocating from excess water. Nerve plants store water in their leaves—overwatering forces them to drop as they try to conserve moisture. Let the soil dry out completely between waterings, and ensure the pot has drainage holes.
Is tap water safe for nerve plants?
Chlorine and fluoride in tap water can harm roots over time. Let tap water sit for 24 hours before using, or switch to rainwater or distilled water. If your water is hard, flush the soil with extra water monthly to prevent salt buildup.
How often should I water a recovering nerve plant?
Wait until the top 1-2 inches of soil are completely dry—stick your finger in to test. Once recovered, water every 7-10 days in spring/summer and every 2-3 weeks in fall/winter. Nerve plants prefer slight drought over soggy soil!