Pruning
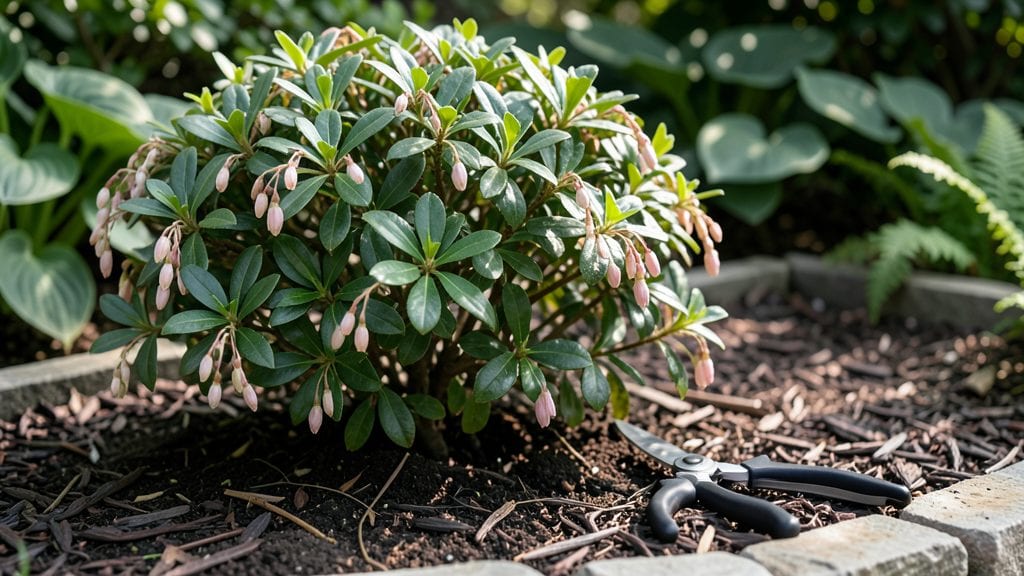
Pruning your Pieris 🌿 plant in early spring is the game-changer for lush, year-round blooms—if you do it right.
Struggling to keep your Pieris blooming? The secret lies in strategic pruning—timing, technique, and a few pro tips can transform your plant from sparse to spectacular.
This evergreen shrub thrives in USDA Zone 6a, but even the hardiest Pieris needs the right cuts to stay vibrant. Skip the guesswork: I’ll walk you through when to prune, which tools to use, and how to avoid common mistakes that leave your plant looking ragged.
By the end, you’ll know exactly how to shape your Pieris for healthier growth and a fuller display—without sacrificing next year’s flowers.
When to prune Pieris plants for maximum blooms and health
Pieris plants, with their stunning spring blooms and evergreen foliage, thrive when pruned at the right time. Unlike many shrubs, Pieris blooms on old wood, meaning last year's growth produces this year's flowers. This makes timing critical—prune too late, and you risk cutting off next year's blossoms.
The key is to prune late winter to early spring, just as new growth begins but before buds swell. This ensures you maintain healthy blooms while encouraging fresh, vibrant foliage.
For gardeners in USDA Zones 6-9, the ideal window is February through March, aligning with the plant's natural dormancy period. In colder zones (6-7), aim for late winter after the last frost but before buds break.
Warmer zones (8-9) can extend pruning into early April, as the threat of frost diminishes. Always check your local frost dates to avoid damaging tender new shoots.
If you miss the late-winter window, don't panic—light pruning can still be done in early spring (April). However, avoid heavy pruning after buds form, as this can reduce flowering. For overgrown or neglected Pieris, gradual rejuvenation pruning over 2-3 years is safer than aggressive cuts all at once.
🌱
| Pruning Time | Best For | USDA Zones | Key Action |
|---|---|---|---|
| Late Winter | Maximum blooms | 6-9 | Remove dead/weak wood; shape lightly |
| Early Spring (Feb-Mar) | Healthy growth | 6-7 | Prune before buds swell |
| Early Spring (Apr) | Light maintenance | 8-9 | Deadhead spent blooms only |
| Summer (Jun-Aug) | Avoid | All | Risk of damaging new growth |
| Fall (Sep-Nov) | Avoid | All | Encourages tender growth before winter |
In USDA Zone 6, where frosts linger into April, prune Pieris in late February to give new growth time to harden off before cold snaps. For Zone 7 and warmer, you have flexibility until early April, but avoid pruning after buds appear.
If you live in Zone 8-9, where winters are mild, prune in March to align with the plant's natural growth cycle.
Timing isn't the only factor—climate matters. In regions with wet springs, delay pruning until the soil is workable to avoid compacting it. If your area experiences late frosts, wait until after the last frost date to prevent damage to fresh cuts.
Always prioritize dormant-season pruning to minimize stress on the plant.
One common mistake is pruning after blooms fade, which removes next year's flower buds. Instead, focus on late-winter shaping to maintain the plant's natural form while encouraging dense foliage.
For overgrown Pieris, spread pruning over 3 years, removing 1/3 of old wood each year to avoid shocking the plant.
🌿
For young Pieris plants (under 3 years old), minimal pruning is needed—just remove dead or crossing branches. Mature plants (3+ years) benefit from light shaping to open the center and improve airflow.
Avoid shearing, as Pieris has a natural, layered habit that shearing disrupts. Instead, use hand pruners for precise cuts just above a leaf node or bud.
After pruning, apply a 2-3 inch layer of mulch around the base to retain moisture and regulate soil temperature. Water deeply to help the plant recover, and avoid fertilizing until new growth appears (typically 4-6 weeks later).
This ensures your Pieris enters the growing season strong and blooms beautifully next spring.
✂️
Step-by-step Pieris pruning guide: tools, techniques, and mistakes to avoid
Pruning your Pieris japonica or Pieris floribunda isn’t just about keeping it tidy—it’s about encouraging vibrant blooms and healthy growth. When done correctly, pruning can transform a leggy, sparse shrub into a lush, flowering powerhouse. The key? Timing, precision, and knowing which cuts to make (and which to avoid).
Before you grab your shears, gather the right tools: bypass pruners for clean cuts, sterilized shears to prevent disease, and gloves to protect your hands from thorns. I also recommend a sharp saw for thicker branches—Pieris wood can get woody over time!
The goal is to shape without stressing the plant, so take your time and follow these steps.
-
Step 1:
Remove Dead or Diseased Wood
Start by snipping out any brown, brittle branches or those with fungal spots. Cut back to the nearest healthy growth or bud. This step prevents pests and diseases from spreading. -
Step 2:
Deadhead Spent Blooms
After flowering (typically late spring), trim back the old flower clusters to encourage new growth. Cut just above the first set of leaves below the bloom. This keeps the shrub looking neat and promotes next year’s flowers. -
Step 3:
Shape the Shrub
Use your shears to trim back overgrown branches by 1/3 of their length. Focus on opening up the center for airflow and light. Avoid cutting into old wood, as Pieris blooms on new growth from the previous year’s wood. -
Step 4:
Rejuvenate Leggy Growth
If your Pieris looks tall and sparse, it’s time for a rejuvenation cut. Trim back 1/2 to 2/3 of the height in early spring (before buds swell). This encourages dense, bushy regrowth and restores the plant’s natural shape. -
Step 5:
Clean Up and Sterilize
After pruning, sterilize your tools with rubbing alcohol to prevent cross-contamination. Remove all clippings from the area to reduce the risk of disease buildup. Finish by applying a layer of mulch around the base to retain moisture.
One of the biggest mistakes I see gardeners make is pruning at the wrong time. For example, cutting back Pieris after blooms fade removes next year’s flower buds, which form on old wood.
Always prune in late winter or early spring, just as new growth begins. Another common error is over-pruning—never remove more than 1/3 of the plant’s foliage in one season.
If your Pieris is severely overgrown, don’t panic! Break the rejuvenation process into two years. In the first year, trim back 1/3 of the height, and in the second year, focus on shaping and deadheading.
This approach gives the plant time to recover without shock. After pruning, keep the soil moist but not soggy and apply a balanced fertilizer to support new growth.
With these techniques, your Pieris will reward you with showy spring blooms and a compact, healthy form for years to come. The key is patience and precision—every cut should have a purpose! 🌿