Shrubs
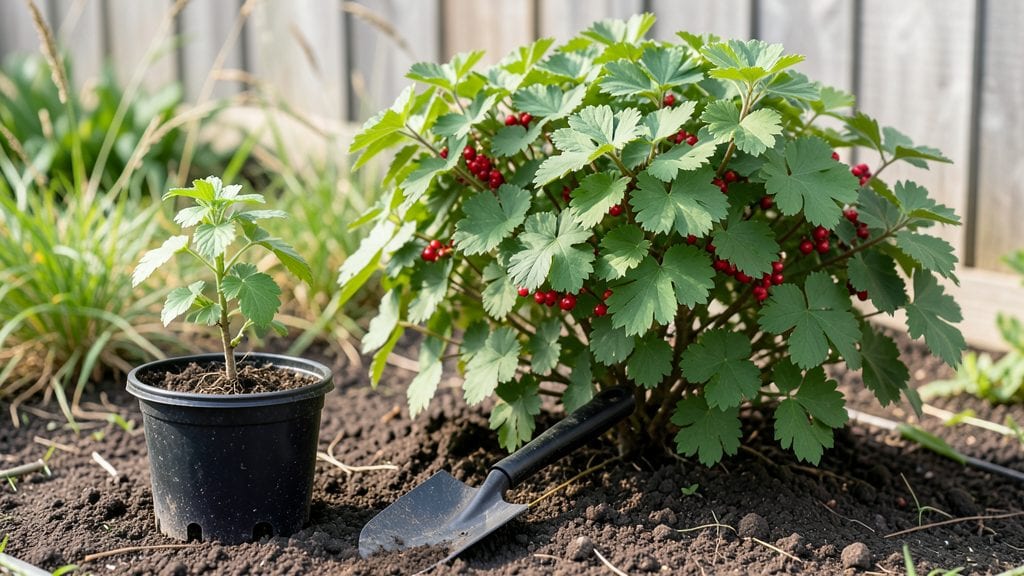
Planting currant bushes is how you turn a neglected corner into a berry-producing powerhouse that outshines store-bought fruit every summer. 🌿 I’ve planted red, black, and white currants—each with its own quirks—and learned that the right spot and soil prep make all the difference between a handful of berries and a bush bursting with them.
The key starts with soil: currants love well-draining, slightly acidic earth with a 3-inch layer of compost mixed in. They thrive in full sun to partial shade, but too much heat can scorch the leaves, so morning sun with afternoon shade works best in hotter climates.
Spacing matters too—give them 4 to 6 feet apart to prevent crowding and disease.
Once planted, keep the soil consistently moist but not soggy for the first two weeks, then taper off to 1 inch of water per week. Mulch around the base to lock in moisture and keep weeds at bay.
By next summer, you’ll be harvesting berries that taste sweeter than anything you’ve ever bought—plus, birds and pollinators will love them too.
Container growing is possible, but choose a 5-gallon pot minimum and use well-draining soil. Just be ready to fertilize lightly in spring and watch for pests like aphids, which love tender new growth. With these steps, your currants will reward you for years to come.
📚 In This Guide
- What you need
- Instructions
- Tips and common mistakes
- Wrapping up and next steps
What you need
- ● Currant Bushes: 3–5 healthy, disease-free plants (choose red, black, or white varieties based on your preference).
- ● Shovel or Trenching Tool: For digging planting holes (12–18 inches deep and wide).
- ● Garden Gloves: To protect your hands from thorns and soil.
- ● Compost or Well-Rotated Manure: 2–3 gallons per plant to enrich the soil.
- ● Mulch (Straw, Wood Chips, or Pine Needles): 2–3 inches thick to retain moisture and suppress weeds.
- ● Watering Can or Hose with a Gentle Nozzle: For thorough watering after planting.
- ○ Fertilizer (Optional but Helpful): A balanced, slow-release fertilizer (10-10-10) or organic option like fish emulsion.
- ● Soil pH Test Kit: Currants thrive in slightly acidic soil (pH 5.5–6.5). Adjust with sulfur or lime if needed.
- ● Plant Support Stakes: For young, top-heavy bushes in windy areas.
- ● Pruning Shears: For shaping and removing dead branches after planting.
- ● Row Cover or Netting: To protect bushes from birds and pests during early growth.
- ● Drip Irrigation System: For consistent moisture, especially in hot climates.
- ● Sunlight: Choose a spot with full sun (6–8 hours daily) or partial shade (4–6 hours).
- ● Well-Draining Soil: Currants hate soggy roots—amend clay soil with compost.
- ● Spacing: Plant bushes 4–6 feet apart to allow airflow and easy harvesting.
- ● Timing: Plant in early spring or fall when the soil is workable but not frozen.
Step-by-step instructions for planting currant bushes
Here's the method I've used to grow healthy currant bushes that yield fruit for years.
🌱 Step 1: Choose the Perfect Planting Spot
Currants thrive in full sun to partial shade, so pick a location with at least 6 hours of sunlight daily. I always look for a spot with well-draining soil—currants hate soggy roots. Test your soil by digging a 12-inch hole; if water pools after 30 minutes, amend the area with 2-3 inches of compost before planting.
Space your bushes 5-6 feet apart to allow airflow and easy harvesting. If planting multiple bushes, arrange them in a loose cluster—this encourages cross-pollination and better fruit set. Avoid low-lying areas where cold air settles, as currants are sensitive to frost damage.
🪴 Step 2: Prepare the Soil and Plant
Dig a hole twice as wide as the root ball but only as deep. Currants prefer slightly acidic to neutral soil (pH 5.5-7.0). If your soil is heavy clay, mix in 1-2 gallons of peat moss or compost to improve drainage. Gently loosen the roots of your currant bush before placing it in the hole.
Position the bush so the top of the root ball sits 1-2 inches above ground level. This prevents water from pooling around the stem, which can cause rot. Backfill the hole with the amended soil, pressing lightly to remove air pockets. Water deeply to settle the soil and eliminate gaps.
💧 Step 3: Water and Mulch for Success
After planting, water your currant bush with 1-2 gallons of water to help the roots establish. Keep the soil consistently moist (but not soggy) for the first 4-6 weeks. You'll know it's right when the top 2 inches of soil feel damp—like a wrung-out sponge.
Spread 2-3 inches of organic mulch (like wood chips or straw) around the base, keeping it 3 inches away from the stem. Mulch helps retain moisture, suppress weeds, and regulate soil temperature. Replenish mulch annually in early spring to maintain its benefits.
☀️ Step 4: Prune and Support New Growth
In their first year, currant bushes focus on root and stem growth rather than fruiting. Prune lightly in early spring to remove any dead or crossing branches. I also cut back any overly long canes by one-third to encourage bushier growth. Avoid heavy pruning now—you want to preserve as much foliage as possible.
Install stakes or a small trellis if your bush looks top-heavy. Currants can get leggy, and support helps them stay upright. Fertilize lightly in early spring with a balanced 10-10-10 fertilizer (about ½ cup per bush) to encourage strong new growth without overstimulating fruit production.
⏰ Step 5: Monitor and Maintain Through the First Year
Check your bushes weekly for signs of pests like aphids or spider mites. A strong spray of water usually knocks them off, but severe infestations may require neem oil. Watch for yellowing leaves—this often signals overwatering or poor drainage, not a nutrient deficiency.
By late summer, you might see small berries forming. Don’t harvest these—let them ripen and fall naturally. This helps the bush redirect energy to root and stem growth for next year’s bigger harvest. In fall, cut back any dead or diseased branches and add a 2-inch layer of compost around the base before winter.
Tips & tricks for planting currant bushes
Here's what I've learned after years of growing currant bushes—these small details make all the difference between a struggling plant and a thriving one.
Soil Test First: Before planting, test your soil's pH using a simple kit from your local garden center. Currants prefer pH 5.5-7.0, and adjusting this before planting saves you from dealing with nutrient deficiencies later. If your soil is too alkaline, mix in sulfur according to package instructions when amending with compost. I've seen bushes struggle for years because their soil was too alkaline—don't make that mistake!
Planting Depth Matters: The instructions mention positioning the root ball 1-2 inches above ground level, but here's the thing: this isn't just about preventing rot. That slight elevation helps prevent water from pooling around the stem during heavy rains. If you plant too deep, you risk suffocating the roots and creating anaerobic conditions that lead to rot. Think of it like wearing waterproof boots—your bush needs that little extra protection.
Watering Wisdom: Those first 4-6 weeks are critical for root establishment, but don't just water randomly. I use the "sponge test" to check moisture: stick your finger 2 inches into the soil. If it feels dry, water thoroughly until it runs out the bottom of the hole. Overwatering is just as bad as underwatering—currants hate soggy roots. A drip irrigation system set on a timer works wonders for consistent moisture without the guesswork.
Mulch Like a Pro: The 2-3 inches of mulch isn't just decorative—it's a game-changer. I always use wood chips because they break down slowly and improve soil structure over time. Keep that 3-inch clearance from the stem to prevent rot, but don't skimp on coverage. Mulch acts like a blanket for your plant's roots, protecting against temperature swings and retaining moisture. Replenish it annually in spring to maintain this protective layer.
Pro Tips for Planting Currant Bushes
- Here's what I've learned after years of growing currant bushes—these small details make all the difference between a struggling plant and a thriving one.
- Soil Test First: Before planting, test your soil's pH using a simple kit from your local garden center.
- Planting Depth Matters: The instructions mention positioning the root ball 1-2 inches above ground level, but here's the thing: this isn't just about preventing rot.
Frequently asked questions
Got questions about planting currant bushes? You’re not alone—growing these berries can feel tricky at first! Here are answers to the most common queries to help you get started with confidence.
When is the best time to plant currant bushes?
Plant currant bushes in early spring (as soon as the soil is workable) or late fall (6–8 weeks before the first frost). Avoid planting in summer heat or freezing winter conditions, as roots need time to establish without stress. Container-grown bushes can also be planted in mild climates during cooler months.
How long does it take for currant bushes to bear fruit?
With proper care, currant bushes typically produce fruit within 2–3 years of planting. Patience is key—young bushes focus on root and branch growth first. Prune lightly in the first year to encourage a strong structure, and fertilize annually to speed up fruiting. Varieties like Concord or Red Lake are known for earlier yields!
Why are my currant leaves turning yellow or spotted?
Yellow leaves often signal nutrient deficiencies (like iron or nitrogen) or overwatering. Spots could mean fungal diseases (e.g., powdery mildew) or pests like aphids. Improve drainage, apply balanced fertilizer, and prune for airflow. For fungal issues, spray with neem oil or copper fungicide. Act fast!
Can I grow currant bushes in containers?
Dwarf varieties (like ‘Consort’ or ‘White Imperial’) thrive in 5-gallon containers with well-draining soil. Use a mix of compost, peat, and perlite, and place the pot in full sun. Containers dry out faster, so water regularly and fertilize every 4–6 weeks. Just ensure the pot has drainage holes to prevent root rot.
Do currant bushes need cross-pollination?
Most currants are self-pollinating, meaning one bush can produce fruit alone. However, planting two varieties nearby (e.g., red and black currants) can increase yields and improve berry quality. Bees and wind help with pollination, but even solitary bushes will fruit—just expect slightly smaller harvests.
How do I renew an old currant bush?
Revitalize aging bushes by rejuvenation pruning: Cut back all stems to 6–12 inches in early spring. This encourages new, vigorous growth. Apply a high-nitrogen fertilizer (like 10-10-10) and mulch to retain moisture. Avoid this method if your bush is diseased—replace it instead to prevent spread.
Wrapping up and next steps
Planting currant bushes is a rewarding journey that combines patience with delicious results—whether you’re growing them for their sweet berries or stunning foliage. 🌱 With the right location, soil prep, and care, you’ll soon enjoy a thriving bush that yields bountiful harvests for years to come. Now’s the perfect time to roll up your sleeves, grab those pruners, and get planting!
Ready to take the next step? Start by marking your garden space, gathering your tools, and following the steps outlined above. Happy gardening—your future currant harvest is waiting! 🍇✨