Shrubs
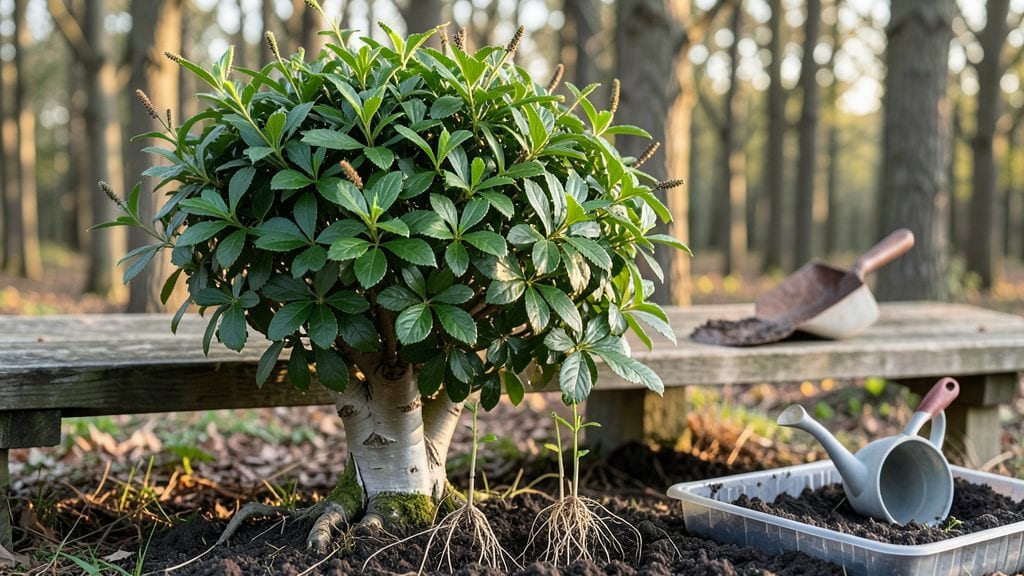
A hornbeam hedge transforms bare space into a living wall that blocks noise, wind, and prying eyes within just three years. 🌿 I planted mine last spring, and by summer’s end, the dense foliage already cast deep shade—something no fence ever could.
The key isn’t luck; it’s the right soil, spacing, and a little patience to let those roots take hold.
Start with well-draining soil mixed with compost—hornbeams hate soggy feet. Space plants 18–24 inches apart for a tight, unbroken screen, or stretch to 36 inches if you want room to grow.
Dig holes twice as wide as the root ball but only as deep, then water deeply before backfilling. Mulch lightly to keep moisture in and weeds out.
By year two, your hedge will look like it’s been there for decades—smooth, glossy leaves and that classic hornbeam shape. Prune lightly in late winter to encourage bushiness, but avoid heavy cuts until the plant’s established. The payoff? A year-round privacy screen that stays green even in winter’s chill.
Works in full sun to partial shade and handles most soils, though sandy loam gives the best results. Skip the common mistake of planting too close together—crowded stems lead to weak growth. With this method, you’ll have that lush, impenetrable barrier faster than you’d expect.
📚 In This Guide
- What you need
- Instructions
- Tips and common mistakes
- Wrapping up and next steps
What you need
- ● Hornbeam plants (Carpinus betulus): 1-year-old bare-root or container-grown saplings (6–12" tall)
- ● Quantity: 1 plant per 18–24" spacing (adjust for desired hedge height and density)
- ○ Soil amendments (optional but recommended): Compost (2–3 gallons per plant)
- ● Well-draining potting mix (for container plants)
- ● Mulch: 2–3 inches of organic mulch (wood chips, straw, or shredded bark)
- ● Fertilizer (slow-release): Balanced 10-10-10 or organic fertilizer (follow package rates)
- ● Digging tools: Shovel (for planting holes)
- ● Trowel (for delicate root adjustments)
- ● Measuring tools: Tape measure (for spacing)
- ● Stakes & string (to mark planting lines)
- ● Watering supplies: Garden hose with adjustable nozzle
- ● Watering can (for container plants)
- ○ Pruning tools (optional for shaping): Hand pruners (for trimming)
- ● Hedge shears (if pruning immediately after planting)
- ● Full sun to partial shade location (6+ hours of sunlight daily)
- ● Well-draining soil (amend clay soil with sand/compost)
- ● pH range: 6.0–7.5 (hornbeams tolerate a wide range but thrive in slightly acidic soil)
- ● Space for hedge growth: Minimum 3–4 feet wide (adjust for mature height of 15–25 feet)
Step-by-Step instructions for planting a hornbeam hedge
Here’s how I plant hornbeam hedges for a lush, dense privacy screen that fills in beautifully within three years.
🌱 Step 1: Prepare the Planting Site
Clear the area of grass, weeds, and debris to give your hornbeam hedge a clean start. I like to mark the hedge line with stakes and string for a straight, professional look. Dig a trench about 12 inches wide and 18 inches deep—this gives roots plenty of room to spread without competing with surrounding plants.
Loosen the soil at the bottom of the trench with a garden fork to improve drainage and root penetration. If your soil is heavy clay, mix in 2-3 inches of compost to help it drain better. Avoid digging deeper than necessary—hornbeams have shallow roots and don’t need extra depth.
🪴 Step 2: Plant the Hornbeam Saplings
Space your hornbeam saplings 3-4 feet apart for a dense hedge. Dig holes just wide enough to accommodate the root ball—no wider, or the roots will dry out. Place each sapling in the hole so the top of the root ball sits 1 inch above ground level; this prevents rot and encourages strong root growth.
Fill the hole with soil, pressing gently around the roots to remove air pockets. Water each sapling deeply to settle the soil and eliminate gaps. I like to add a 2-inch layer of mulch around the base, keeping it 6 inches away from the trunk to prevent moisture buildup that could cause rot.
💧 Step 3: Water and Monitor Early Growth
Water your new hedge 1-2 times per week for the first 6-8 weeks, giving each plant about 1 gallon of water. Check soil moisture by sticking your finger 2 inches deep—if it feels dry, water again. Overwatering is just as harmful as underwatering, so let the top inch of soil dry out between waterings.
Watch for signs of stress, like yellowing leaves or wilting. If you see these, adjust your watering schedule or check for pests like spider mites, which love dry conditions. Hornbeams are tough once established, but young plants need consistent care to thrive.
☀️ Step 4: Prune for Shape and Density
Start light pruning in the second year to encourage bushiness. Trim the tips of new growth by ⅓ of their length using clean, sharp pruners. This redirects energy to side branches, creating a fuller hedge. Prune in late spring or early summer after the plant has finished flowering.
For a formal hedge, use a hedge trimmer to shape the top and sides evenly. Step back often to check your work—uneven cuts will show as you fill in. Avoid heavy pruning in the first year; let the plants focus on root growth before shaping.
⏰ Step 5: Maintain Through the First Three Years
Fertilize lightly in early spring with a balanced 10-10-10 fertilizer to support growth. Spread ½ cup per plant and water it in. Avoid over-fertilizing—hornbeams prefer lean soil and can scorch in rich conditions. Mulch annually in late winter to retain moisture and suppress weeds.
By year three, your hedge should fill in beautifully, providing privacy and structure. Keep an eye out for pests like scale or borers, which can stress young plants. A quick spray of horticultural oil in early summer usually keeps them at bay. With consistent care, your hornbeam hedge will stand strong for decades.
Tips & tricks for planting a hornbeam hedge
Creating a lush, private hedge takes more than just planting saplings—it’s about the details that make all the difference. Here’s what I’ve learned from years of trial and error to help your hornbeam hedge thrive.
Soil Preparation is Key: In Step 1, when you’re digging that 12-inch-wide trench, don’t rush the loosening at the bottom. Use a garden fork to break up compacted soil gently—this improves root penetration dramatically. If your soil is heavy clay, mix in that 2-3 inches of compost right at the bottom of the trench. This creates a perfect root zone while preventing waterlogging. The goal is to mimic the natural, well-draining conditions hornbeams love.
Planting Depth Matters: During Step 2, that 1-inch elevation of the root ball above ground level is critical. I’ve seen too many new gardeners bury the root ball too deeply, which can lead to rot. Think of it like planting a tree—you want the roots to spread horizontally, not be suffocated underground. After planting, press soil firmly around the roots to eliminate air pockets, but don’t compact it like you’re building a sidewalk.
Watering Wisdom: In those first 6-8 weeks (Step 3), consistency is everything. I’ve found that watering in the early morning gives plants time to absorb moisture before evening evaporation. That 2-inch soil moisture check is your best friend—if it feels dry at that depth, it’s time to water. And here’s a pro tip: use a soaker hose for deep, even watering that reaches the roots without disturbing the soil surface.
Pruning Strategy: When you start that light pruning in the second year (Step 4), focus on removing only the very tips of new growth—never more than ⅓ of the length. This might seem counterintuitive, but it encourages bushier growth by redirecting energy to side branches. I’ve seen hedges grow unevenly when people take too much off at once. And always prune after flowering—this gives the plant time to recover before winter.
Pro Tips for Planting Hornbeam Hedge
- Creating a lush, private hedge takes more than just planting saplings—it’s about the details that make all the difference.
- Soil Preparation is Key: In Step 1, when you’re digging that 12-inch-wide trench, don’t rush the loosening at the bottom.
- Planting Depth Matters: During Step 2, that 1-inch elevation of the root ball above ground level is critical.
Frequently asked questions
Got questions about planting a hornbeam hedge?
You’re not alone—this fast-growing privacy screen has its quirks! Here are answers to the most common queries to help you get started with confidence.
When is the best time to plant hornbeam hedges?
Plant your hornbeam hedge in early spring (March–April) or early fall (September–October) for the best root establishment. Avoid extreme heat or frost, as young plants are sensitive. If you must plant in summer, water deeply and mulch to retain moisture.
How fast will a hornbeam hedge grow, and when can I expect privacy?
Hornbeam hedges grow 1–2 feet per year under ideal conditions. With proper care, you can achieve a 6-foot-tall privacy screen in about 3 years. For faster results, opt for pre-grown plants (2–3 feet tall) instead of bare-root seedlings.
Can I plant hornbeam hedges in full shade?
Hornbeams are tolerant of partial shade but thrive best in full sun to partial shade (4–6 hours of sunlight daily). In deep shade, growth may slow, and foliage could become sparse. If your site is shady, choose a location with the most light possible or consider alternatives like Carolina silverbell or inkberry holly.
How often should I water newly planted hornbeam hedges?
Water deeply 2–3 times per week for the first year, ensuring the soil stays moist but not soggy. After establishment, hornbeams are drought-tolerant but benefit from 1 inch of water weekly during dry spells. Mulch around the base to retain moisture and suppress weeds.
Are hornbeam hedges prone to pests or diseases?
Hornbeams are generally low-maintenance and pest-resistant, but watch for aphids, spider mites, or scale insects in dry conditions. Treat infestations with neem oil or insecticidal soap. Overwatering can lead to root rot, so ensure well-draining soil. Prune to improve airflow and reduce disease risk.
How and when should I prune my hornbeam hedge?
Prune twice a year: once in late spring (after new growth) and again in early summer to shape and encourage density. Use sharp, clean shears and avoid over-pruning, which can stress the plant. For a formal hedge, trim no more than ⅓ of the new growth per year.
Wrapping up and next steps
Planting a hornbeam hedge is your ticket to a lush, private sanctuary in just three years! With the right spacing, soil prep, and care, you’ll enjoy a disease-resistant, fast-growing screen that thrives year after year.
Whether you’re blocking noise, adding curb appeal, or creating a wildlife-friendly border, this hedge delivers beauty and function—no compromise needed.
Ready to transform your space? Grab your tools, mark your rows, and get planting! For extra confidence, snap a photo of your progress and tag us—we’d love to see your future privacy paradise take shape. 🌿✨