Orchid Care
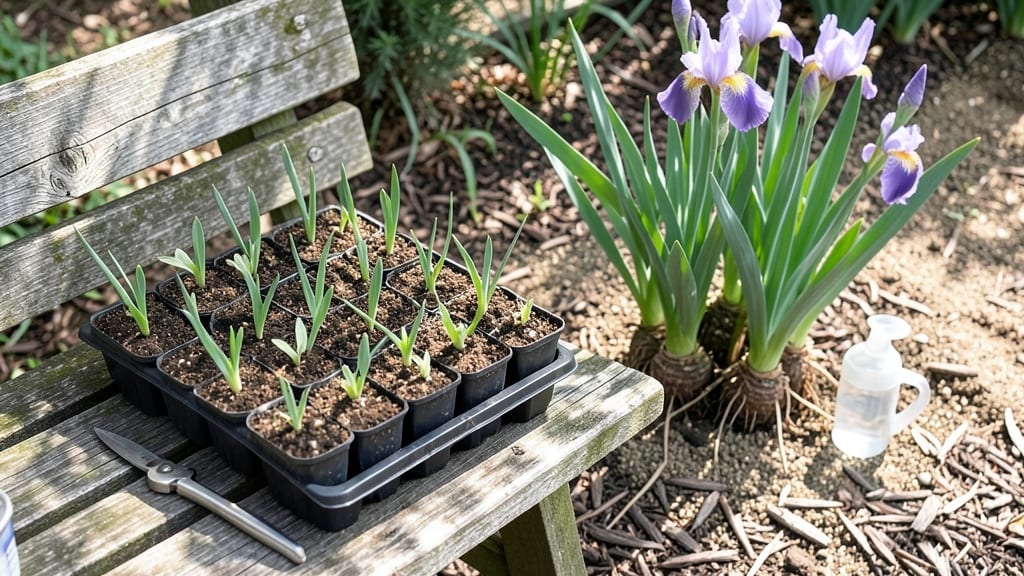
Planting iris roots reveals the secret to those showstopping purple blooms that make neighbors do double-takes every spring. I’ve learned the hard way that burying those gnarled rhizomes too deep kills them before they even sprout—so I’ll show you exactly how to get the depth right without smothering them.
The key is layered soil: a mix of sandy loam and compost that drains fast but holds enough moisture to wake those roots from dormancy.
You’ll need a sunny spot with at least 6 hours of morning light, and timing matters—plant in early fall or late winter when the ground is workable but not soggy. Too deep, and they rot; too shallow, and they bake.
After planting, you’ll water just enough to settle the soil, then back off—iris hate soggy feet. By next spring, you’ll see sword-like foliage pushing through, followed by those iconic blooms that last for weeks.
The first mistake I made was covering the tops of the rhizomes, so I’ll show you how to leave them exposed like a proud sunbather.
This method works for bearded, Siberian, and even those rare Louisiana irises—just adjust the soil slightly for your climate. Let’s get those rhizomes in the ground the right way, so you’re not digging them up in frustration next year.
📚 In This Guide
- What you need
- Instructions
- Tips and common mistakes
- Wrapping up and next steps
What you need
- ● Iris rhizomes: Healthy, dormant rhizomes (preferably with fan-shaped roots and no signs of rot). Aim for 3–5 per planting spot for a fuller look.
- ● Well-draining soil: A mix of 50% garden soil, 30% coarse sand or perlite, and 20% compost (irises hate soggy feet!).
- ● Garden fork or trowel: For digging trenches (aim for 6–8 inches deep and 12–18 inches wide).
- ● Organic mulch: 2–3 inches of pine bark or gravel (keeps moisture in but improves drainage).
- ○ Fertilizer (optional but helpful): A balanced, slow-release 10-10-10 or phosphorus-rich (5-10-10) formula to encourage root growth.
- ● Soil pH tester: Irises thrive in slightly acidic to neutral soil (pH 6.0–7.0). Adjust with lime or sulfur if needed.
- ● Root stimulator: A mycorrhizal fungi or seaweed-based tonic to boost early growth.
- ● Drip irrigation or soaker hose: For gentle, deep watering (avoid overhead sprinklers—irises dislike wet foliage).
- ● Plant labels: Mark varieties if you’re growing multiple types (trust us, you’ll forget!).
Step-by-Step instructions for planting iris roots
Here’s how to plant iris roots for vibrant, long-lasting blooms—using the layered soil method that keeps them thriving for years.
Prepare the Planting Site
Choose a location with full sun—at least 6 hours of direct sunlight daily—and well-draining soil. Irises hate soggy roots, so avoid low spots where water pools. If your soil is heavy clay, amend it with 2-3 inches of coarse sand or perlite mixed into the top 12 inches of soil. This improves drainage and prevents root rot, which can kill irises quickly.
Loosen the soil with a garden fork or tiller to a depth of 12 inches, breaking up compacted layers. The goal is to create a loose, airy environment that encourages root spread. If you’re planting in a garden bed, space each clump 18-24 inches apart to allow for future growth. For container planting, use pots with drainage holes and fill with a mix of 50% potting soil and 50% perlite or sand.
Divide and Inspect the Roots
Before planting, gently separate the iris rhizomes (thick, fleshy roots) if they’re crowded. Each rhizome should have at least one fan of leaves and 3-4 healthy roots attached. Discard any rhizomes that are soft, mushy, or show signs of rot—these won’t survive. Trim any damaged roots with clean, sharp pruners, leaving 2-3 inches of healthy root per rhizome.
Inspect the rhizomes for eyes, which are small buds that will sprout into new growth. These should be facing upward—if they’re buried, the plant won’t emerge properly. If you notice any pests or mold, soak the rhizomes in a 1:10 bleach-water solution for 10 minutes to disinfect before planting. Rinse thoroughly afterward to remove any residue.
Layer the Soil for Optimal Growth
The key to planting irises successfully is creating a gradual soil transition that mimics their natural habitat. Start by mounding the amended soil into a 3-4 inch high ridge in the planting area. Place each rhizome on top of this ridge, ensuring the eyes face upward and the roots drape naturally over the sides. This positioning prevents water from pooling around the rhizomes, which can cause rot.
Cover the rhizomes with 1-2 inches of soil, leaving the top half exposed to sunlight. The exposed portion will dry out slightly between waterings, reducing the risk of disease. If planting in containers, arrange the rhizomes along the top edge of the pot and fill the sides with soil, leaving the top half uncovered. Water lightly after planting to settle the soil without soaking the rhizomes.
Water and Mulch for Long-Term Care
Water the newly planted irises lightly but thoroughly—just enough to moisten the soil without creating puddles. After the first watering, let the soil dry out completely before watering again. Overwatering is the fastest way to kill irises, so wait until the top 2 inches of soil feel dry before adding more moisture. This usually means watering once every 7-10 days during the growing season, unless your area experiences extreme heat or drought.
Apply a 2-3 inch layer of mulch around the base of the plants, keeping it at least 2 inches away from the rhizomes to prevent rot. Use pine straw, gravel, or coarse bark—avoid organic mulches like wood chips, which can retain too much moisture. Mulching helps regulate soil temperature and reduces weed competition, allowing the irises to focus their energy on blooming.
Monitor and Maintain Through the First Season
In the first 4-6 weeks after planting, check the rhizomes for signs of new growth. Healthy irises will send up sword-like leaves and, by late spring, sturdy stems topped with blooms. If you notice yellowing leaves, it’s often a sign of overwatering or poor drainage—adjust your watering schedule immediately. If the leaves appear weak or limp, the rhizomes may need more sunlight or better air circulation.
Once the blooming season ends, cut back the foliage to 6 inches tall in early summer. This encourages the plant to store energy in the rhizomes for next year’s blooms. Avoid fertilizing irises in their first year—they’re still establishing roots and don’t need extra nutrients. After the first season, apply a low-nitrogen, phosphorus-rich fertilizer in early spring to promote strong flower production.
Tips & tricks for planting iris roots
These simple yet game-changing tips will help you avoid the most common iris planting pitfalls and ensure your rhizomes thrive for years to come.
Soil Amendments Make All the Difference: If you're working with heavy clay soil, don't just scratch the surface—dig down to that full 12-inch depth when amending with sand or perlite. I've seen too many gardeners only amend the top 4-6 inches, leaving the lower layers compacted. This creates a bottleneck where roots can't spread properly, leading to stunted growth. Think of it like building a proper foundation for your house—you wouldn't just lay bricks on top of unstable ground, would you?
Rhizome Positioning is Critical: When creating that 3-4 inch ridge in Step 3, make sure the rhizomes sit comfortably on top rather than being forced into the soil. The exposed portion should be about half the rhizome's length—this isn't a mistake, it's intentional! The exposed area helps prevent rot by allowing the rhizome to dry slightly between waterings. I learned this the hard way after losing several irises to overwatering when I buried them too deeply.
Watering Wisdom for Long-Term Success: That 7-10 day watering schedule might seem generous, but it's crucial for establishing healthy roots. After planting, I recommend using a moisture meter to check soil dryness rather than guessing. Irises are surprisingly drought-tolerant once established, but they need consistent moisture during their first growing season to develop strong root systems. The key is to water deeply but infrequently—think of it as giving your irises a long drink rather than frequent sips.
First-Year Maintenance Secret: Don't be tempted to fertilize during that first year, even if your irises look hungry. The roots are still establishing themselves, and excess nutrients can actually encourage weak, floppy growth. Instead, focus on proper spacing (18-24 inches apart) and that 6-inch foliage cutback in early summer. This might seem counterintuitive, but it forces the plant to store energy in the rhizome for next year's spectacular blooms. Trust me, the patience pays off with bigger, more vibrant flowers the following spring.
Pro Tips for Planting Iris Roots
- These simple yet game-changing tips will help you avoid the most common iris planting pitfalls and ensure your rhizomes thrive for years to come.
- Soil Amendments Make All the Difference: If you're working with heavy clay soil, don't just scratch the surface—dig down to that full 12-inch depth when amending with sand or perlite.
- Rhizome Positioning is Critical: When creating that 3-4 inch ridge in Step 3, make sure the rhizomes sit comfortably on top rather than being forced into the soil.
Frequently asked questions
Got questions about planting iris roots?
You’re not alone! Here are answers to the most common concerns—from timing to troubleshooting—to help you grow stunning irises with confidence.
When is the best time to plant iris roots?
The ideal window is late summer to early fall (August–October in most climates). This gives roots time to establish before winter dormancy. If you miss this, spring planting (February–March) works too—just ensure the soil isn’t frozen or soggy. Avoid planting in extreme heat or cold.
How long do iris roots take to bloom after planting?
Patience pays off! Most irises take 2–3 years to bloom after planting from roots. First-year energy goes into root growth, while second-year plants may produce sparse flowers. Healthy, well-established roots in the right soil (like our layered approach) can reward you with bold blooms by year 3.
What do I do if my iris roots look mushy or rotting?
Mushy roots signal rot, often from overwatering or poor drainage. Act fast:
- Trim any black, soft roots with clean scissors.
- Replant in well-draining soil (amend with sand or grit if needed).
- Avoid watering until the soil dries slightly.
- Fungicide (like copper-based sprays) can help prevent spread.
Can I plant iris roots in containers instead of the ground?
Containers work great for small spaces or colder climates. Use a deep pot (12+ inches) with drainage holes and a mix of:
- 50% garden soil
- 30% perlite or sand
- 20% compost
How often should I divide iris roots to keep them healthy?
Divide irises every 3–5 years in early fall to prevent overcrowding and boost blooms. Look for fan-shaped rhizomes with 2–3 healthy leaves per section. Discard old, woody centers and replant divisions 4–6 inches deep. Pro tip: More divisions = more blooms next season!
Wrapping up and next steps
Planting iris roots is your gateway to stunning, vibrant blooms that brighten every spring! By mastering layered soil techniques and proper spacing, you’ll create the ideal environment for these hardy perennials to thrive. With patience and care, your garden will soon burst with color—and that’s a reward worth celebrating!
Ready to take the next step? Grab your gloves, mark your calendar, and schedule your planting session before the first frost. Watch your iris garden transform into a showstopper—you’ve got this! 🌸✨