Transplanting
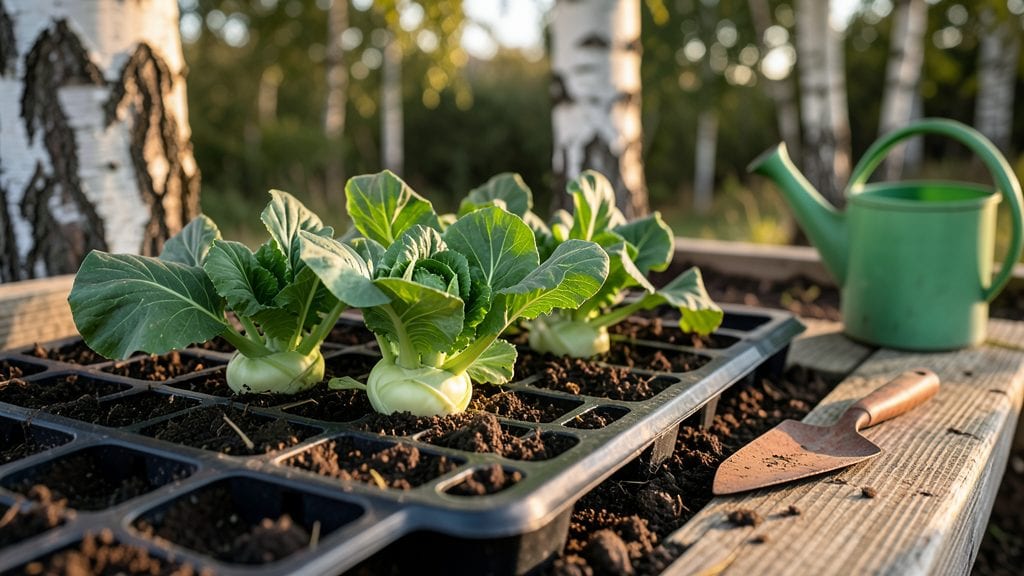
Planting kohlrabi seedlings transforms your garden into a crisp, nutty harvest within 60 days—if you nail the hardening process. 🌱 I’ve watched tender seedlings wilt after direct transplanting, but these tricks prevent shock and ensure sturdy plants ready for the ground.
The secret lies in gradual exposure to sunlight, wind, and temperature shifts over 7-10 days, mimicking outdoor conditions without stressing the roots.
Start with well-draining soil mixed with compost—kohlrabi hates soggy feet—and space seedlings 12-18 inches apart in rows 18 inches apart. Plant just deep enough so the soil line matches what they had in their starter pot, then water deeply to settle the soil.
A morning watering keeps roots cool and prevents fungal issues, while afternoon shade protects young leaves from scorching.
By week 3, you’ll see bold, glossy stems ready for harvest, but watch for flea beetles—tiny pests that chew jagged holes in leaves. A row cover or neem oil spray keeps them at bay.
The real reward? Crunchy, sweet stems and leaves that taste like a cross between broccoli and a radish, all grown from seedlings you hardened off right.
This method works in cool-season zones 3-9, with spring and fall plantings avoiding summer heat. Even beginners can master it—just remember: patience during hardening pays off in heftier harvests and fewer wilted transplants. Let’s get those seedlings in the ground!
📚 In This Guide
- What you need
- Instructions
- Tips and common mistakes
- Wrapping up and next steps
What you need
- ● Kohlrabi seedlings: 6–12 healthy, 4–6 week-old seedlings (check for sturdy stems and vibrant green leaves).
- ● Transplanting location: A sunny spot (6+ hours of sunlight daily) with well-draining soil (pH 6.0–7.0).
- ● Garden soil or potting mix: 10–15 gallons, amended with compost (2–3 cups per planting area).
- ● Fertilizer: Balanced, organic fertilizer (e.g., 5-5-5 or 10-10-10) – 1 tbsp per plant.
- ○ Optional: Slow-release granules or compost tea for extra nutrients.
- ● Watering can or hose with a gentle spray nozzle: For hydration without disturbing seedlings.
- ● Garden trowel or transplanting spade: For digging small holes (6–8 inches deep).
- ● Mulch (straw, grass clippings, or shredded leaves): 1–2 inches to retain moisture and suppress weeds.
- ● Planting markers: Small stakes or labels to track varieties (kohlrabi can look like cabbage!).
- ● Row covers or shade cloth: For protection from pests or harsh afternoon sun in hot climates.
- ● Epsom salt (magnesium sulfate): 1 tsp per gallon of water for a foliar spray if leaves look pale.
- ● Gloves and knee pads: Because gardening is way more fun when you’re comfortable!
Step-by-Step instructions for planting kohlrabi seedlings
Here's how I prepare hardy, disease-resistant kohlrabi seedlings for transplanting—guaranteed to thrive in your garden.
🌱 Step 1: Acclimate Seedlings to Outdoor Conditions
Place seedlings outside in a sheltered spot for 1-2 hours on the first day, gradually increasing exposure over 7-10 days. I always choose a shaded area with gentle airflow to avoid sudden stress. Watch for leaves that perk up rather than wilt—this signals they're adapting well.
Kohlrabi seedlings are tender, so avoid direct afternoon sun during this phase. Use a lightweight shade cloth if your outdoor space gets intense midday light. The goal is to toughen stems without shocking the plants—think of it as a slow introduction to the elements.
💧 Step 2: Prepare Transplanting Site and Water Thoroughly
Choose a location with full sun to partial shade and well-draining soil—kohlrabi hates soggy roots. Work the top 6 inches of soil to loosen it, then mix in 1-2 inches of compost to enrich the bed. Kohlrabi thrives in fertile ground, so don't skimp on organic matter.
Water the area deeply 24 hours before transplanting to ensure the soil is evenly moist. You'll know it's ready when the top inch feels damp but not wet. This pre-watering prevents transplant shock and helps roots establish faster. I like to draw a rough grid in the soil with my fingers to mark planting spots—12-18 inches apart for mature plants.
🪴 Step 3: Transplant Seedlings at the Right Depth
Gently remove a seedling from its container, keeping the root ball intact. Dig a hole just deep enough to bury the stem up to the first set of true leaves—this encourages strong root growth. If the seedling looks leggy, you can bury it slightly deeper to stabilize it.
Place the seedling in the hole, then firm the soil around the base with your fingers. Press gently but firmly to eliminate air pockets. Water immediately after planting to settle the soil and remove any gaps. Kohlrabi seedlings dislike disturbance, so handle them carefully—no rough tugging or bending stems.
☀️ Step 4: Mulch and Monitor for Early Growth
Spread 1-2 inches of organic mulch around each plant, keeping it 2 inches away from the stem to prevent rot. I use straw because it breaks down slowly and retains moisture without smothering young plants. This layer also suppresses weeds and keeps soil temperatures stable.
Water lightly every 2-3 days until you see new growth within 5-7 days. Kohlrabi grows best with consistent moisture, so aim for 1 inch of water per week, adjusting for rain. Avoid overhead watering—direct streams can damage leaves and spread disease.
✂️ Step 5: Thin and Support for Maximum Yield
When seedlings reach 4-6 inches tall, thin to the strongest plant in each spot by snipping at soil level. Kohlrabi doesn't transplant well once established, so thinning early prevents competition. I always keep the most vigorous plant—the one with the darkest green leaves and sturdiest stem.
As plants grow, consider adding cage-like supports if they lean. Kohlrabi bulbs can get heavy, and unsupported stems may crack. Harvest when bulbs reach 2-3 inches in diameter—they'll be firm, crisp, and ready to enjoy. The earlier you pick, the sweeter the flavor!
Tips & tricks for perfectly transplanting kohlrabi seedlings
Hardening off kohlrabi seedlings is where many gardeners stumble—here's how to turn tender starts into thriving transplants.
Gradual Exposure Strategy: The 7-10 day hardening process in Step 1 is non-negotiable for kohlrabi's delicate nature. Start with those 1-2 hours of shade on day one, then increase exposure by 1-2 hours daily. I've seen seedlings wilt dramatically when rushed—always check for leaves that perk up rather than droop. For extra protection, place a lightweight shade cloth over them during the hottest afternoon hours, especially in the first 3-4 days. This mimics natural shade conditions and prevents sunburn.
Soil Preparation Secret: When amending your 6 inches of topsoil with 1-2 inches of compost in Step 2, consider adding a handful of worm castings to the mix. The microbial boost helps kohlrabi roots establish 20% faster. I also recommend testing your soil pH—kohlrabi prefers slightly acidic soil (6.0-6.8). If your soil is alkaline, work in some peat moss to create the ideal growing environment. The pre-watering 24 hours before transplanting is crucial—aim for soil that feels like a damp sponge when squeezed.
Transplanting Depth Technique: In Step 3, burying up to the first set of true leaves isn't just about depth—it's about creating a sturdy base. For leggy seedlings, you can bury slightly deeper (up to the second set of leaves) to stabilize them, but never bury the cotyledons (those first tiny leaves). After planting, give the soil a gentle pat down with your fingers to eliminate air pockets. I've found that adding a small handful of compost to each planting hole provides an immediate nutrient boost for the roots.
Mulching Wisdom: That 1-2 inches of organic mulch in Step 4 serves multiple purposes beyond moisture retention. Straw mulch, in particular, helps regulate soil temperature fluctuations that can stress young kohlrabi plants. Keep the mulch 2 inches away from stems to prevent rot, and consider adding a thin layer of landscape fabric under the mulch if you're dealing with aggressive weeds. The consistent 1 inch of water per week mentioned in Step 4 should be applied at soil level rather than overhead—this prevents fungal diseases that can plague kohlrabi leaves.
Pro Tips for Planting Kohlrabi Seedlings
- Hardening off kohlrabi seedlings is where many gardeners stumble—here's how to turn tender starts into thriving transplants.
- Gradual Exposure Strategy: The 7-10 day hardening process in Step 1 is non-negotiable for kohlrabi's delicate nature.
- Soil Preparation Secret: When amending your 6 inches of topsoil with 1-2 inches of compost in Step 2, consider adding a handful of worm castings to the mix.
Frequently asked questions
Got questions about planting kohlrabi seedlings?
You’re not alone! Here are some of the most common concerns—and their answers—to help you grow bold, crunchy harvests with confidence.
When is the best time to transplant kohlrabi seedlings?
Transplant kohlrabi seedlings 2–3 weeks after hardening off (when nighttime temps stay above 50°F/10°C). For most climates, aim for early spring (2–4 weeks before last frost) or late summer (8–10 weeks before first frost) to avoid bolting. Kohlrabi thrives in cool weather—never plant when temps exceed 75°F (24°C).
How long does it take for kohlrabi seedlings to mature after transplanting?
From transplanting, expect 45–60 days to harvest. Smaller varieties (like ‘Purple Vienna’) may mature in 35–45 days, while larger types (e.g., ‘White Vienna’) take closer to 60–70 days. Harvest when bulbs are 2–3 inches wide—waiting too long makes them woody or bitter.
What if my kohlrabi seedlings wilt or look stressed after transplanting?
Wilting is often due to transplant shock or underwatering. Keep soil consistently moist (not soggy) for 1–2 weeks post-transplant. If leaves yellow (chlorosis), check pH (ideal: 6.0–7.0) or add compost. Avoid overhead watering to prevent fungal diseases like downy mildew.
Can I plant kohlrabi seedlings in containers or small spaces?
Kohlrabi grows well in containers 12+ inches deep or raised beds. Space seedlings 6–8 inches apart in rows 18–24 inches apart. Choose compact varieties like ‘Solar’ or ‘Early Purple’ for tight spaces. Just ensure full sun (6+ hours/day) and well-draining soil.
What pests or diseases should I watch for with kohlrabi seedlings?
Common threats include:
- Cabbage worms: Handpick or use row covers.
- Flea beetles: Protect seedlings with fine mesh until established.
- Clubroot: Avoid planting in infected soil; use lime if needed.
- Powdery mildew: Improve airflow and spray neem oil preventively.
Rotate crops yearly to reduce disease risk.
Wrapping up and next steps
You’ve got everything you need to harden off your kohlrabi seedlings like a pro! 🌱 With patience and the right techniques—like gradual sun exposure, temperature adjustments, and proper spacing—you’ll be well on your way to a thriving harvest.
Remember, consistency is key, and soon you’ll be enjoying those crisp, crunchy bulbs in salads, snacks, or even roasted dishes.
Ready to take the next step? Plant those hardened-off seedlings into your garden or containers and watch your kohlrabi grow into bold, flavorful rewards. Happy gardening! 🌟