Container Gardens
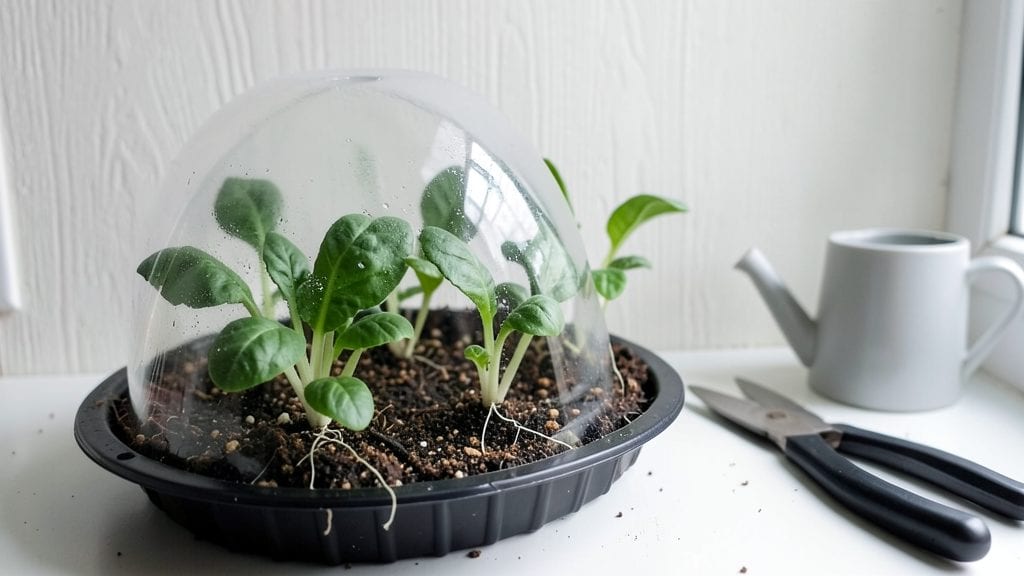
Planting sprouts indoors gives you crisp, nutrient-packed greens in just five days—no soil, no sunlight struggles, just a jar and a countertop. 🌱 I’ve grown everything from alfalfa to radish sprouts this way, and the speed is shocking.
What takes weeks in the ground happens overnight on my kitchen counter, with zero yard space needed.
The secret is simple: three supplies—a wide-mouth jar, a mesh lid or cheesecloth, and seeds you can find at any grocery store. Rinse them twice daily, keep them in a warm spot, and watch them unfurl into edible greens faster than store-bought microgreens.
No fancy equipment, no gardening experience—just patience and a spray bottle.
By day five, you’ll have 1-2 inches of vibrant sprouts, ready to snack on raw or toss into salads. The flavor is fresher than anything you’ve bought, and the process is so clean it’s perfect for small apartments or even kitchen windowsills.
Plus, you’re growing food with no pesticides, no soil mess, and zero outdoor space.
Here’s where it gets interesting—this method works for any seed that’s labeled for sprouting, from broccoli to lentils. The only real challenge is keeping things dry enough to avoid mold, but I’ll show you how to do that without losing a single batch. Let’s get those jars growing!
📚 In This Guide
- What you need
- Instructions
- Tips and common mistakes
- Wrapping up and next steps
What you need
- ● Sprouting container: A wide-mouth mason jar (quart size) or a dedicated sprouting tray (1–2 containers per batch).
- ● Sprouting seeds: ½–1 cup of organic, raw seeds (e.g., alfalfa, broccoli, lentils, or sunflower). Check germination rates—aim for 95%+!
- ● Cheesecloth or sprouting lid: A fine mesh screen or jar lid with a breathable cover to secure seeds and allow airflow.
- ● Rubber band or bungee cord: To hold the cheesecloth in place (if using a jar).
- ● Water: Room-temperature, filtered water (chlorine can inhibit germination).
- ● Colander: A stainless-steel or plastic colander for rinsing (avoid aluminum).
- ○ Paper towels or sprouting mat (optional): For draining excess water during germination.
- ● Sprouting guidebook: A handy reference for seed-specific germination times and care tips.
- ● Small fan or ventilation: Improves airflow to prevent mold (especially for humid climates).
- ● Food dehydrator or oven: For drying sprouts if you plan to store them long-term.
- ● Labeling markers: To track seed types and planting dates.
Step-by-step instructions for planting sprouts indoors
Here's how to grow crisp, nutrient-packed sprouts in just 5 days—no soil, no mess, and no waiting weeks.
🌱 Step 1: Soak Seeds for Optimal Germination
Rinse ¼ cup of seeds (choose lentils, alfalfa, or broccoli) under cool water, then place them in a clean quart-sized jar. Cover with 2-3 inches of filtered water—enough to fully submerge the seeds. Let them soak for 8-12 hours at room temperature. You'll see them begin to plump and soften, signaling they're ready for sprouting.
Drain the water completely through a fine-mesh strainer, shaking gently to remove excess moisture. This step is critical—leaving seeds waterlogged invites mold. I always use a dedicated jar for sprouting to avoid cross-contamination with other foods.
💧 Step 2: Set Up the Sprouting Jar with Proper Drainage
Return the drained seeds to the jar and secure a sprouting lid (or a clean kitchen towel tied with a rubber band) loosely over the top. The lid should allow airflow but prevent debris from entering. Place the jar in a dark, warm spot—like a pantry or cabinet—where the temperature stays between 65-75°F.
Every 12 hours, rinse the seeds under cool running water for 30-60 seconds to remove seed casings and prevent bacterial growth. Drain thoroughly each time. You'll notice tiny tails emerging within 24 hours—this is your cue that germination is underway. Keep the jar upright to avoid water pooling.
☀️ Step 3: Transition to Light for Leafy Sprouts
After 3-4 days, when sprouts reach about ½ inch tall and show their first true leaves, move the jar to bright, indirect light (a sunny windowsill works well). This halts root growth and encourages leaf development. If using alfalfa or clover, you'll see vibrant green clusters forming—this is the peak stage for flavor and nutrition.
Continue rinsing twice daily, but reduce water exposure to 15-20 seconds to avoid overhydrating the delicate sprouts. You'll know they're ready to eat when they're 1-2 inches tall and have 2-3 leaves. The entire process takes just 5 days—far faster than soil-based growing.
✂️ Step 4: Harvest and Store for Maximum Freshness
Snip the sprouts just above the root base with clean scissors for a tidy harvest. Rinse one final time under cool water, then drain on a paper towel-lined plate. Spread them out to dry for 10 minutes—this removes excess moisture and extends shelf life. Store in an airtight container in the fridge, where they'll stay crisp for 5-7 days.
Real talk: If you see any slimy residue or off smells, discard the batch immediately—this signals bacterial growth. I always wash my hands before handling sprouts and use separate utensils to avoid contamination. For best results, eat within 3 days of harvesting for peak freshness.
Tips & tricks for perfect indoor sprout germination
Here's what I learned the hard way after ruining three batches of sprouts—these tricks ensure you get crisp, vibrant sprouts every time without the mess or mold risks.
Soak Time is Non-Negotiable: That 8-12 hour soak window is critical for proper hydration without overdoing it. I learned this after my first batch turned to mush—too long in water makes seeds waterlogged and prone to mold. Use filtered water to avoid chlorine buildup, which can inhibit germination. If you forget overnight, don't panic—just drain immediately when you remember and proceed with rinsing.
Temperature Control Makes All the Difference: Maintain that 65-75°F range consistently. I discovered this when my kitchen's cool morning air slowed germination to a crawl. Place your jar near your fridge (but not inside) or use a small heating pad on low if your home runs cold. The 24-hour mark is when you should see those first tiny tails—if not, your environment might be too cool.
Rinsing Technique Prevents Disaster: Those 12-hour rinses aren't just about cleanliness—they're about oxygen flow. I used to rush through rinsing, but now I make sure to shake the jar vigorously for the full 30-60 seconds to remove all seed casings. Use a fine-mesh strainer that lets water drain completely—standing water is how mold parties start. After the light transition on day 3, cut rinsing to 15-20 seconds to avoid overhydrating the delicate sprouts.
Light Transition Strategy: When moving to light at 3-4 days, position your jar where it gets bright but indirect sunlight. Direct sun can scorch the delicate sprouts, while too little light means you'll get long, leggy sprouts with minimal leaves. I place mine on an east-facing windowsill—morning light is perfect without the intensity of afternoon sun. Watch for that vibrant green color when they're ready to harvest.
Pro Tips for Planting Sprouts Indoors
- Here's what I learned the hard way after ruining three batches of sprouts—these tricks ensure you get crisp, vibrant sprouts every time without the mess or mold risks.
- Soak Time is Non-Negotiable: That 8-12 hour soak window is critical for proper hydration without overdoing it.
- Temperature Control Makes All the Difference: Maintain that 65-75°F range consistently.
Frequently asked questions
Got questions about growing sprouts indoors?
You’re not alone—this method is simple, but a few details can make all the difference. Below, we’ve rounded up the most common queries to help you sprouting like a pro!
How long does it take for sprouts to grow indoors?
Most sprouts are ready to eat in just 3–5 days! Fast growers like alfalfa and radish sprouts pop up in 3–4 days, while denser seeds (e.g., lentils or chickpeas) may take 4–5 days. Check daily for plump, vibrant sprouts—no waiting weeks like with soil gardening!
Do I need sunlight for indoor sprouts?
Nope! Sprouts grow in total darkness for the first 2–3 days to prevent mold and encourage strong stems. After that, move them to a bright, indirect light source (like a sunny windowsill) for 1–2 hours daily to boost chlorophyll. Skip direct sun—it can overheat your jar!
Why are my sprouts moldy? How do I fix it?
Mold (fuzzy spots) happens when sprouts stay too wet or aren’t rinsed well. Stop watering immediately and rinse them thoroughly with clean water. Discard any moldy batches—it’s unsafe to eat. To prevent it, rinse sprouts 2x daily and use a breathable sprouting lid (like a mesh screen).
What’s the cheapest way to sprout indoors?
Skip fancy kits! You only need:
- A glass jar with a lid (or a mason jar)
- Cheesecloth or a sprouting lid (DIY with a rubber band + cloth)
- Organic seeds (buy in bulk or reuse seed packets)
Can I grow sprouts without a jar? What are my options?
Try these no-jar methods:
- Sprouting bags: Mesh bags (like sprout bags) let water drain—just soak, rinse, and hang.
- Colander + bowl: Place a colander over a bowl, add seeds, and rinse twice daily.
- Stacked plates: Layer seeds between damp paper towels on a plate, flip daily.
How do I store harvested sprouts to keep them fresh?
Store sprouts in an airtight container in the fridge for 4–5 days. For longer shelf life (up to 1 week), dry them slightly with a paper towel before storing. Avoid washing before refrigerating—excess moisture speeds up spoilage. Eat within 5 days for peak freshness and safety!
Wrapping up and next steps
Growing sprouts indoors is a game-changer—it’s fast, soil-free, and packed with nutrition! With just a few simple supplies and a little patience, you’ll harvest fresh, crunchy sprouts in just 5 days.
Whether you’re a beginner or a seasoned gardener, this method proves that homegrown goodness is always within reach. 🌱
Ready to take the next step? Start with one easy sprout—like alfalfa or broccoli—and soon, you’ll be experimenting with flavors and varieties. Your kitchen (and taste buds) will thank you! 💚