Container Gardens
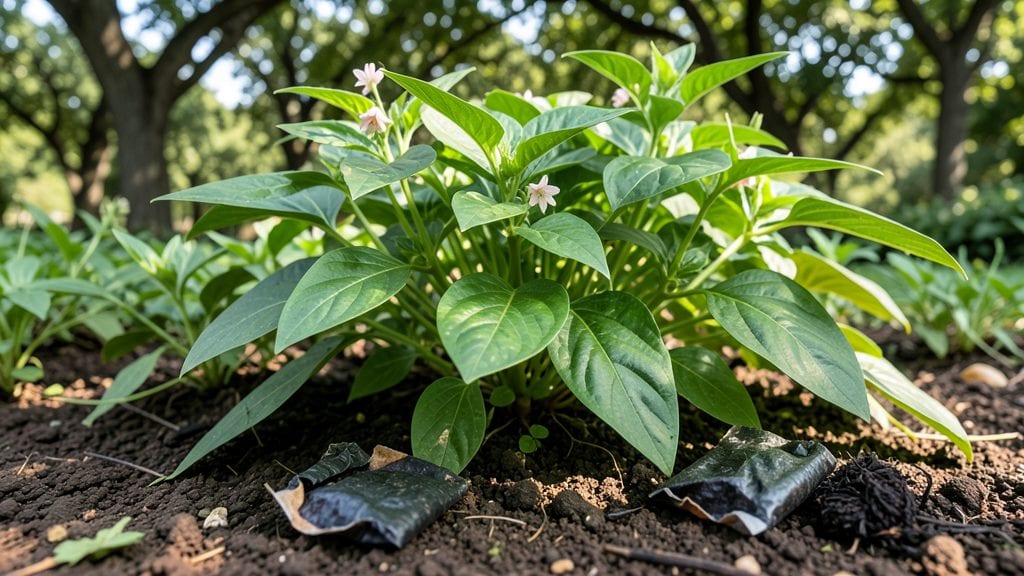
Planting tea bags isn't just clever—it's a game-changer for herb and flower regrowth in containers. 🌱 I've turned stale tea bags into a free fertilizer that jumpstarts seedlings and keeps soil rich without the hassle of chemical additives. The best part? You're using something you'd normally toss.
Here's the secret: those used tea bags still hold nitrogen and trace minerals your plants crave. Simply bury them near roots, mix them into compost, or even plant seeds directly in the damp bag—it acts like a slow-release nutrient boost.
My basil and marigolds grow twice as fast this way, and the soil stays looser and more fertile.
You'll see stronger stems, deeper green leaves, and more blooms within weeks. The method works for almost any container garden—herbs, flowers, even tiny veggies. Just avoid overdoing it (one per plant is plenty) to prevent root burn from concentrated tannins.
Perfect for small spaces, budget gardeners, or anyone who wants to reduce waste. The same trick works in raised beds too—just sprinkle a few in the soil before planting. Ready to turn trash into growth?
📚 In This Guide
- What you need
- Instructions
- Tips and common mistakes
- Wrapping up and next steps
What you need
- ● Used tea bags: Any type (black, green, herbal, or fruit-infused), but avoid those with artificial flavors or oils. Quantity: 3–5 for a small container or 10+ for a larger setup.
- ● Small containers: Yogurt cups, egg cartons, or biodegradable pots (4–6 inches deep). Tip: Poke 2–3 drainage holes in the bottom!
- ● Potting soil: Lightweight, well-draining mix (like seed-starting soil). Quantity: 1–2 cups, depending on container size.
- ● Water: Room-temperature, preferably filtered or rainwater to avoid chlorine.
- ● Spray bottle: For gentle watering without over-saturating.
- ● Tweezers: To handle small tea bags or delicate seedlings.
- ● Fertilizer: Diluted liquid fertilizer (like fish emulsion) every 2–3 weeks for faster growth.
- ● Grow lights or sunny windowsill: If your space lacks natural light.
- ● ✅ Time: 5–10 minutes for setup; patience for sprouts (2–4 weeks).
- ● ✅ Space: A bright spot (6+ hours of sunlight/day or a grow light).
- ○ ✅ Tea bag prep: Rinse bags to remove excess tannins (optional but recommended for faster growth).
Step-by-Step instructions for planting tea bags
Here's how to turn used tea bags into thriving herbs and flowers with minimal effort.
🌱 Step 1: Prepare the Tea Bag for Planting
Start with organic, biodegradable tea bags—the paper and stitching must break down in soil. Remove any metal staples or plastic clips (they don’t decompose). I like to open the bag and gently shake out the used leaves into my hand. This prevents clumping and lets the soil contact more surface area for faster decomposition.
Place the empty tea bag (or loose leaves) ½ inch deep in moist soil. If planting directly in the ground, dig a small hole with your finger. For containers, use a 4-inch pot with drainage holes. The key here is moisture—water the soil thoroughly before planting to help the tea break down and stimulate root growth.
☀️ Step 2: Choose the Right Location and Light
Most tea-bag regrowth thrives in partial shade to full sun, depending on the plant. Basil, mint, and parsley (common tea herbs) need 4-6 hours of sunlight daily. Place your tea bag near a window, under a tree, or in a shaded garden bed. If using a container, position it where it gets morning sun and afternoon shade—this prevents wilting.
Watch for new sprouts in 2-4 weeks. You’ll see tiny green shoots pushing through the soil first. Keep the area consistently moist (not soggy) until you notice first true leaves—this signals the plant is establishing roots. If using a pot, mist the soil daily until sprouts appear.
💧 Step 3: Maintain Moisture and Fertility
Once sprouts emerge, water 1-2 times weekly, ensuring the soil stays evenly damp but not waterlogged. Overwatering drowns tender roots, while underwatering stunts growth. I use a spray bottle for small pots to avoid disturbing the delicate seedlings. For ground plantings, water at the base to keep leaves dry.
After 4-6 weeks, when plants reach 3-4 inches tall, fertilize lightly with diluted compost tea or a balanced 10-10-10 fertilizer. Tea-bag regrowth is nutrient-light, so don’t overdo it. You’ll know it’s working when leaves stay bright green and new growth appears every 2-3 weeks. Harvest leaves as needed, but avoid taking more than ⅓ of the plant at once.
✂️ Step 4: Harvest and Encourage Growth
Harvest herbs when they’re 3-5 inches tall for best flavor and growth. Use clean scissors to snip just above a leaf node (the point where leaves meet the stem). This encourages bushier growth. For flowers like nasturtiums or violets (which can regrow from tea bags), wait until blooms open fully before picking.
To keep plants productive, prune regularly—this prevents legginess and promotes dense foliage. If your tea-bag plants slow down after a few months, replace the soil with fresh potting mix and add a slow-release fertilizer. With care, some herbs (like mint or basil) will regrow for months from the same tea bag!
Tips & tricks for perfect tea bag regrowth
Here's what I've learned from turning my tea scraps into thriving herbs—simple tricks that make all the difference.
Soil Prep Matters: Before planting, mix your tea bag (or loose leaves) with a little compost or worm castings. This gives your seedlings a nutrient boost right from the start. I like to use a 50/50 mix of potting soil and compost in my 4-inch pots—this creates the perfect balance of moisture retention and aeration for those delicate roots. The extra nutrients help speed up decomposition of the tea bag material, so you'll see sprouts in that 2-4 week window instead of waiting longer.
Lighting Secret: If you're growing herbs like basil or parsley that need 4-6 hours of sunlight, place your pots on a sunny windowsill facing south. For flowers like nasturtiums that prefer partial shade, rotate your pots every few days so all sides get even light exposure. I've found that morning sun and afternoon shade works best in most kitchens—it prevents the soil from drying out too quickly while still giving your plants the light they need to thrive.
Watering Wisdom: The key to consistent moisture is patience. Instead of watering deeply once, I use a spray bottle to mist my pots daily until sprouts appear. This keeps the soil evenly damp without creating waterlogged conditions that can drown tender roots. Once your plants reach 3-4 inches tall, you can switch to the 1-2 times weekly watering schedule mentioned in Step 3, but always check the top inch of soil first—if it's dry, it's time to water.
Harvesting Hack: When harvesting your herbs, always use clean scissors to avoid spreading disease. I like to harvest in the morning after the dew has dried but before the sun gets too intense—this preserves flavor and moisture. For flowers, wait until blooms are fully open before picking. And here's a pro tip: if you're growing mint or basil, you can actually propagate new plants from those stem cuttings! Just place the cuttings in water until roots form, then transplant to soil.
Pro Tips for Planting Tea Bags
- Here's what I've learned from turning my tea scraps into thriving herbs—simple tricks that make all the difference.
- Soil Prep Matters: Before planting, mix your tea bag (or loose leaves) with a little compost or worm castings.
- Lighting Secret: If you're growing herbs like basil or parsley that need 4-6 hours of sunlight, place your pots on a sunny windowsill facing south.
Frequently asked questions
Got questions about planting tea bags? You’re not alone!
Here are some of the most common queries—plus quick, no-fuss answers to help you grow like a pro.
Can I use any tea bag for planting?
Stick to organic, loose-leaf, or compostable tea bags—avoid those with plastic or non-compostable fibers. Herbal teas (like chamomile or mint) work best, while black or green tea bags may contain dyes or additives that could harm soil. Always check the label!
How long does it take for tea bag plants to grow?
Patience is key! Most tea bag herbs (like basil or mint) sprout in 1–3 weeks, while flowers (e.g., marigolds) may take 4–6 weeks. Keep soil moist, provide sunlight (6+ hours/day), and avoid overwatering—consistency is everything.
What’s the best way to transplant tea bag seedlings?
Once seedlings have 2–3 true leaves (not just the initial sprouts), gently remove them from the tea bag, tease apart the roots, and plant them 1 inch deep in a pot or garden bed. Use well-draining soil and water lightly to avoid shock. Pro tip: Harden them off for a day by placing outside before full transplant!
Can I reuse a tea bag after planting?
Not really—once you’ve planted the bag, it’s one-and-done! The bag breaks down in soil, but the roots will outgrow it. If you’re composting, toss the empty bag (minus staples) into your compost pile afterward. Bonus: Save unused tea bags for compost or mulch instead!
Why aren’t my tea bag plants growing?
Troubleshoot with this quick checklist:
No sprouts? Check moisture—tea bags need consistent dampness (not soggy).
Leggy or weak? Move to a sunnier spot (or add a grow light).
Yellow leaves? Overwatering or poor drainage—let soil dry slightly between waterings.
If all else fails, try a new tea bag—sometimes the seeds just need a second chance!Wrapping up and next steps
Planting tea bags is a fun, eco-friendly, and rewarding way to grow herbs, flowers, and even vegetables with minimal effort! Whether you’re reviving mint, basil, or marigolds, this method proves that sustainability can be both simple and beautiful. 🌱
Now that you’re ready to give it a try, start small—pick one or two tea bags and observe the magic unfold. Share your green thumb success with friends or expand your garden by experimenting with other compostable materials. The earth (and your future plants) will thank you!