Vegetables
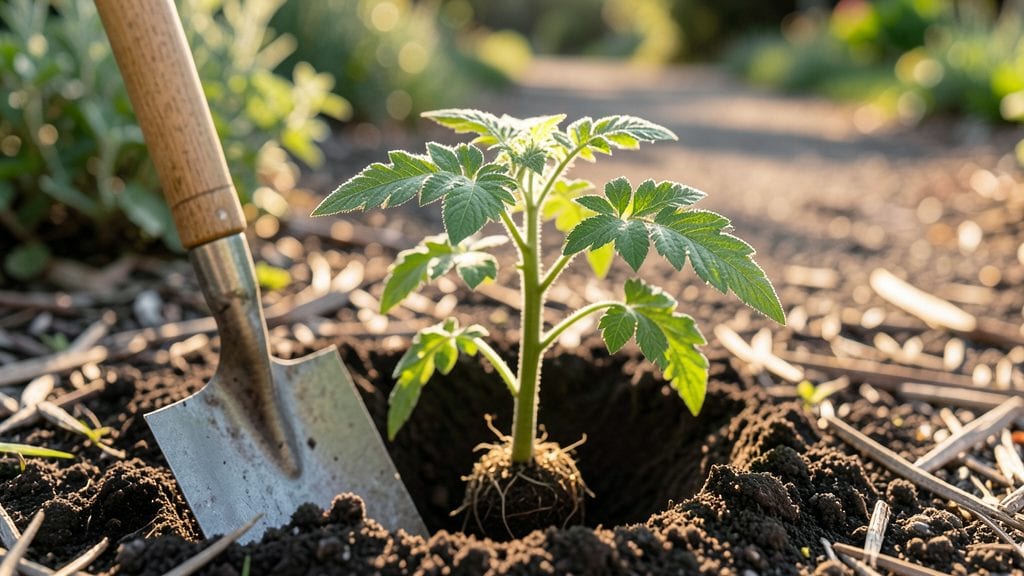
Planting tomatoes outdoors in early spring is the moment my garden truly comes alive—when those first seedlings get their taste of real sunlight and warmth. 🌱 I’ve learned the hard way that timing, soil, and variety make all the difference, especially when frost still lingers in the forecast.
The right cold-hardy varieties like 'Stupice' or 'Mountain Merit' can handle cooler temperatures and still produce fruit, while others bolt before they even set leaves.
You’ll need well-draining soil (amended with compost if yours is heavy clay), 5-gallon pots for transplants, and a sunny spot that gets at least 6-8 hours of light.
Most gardeners wait until after the last frost date, but if you’re in a cooler zone, start with black plastic mulch to warm the soil faster. Spacing is key—18-24 inches apart for determinate tomatoes, 24-36 inches for indeterminate vines that’ll keep growing all season.
After planting, keep soil consistently moist (not soggy) and stake or cage your plants early to avoid flopping. The first few weeks are critical—watch for pests like aphids and mulch heavily to retain moisture and suppress weeds.
By midsummer, you’ll be harvesting tomatoes that taste like nothing store-bought can match, and the plants will reward your patience with vibrant green foliage and heavy fruit loads.
This method works for Zone 4-8 gardens, though adjust timing for warmer climates—plant in late spring to avoid summer’s scorching heat. The biggest mistake? Rushing the transplant too soon. Give those roots time to establish, and your tomatoes will thrive all season long.
📚 In This Guide
- What you need
- Instructions
- Tips and common mistakes
- Wrapping up and next steps
What you need
- ● Tomato seedlings or seeds: 3–5 plants (choose cold-tolerant varieties like 'Stupice', 'Mountain Merit', or 'Glacier').
- ● Garden soil or potting mix: 1–2 bags (well-draining, rich in organic matter).
- ● Compost or fertilizer: 1–2 cups (balanced 10-10-10 or organic options like worm castings).
- ● Mulch: Straw, grass clippings, or black plastic (to retain warmth and moisture).
- ● Garden stakes or cages: 3–5 (6–8 ft tall for indeterminate varieties).
- ● Pruning shears or scissors: (for trimming and harvesting).
- ● Watering can or hose with a gentle nozzle: (avoid blasting seedlings!).
- ● Row covers or frost blankets: (for extra protection in chilly nights).
- ● Cold frames or mini greenhouses: (extends the growing season!).
- ● Soil thermometer: (to monitor warmth—ideal range: 60–70°F).
- ● Epsom salt: (1 tbsp per plant for magnesium boost).
- ● Plant markers: (to track varieties and watering schedules).
Step-by-Step instructions for planting cold-hardy tomatoes outdoors
Here’s how to plant early-season varieties that handle spring’s cooler temperatures like pros.
🌱 Step 1: Prepare the Planting Site and Soil
Choose a location with full sun exposure (6-8 hours daily) and shelter from strong winds, which can stress young plants. Tomatoes thrive in well-draining soil with a pH between 6.0 and 6.8—test your soil or amend with compost if needed. I always mix in 3-4 inches of aged compost into the top 6-8 inches of soil to improve fertility and moisture retention.
For better root development, dig a hole twice as wide as the root ball but only as deep as the container’s bottom. This encourages roots to spread horizontally rather than stay confined. If your soil is heavy clay, add a handful of perlite or coarse sand to improve drainage—tomatoes hate soggy roots.
🪴 Step 2: Harden Off Seedlings Before Transplanting
Two weeks before your last frost date, start hardening off seedlings by placing them outside in a shaded, sheltered spot for 1-2 hours the first day. Gradually increase their outdoor time by 1 hour daily, moving them to direct sunlight by day 7. This toughens their cell walls and prevents shock when planted.
Watch for wilting or yellowing leaves—these are signs they’re not ready. Cold-hardy varieties like ‘Stupice’ or ‘Mountain Merit’ tolerate 40-45°F nights, but even they need time to adjust. If frost is forecast, cover seedlings with frost cloth or a lightweight blanket secured with bricks or stakes.
☀️ Step 3: Plant Seedlings at the Right Depth and Spacing
Remove seedlings from their containers and gently loosen the roots if they’re circling the bottom. Plant deeper than the original soil line—up to ⅔ of the stem—to encourage stronger root growth. For determinate varieties (bush types), space plants 18-24 inches apart; for indeterminate (vining types), allow 24-36 inches. Rows should be 3-4 feet apart for airflow.
Fill the hole with soil, pressing lightly to eliminate air pockets, then water deeply to settle the roots. Avoid overwatering now—you’ll see first true leaves perk up within 24 hours if moisture is right. Mulch with 2-3 inches of straw or shredded leaves to retain soil moisture and suppress weeds.
💧 Step 4: Water and Fertilize for Strong Early Growth
Water deeply every 2-3 days until the top 2 inches of soil feel dry. Early-season tomatoes need consistent moisture but hate soggy soil—water at the base, not overhead, to prevent disease. I use a soaker hose or drip irrigation to keep leaves dry and roots hydrated.
Wait 7-10 days before fertilizing to let roots establish. Then, apply a balanced fertilizer (10-10-10) at half-strength to avoid burning tender roots. Cold-hardy varieties grow slower at first, so don’t rush fertilization—focus on strong stem development before flowering. You’ll know they’re thriving when new leaves appear every 5-7 days.
✂️ Step 5: Prune and Support for Maximum Yield
Once plants reach 12-18 inches tall, install stakes or cages to support vining types. Prune suckers (side shoots) regularly—these drain energy from fruit production. For indeterminate varieties, remove lower leaves up to 12 inches from the ground to improve airflow and reduce disease risk.
If night temperatures drop below 50°F, cover plants with frost cloth for a few more weeks. Cold-hardy tomatoes will still produce, but warmer days (60°F+) speed up growth. You’ll see first flowers in 4-6 weeks—pinch them off if nights are still chilly to redirect energy to foliage.
Tips & tricks for planting cold-hardy tomatoes outdoors
These practical insights will help you avoid common pitfalls and maximize your early-season tomato harvest—no matter how chilly your spring nights get.
The Soil Preparation Secret: In Step 1, when amending your soil with 3-4 inches of aged compost, go the extra mile by mixing in a handful of worm castings (optional but game-changing). These contain beneficial microbes that help roots absorb nutrients more efficiently, especially important for cold-hardy varieties that grow slower at first. The key is to work the compost into the top 6-8 inches—this creates a nutrient-rich zone where roots will naturally seek out moisture and food.
Harden Off Like a Pro: During the 2-week hardening process in Step 2, I've found that placing seedlings on a elevated surface like a trellis or wire rack (rather than directly on soil) prevents rot from potential moisture wicking up from the ground. Also, if your nights dip below 40°F, move seedlings to a protected microclimate near a south-facing wall—this can add 5-10°F of warmth through radiant heat. The gradual 1-hour daily increase is critical; think of it as building their resilience like a marathon runner's training.
Planting Depth Hack: When planting deeper than the original soil line in Step 3, here's what nobody tells you: If your seedlings have particularly thick stems (common with cold-hardy varieties), you can bury up to ⅔ of the stem without worry—these varieties often have thicker stems that can handle the stress better. For extra insurance, make a small slit in the soil with your finger before inserting the stem; this prevents air pockets that could strangle new root growth. The 24-hour perk-up test is your best indicator of proper moisture levels.
Watering Wisdom: In Step 4, the "deeply every 2-3 days" guideline works best with a moisture meter—these $15 tools are worth every penny. Aim to keep soil moisture at 60% in the top 2 inches; anything less stresses plants, while anything more invites fungal diseases. For container-grown tomatoes, reduce to every 1-2 days since pots dry out faster. And here's the kicker: water in the early morning so foliage dries completely by nightfall, reducing disease risk from prolonged moisture.
Pro Tips for Planting Tomatoes Outdoors
- These practical insights will help you avoid common pitfalls and maximize your early-season tomato harvest—no matter how chilly your spring nights get.
- The Soil Preparation Secret: In Step 1, when amending your soil with 3-4 inches of aged compost, go the extra mile by mixing in a handful of worm castings (optional but game-changing).
- Also, if your nights dip below 40°F, move seedlings to a protected microclimate near a south-facing wall—this can add 5-10°F of warmth through radiant heat.
Frequently asked questions
Got questions about planting tomatoes outdoors in early spring? You’re not alone! Here are some of the most common concerns—and their answers—to help you grow a thriving crop, even when the weather is still chilly.
How early can I plant tomatoes outdoors before the last frost?
Plant tomatoes outdoors only after the soil reaches at least 50°F (10°C) and nighttime temperatures stay above 45°F (7°C). Use cold-hardy varieties (like ‘Stupice’ or ‘Mountain Merit’) to push limits, but wait until frost risk passes for tender seedlings. Hardened-off plants can tolerate cooler temps better than fresh starts.
What if my seedlings get frostbitten after planting?
If frost hits young plants, cover them immediately with row covers, blankets, or plastic bottles to trap warmth. Remove covers once temps rise above freezing. Damaged leaves may regrow, but avoid replanting—stressed roots won’t recover well. Pro tip: Plant in warm microclimates (like near south-facing walls) to delay frost exposure.
Can I plant tomatoes in containers outdoors in early spring?
Containers warm up faster than soil and give you flexibility to move plants if frost threatens. Use 5-gallon pots or larger with well-draining soil, and place them in sunny spots. Cold-hardy varieties like ‘Tumbling Tom’ thrive in containers. Just ensure pots have drainage holes to prevent root rot in cooler, wetter conditions.
How do I protect my tomato plants from pests in early spring?
Early-season pests like aphids, flea beetles, and slugs love tender tomato leaves. Use row covers for physical protection, apply neem oil or insecticidal soap, and set up beer traps for slugs. Encourage beneficial insects (like ladybugs) by planting basil or marigolds nearby. Pro tip: Inspect plants daily—catch pests early!
What’s the best alternative if my tomatoes won’t survive the cold?
If your climate is too harsh, try cold-tolerant greens (like kale or spinach) in early spring, then swap for tomatoes once soil warms. For tomatoes specifically, opt for ‘Early Girl’ or ‘Siberian’ varieties—both handle cooler temps better than standard types. You can also start seeds indoors 6–8 weeks before the last frost and transplant later.
Wrapping up and next steps
Planting tomatoes outdoors in early spring is totally doable—especially with cold-hardy varieties and the right prep! 🌱 Whether you’re a seasoned gardener or just starting, these tips will help you grow thriving, flavorful tomatoes even in cooler climates. Remember, patience and consistency are key, so don’t rush the process.
Now that you’re armed with the best varieties and techniques, it’s time to roll up your sleeves and get planting. Start by selecting your seedlings or seeds, prep your soil, and give those tomato plants the love they deserve.
Before you know it, you’ll be harvesting juicy, homegrown tomatoes straight from your garden! 🍅