Transplanting
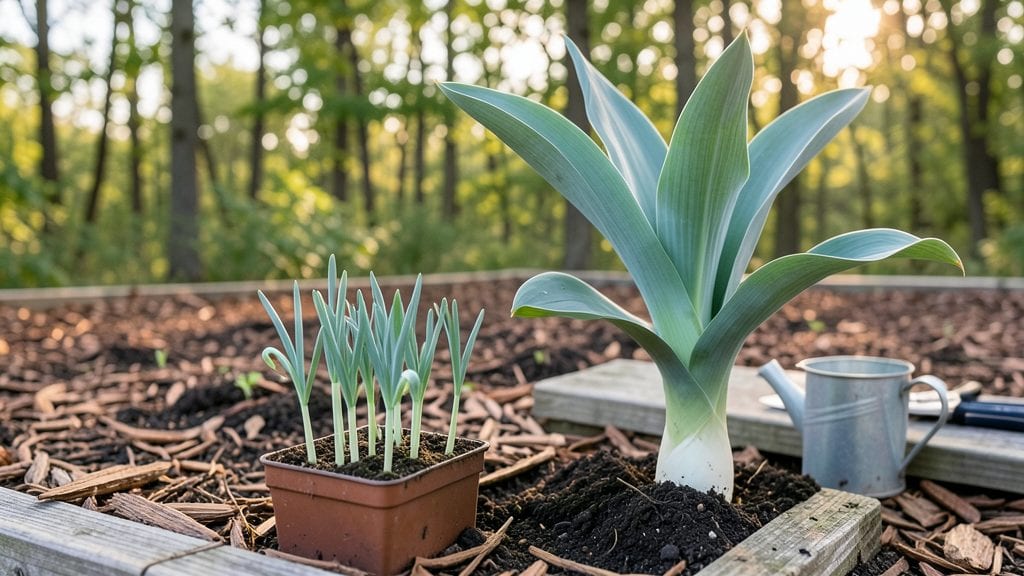
Planting wild leeks transforms your shady corner into a perennial pantry. 🌱 I’ve watched these hardy alliums push through rocky soil and snowmelt to deliver that signature wild garlic-onion flavor—no fancy garden required.
The key is patience, since they take 3-5 years to bulk up, but once established, they’ll outlast your garden bench.
You’ll need mature wild leeks—either dug from sustainable wild sources (with permission!) or purchased from reputable growers. Avoid seeds, as they’re notoriously unreliable; divisions or small clumps work best.
A 6-inch-deep hole in moist, well-draining soil (even clay works) is all they ask, plus a spot with partial shade and consistent moisture. Plant in early spring or fall, spacing clumps 12-18 inches apart to prevent overcrowding.
What you’ll get is a low-maintenance harvest that rewards you for years. The first year, you’ll see just a few leaves, but by year three, you’ll pull pounds of ramps each spring—enough to trade with neighbors or freeze for winter.
They multiply slowly, so they won’t take over like mint, and deer tend to leave them alone.
Fair warning: Some states regulate wild leek harvesting, so check local laws before digging. For best results, mulch heavily in winter to protect the crowns, and avoid disturbing the soil once planted. Now, grab a trowel—your future meals are already underground.
📚 In This Guide
- What you need
- Instructions
- Tips and common mistakes
- Wrapping up and next steps
What you need
- ● Wild leek bulbs or seeds: 3–6 bulbs (for a small patch) or 1–2 packets of seeds (if starting from scratch)
- ● Choose certified organic or locally sourced bulbs to avoid invasive species.
- ● Garden soil: Well-draining, moist, and slightly acidic (pH 6.0–7.0). Amend with compost if your soil is heavy clay or sandy.
- ○ Optional: Leaf mold or peat moss (1–2 inches mixed into the topsoil) for moisture retention.
- ● Organic mulch: 2–3 inches of straw, shredded leaves, or wood chips to suppress weeds and retain moisture.
- ● Garden fork or trowel: For digging planting holes (6–8 inches deep).
- ○ Pruners or shears: For trimming foliage (optional, if prepping bulbs).
- ● Watering can or hose with a gentle spray nozzle: Wild leeks love consistent moisture!
- ○ Garden gloves: Optional but helpful for handling soil and bulbs.
- ● Sunlight: Partial to full shade (2–4 hours of direct sun daily). Avoid harsh afternoon sun in hot climates.
- ● Water source: A reliable way to keep soil moist (especially in the first growing season).
- ● Patience: Wild leeks take 2–3 years to establish fully, but they’ll reward you with decades of harvests!
Step-by-Step instructions for planting wild leeks
Wild leeks thrive with minimal fuss—here’s how to establish a hardy, self-sustaining patch that multiplies yearly.
🌱 Step 1: Identify and Prepare the Planting Site
Wild leeks (also called ramps) prefer partial shade to full shade, thriving where other plants struggle—think under tall trees or along forest edges. Test your site by checking for moist, well-draining soil that stays slightly damp but never soggy. If your soil is heavy clay, amend it with 2-3 inches of compost mixed into the top 6 inches of soil to improve drainage and fertility.
I dig a shallow trench about 4 inches deep along the planting line—this helps roots spread horizontally while keeping the crowns just below the surface. Wild leeks hate competition, so clear the area of weeds and grass within a 2-foot radius to give them room to establish.
🌱 Step 2: Divide and Plant Wild Leek Clumps
Wild leeks spread via rhizomes, so you’ll want 3-4 inch clumps with at least one healthy green shoot per section. Separate the rhizomes gently with your hands or a clean knife, ensuring each piece has 2-3 buds—these will grow into new plants. Plant the clumps 12-18 inches apart in rows 18-24 inches apart to allow for future expansion.
Place each clump horizontally in the trench, with the buds facing upward. Cover lightly with soil, pressing down just enough to eliminate air pockets but not compacting it. Water deeply right after planting to settle the soil and encourage root contact. Avoid burying the crowns too deep—wild leeks rot if smothered.
💧 Step 3: Water and Mulch for Establishment
Keep the soil consistently moist for the first 4-6 weeks—wild leeks are shallow-rooted and dry out quickly in hot weather. Water deeply 2-3 times per week until new growth appears, then taper to once weekly during dry spells. You’ll know you’re nailing it when the soil feels damp 1-2 inches down but not waterlogged.
Spread a 2-inch layer of mulch (shredded leaves, straw, or wood chips) around the plants to retain moisture and suppress weeds. Mulch also keeps soil temperatures stable, which wild leeks love. Refresh the mulch layer in early spring to protect emerging shoots from late frosts.
☀️ Step 4: Monitor and Maintain Through the First Year
Wild leeks establish slowly, so don’t expect a harvest the first year. Instead, focus on weed control—pull any competing plants by hand, as wild leeks are sensitive to disturbance. You’ll see new shoots emerge in late spring, but resist the urge to harvest until the plants are 2-3 years old—their rhizomes need time to build energy stores.
Fertilize lightly in early spring with a balanced organic fertilizer (10-10-10) applied at half-strength, scattering it around the base and watering it in. Over-fertilizing leads to leafy growth at the expense of rhizome development, which is where the flavor lives. By their third year, your patch will spread aggressively—this is a good thing!
⏰ Step 5: Plan for Long-Term Harvest and Propagation
Wild leeks are perennial, so once established, they’ll return year after year. Harvest selectively in early spring before the plants bolt, cutting the entire leaf base just above the soil line. Leave at least half the foliage to ensure the rhizomes continue growing. You’ll notice the plants regrow quickly—this resilience is why they’re prized in woodland gardens.
Every 3-4 years, divide mature clumps in early spring to prevent overcrowding. Dig up sections of the rhizome network, replant them in new areas, and share with fellow gardeners. Wild leeks spread easily, so a little goes a long way—your patch will soon become a self-sustaining forest understory.
Tips & tricks for planting wild leeks
Here's what I've learned from years of growing my own wild leek patch—and how to avoid the mistakes that can turn a promising start into disappointment.
Soil Preparation Secret: The key to thriving wild leeks lies in that 4-inch deep trench mentioned in Step 1. This isn't just about depth—it's about creating a horizontal root environment. Wild leeks spread aggressively sideways, so this trench mimics their natural woodland habitat. I've found that adding a handful of composted leaf mold to the trench bottom gives them an extra boost of organic matter without overwhelming their delicate roots. This is particularly important if your soil is sandy—it helps retain that crucial moisture they crave.
Rhizome Division Technique: When separating those 3-4 inch clumps in Step 2, look for pieces with 2-3 buds that feel plump and firm. The buds should be white or pale pink, not brown or shriveled. I've made the mistake of using smaller pieces with only one bud—they often fail to establish. Pro tip: Soak the rhizomes in water for 15-20 minutes before planting to jumpstart root growth. This simple step can double your success rate, especially in hot, dry conditions.
Watering Wisdom: Those first 4-6 weeks of consistent moisture are non-negotiable. I've learned the hard way that wild leeks can't tolerate drying out, even briefly. The trick is to water deeply 2-3 times per week—not just a quick sprinkle. Use your finger to check moisture 1-2 inches down; it should feel like a wrung-out sponge. In extreme heat, I've had to water daily, but always let the top inch dry slightly between waterings to prevent fungal issues. A soaker hose makes this job effortless.
Mulch Strategy: That 2-inch layer of mulch isn't just decoration—it's insulation. I've found that wood chips work best because they break down slowly, adding organic matter over time. The key is to keep the mulch 2 inches away from the plant stems to prevent rot. In my climate, I refresh the mulch in early spring with a mix of shredded leaves and straw—this creates a microclimate that keeps soil temps stable, which wild leeks absolutely love. Don't skip this step, especially if you're in a region with temperature swings.
Pro Tips for Planting Wild Leeks
- Here's what I've learned from years of growing my own wild leek patch—and how to avoid the mistakes that can turn a promising start into disappointment.
- Soil Preparation Secret: The key to thriving wild leeks lies in that 4-inch deep trench mentioned in Step 1.
- Rhizome Division Technique: When separating those 3-4 inch clumps in Step 2, look for pieces with 2-3 buds that feel plump and firm.
Frequently asked questions
Got questions about growing wild leeks? You’re not alone! Here are some of the most common queries—plus straightforward answers to help you succeed.
When is the best time to plant wild leeks?
Plant wild leeks in early spring (as soon as the soil is workable) or early fall (4-6 weeks before the first frost). They thrive in cooler weather and establish roots before summer heat. Avoid planting in peak summer—transplants struggle in dry, hot conditions. Pro tip: If planting in fall, mulch heavily to protect roots through winter!
How long does it take for wild leeks to grow enough to harvest?
With patience, you’ll see small shoots in 4-6 weeks, but full maturity (harvestable bulbs) takes 2-3 years. The first year focuses on root establishment, so resist the urge to dig! After that, you can harvest selective leaves (never the whole plant) to encourage regrowth. Think of it as a long-term investment—like a forest, not a garden!
Can I grow wild leeks in containers or small spaces?
Wild leeks adapt well to containers (12+ inches deep) or tight spots like raised beds. Just ensure they get 6+ hours of sun and rich, moist soil. For containers, mix in compost and water regularly—they’re shallow-rooted but love space to spread. Bonus: Their fragrant foliage deters pests naturally!
Why are my wild leek leaves turning yellow or dying?
Yellowing leaves often signal overwatering, poor drainage, or nutrient deficiency. Check the soil—it should be moist but not soggy. Amend with compost if the soil is depleted, and ensure containers have drainage holes. Watch for:
- Mushy leaves = Too much water
- Brittle, pale leaves = Needs nitrogen (try fish emulsion)
- Wilting in heat = Mulch to retain moisture
Are wild leeks and ramps the same? Can I substitute them?
Yes! Wild leeks (Allium tricoccum) and ramps are the same plant—just different names for the same edible allium. You can substitute them 1:1 in recipes, but note that wild leeks have a milder, onion-garlic hybrid flavor compared to ramp’s sharper kick. Tip: Freeze harvested bulbs to preserve flavor for later use!
Wrapping up and next steps
Planting wild leeks is a rewarding way to add a hardy, nutrient-rich perennial to your garden—no fancy soil required! 🌱 Whether you’re foraging for transplants or growing from seed, these resilient plants thrive with minimal effort.
Start small, experiment with locations, and soon you’ll enjoy a self-sustaining harvest for years to come.
Ready to dive in? Take the next step:
- Mark your calendar for early spring or fall planting—wild leeks love the cooler months!
- Grab a shovel and a sunny spot (or dappled shade) in your yard or a container.
- Share your progress with fellow gardeners—wild leeks spread joy (and flavor!) like wildfire.