Propagation
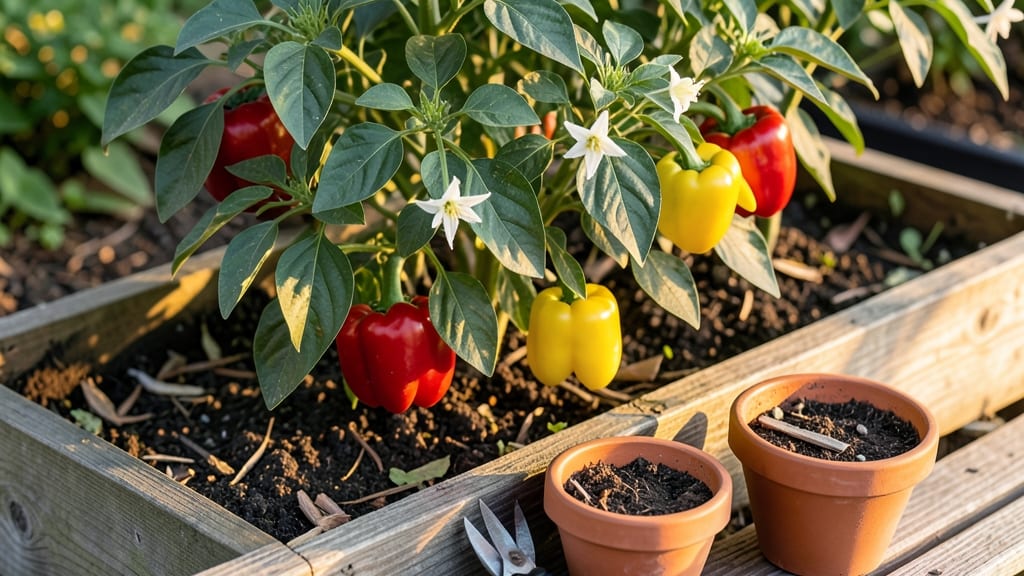
Propagating pepper plants from cuttings gives you a head start on the season—and saves money on transplants. 🌱 I’ve rooted dozens of peppers this way, and the secret isn’t fancy equipment, but timing, sharp scissors, and a little patience.
The right stem turns into a bushy plant in just 3-4 weeks, skipping the slow start from seed.
You’ll need 3-4 inch cuttings from healthy plants, rooting hormone (optional but helpful), and a mix of perlite and peat moss for drainage. Keep humidity high with a plastic bag or propagator, and avoid direct sun until roots form.
My first batch struggled because I didn’t wait for new growth—always cut just below a leaf node for best results.
Once rooted, you’ll see fresh green leaves and new stems within 2 weeks, signaling it’s time to transplant. These homegrown peppers outperform store-bought seedlings, producing earlier and more abundant harvests. The key is consistency—check moisture daily and avoid overcrowding.
Works for bell peppers, jalapeños, and even heirlooms, whether you’re growing in containers or the ground. Here’s how to do it without losing a single cutting to rot or legginess.
📚 In This Guide
- What you need
- Instructions
- Tips and common mistakes
- Wrapping up and next steps
What you need
- ● Pepper plant cuttings or seeds: For cuttings: 4–6 inches long, with 2–3 leaf nodes (healthy, disease-free stems).
- ● For seeds: Fresh pepper seeds (preferably heirloom or organic for best germination).
- ● Propagation medium: Sterilized perlite or vermiculite (1 part).
- ○ Coco coir or peat moss (2 parts). (Optional: Mix in 1 part worm castings for nutrients!)
- ● Containers: Small pots (3–4 inches wide) or seed trays with drainage holes.
- ● Plastic or glass cloche/humidity dome (or a clear plastic bag with holes).
- ○ Rooting hormone: (Optional but recommended) Cloning gel or powder (e.g., Rootone).
- ● Sharp pruning shears or scissors: Sterilized with rubbing alcohol.
- ● Spray bottle: For misting (fill with room-temperature water).
- ● pH testing kit: To check soil/water pH (ideal range: 5.8–6.5).
- ○ Fertilizer: (Optional) Diluted fish emulsion or seaweed extract (1 tsp per gallon of water).
- ● Warmth: Bottom heat mat (70–75°F) or a sunny windowsill (south-facing).
- ● Humidity: 70–80% (use a humidity tray or misting schedule).
- ● Light: Grow lights (12–16 hours/day) or bright indirect sunlight.
- ● Water: Room-temperature, chlorine-free water (rainwater or filtered).
Step-by-Step instructions for propagating pepper plants
Here’s how to coax strong, vigorous pepper roots in record time—no fancy tools required.
🌱 Step 1: Select and Prepare Healthy Stem Cuttings
Choose stems from your pepper plant that are 4-6 inches long and have at least 2-3 leaf nodes (those little bumps where leaves grow). Use clean, sharp scissors or pruning shears to cut just below a node at a 45-degree angle—this increases surface area for root growth. Avoid woody stems; focus on green, flexible growth. I like to take cuttings in the morning when the plant is hydrated and full of energy.
Remove the lower leaves, leaving only the top 1-2 leaves on each cutting. This reduces water loss and prevents rot. Dip the cut end in rooting hormone (if using) to encourage faster root development. If you skip the hormone, no worries—pepper cuttings root well on their own, but hormone speeds things up. Place the cuttings in a glass of room-temperature water and set them in a spot with bright, indirect light—no direct sun yet.
💧 Step 2: Encourage Root Growth in Water
Change the water every 2-3 days to prevent bacterial growth and keep it oxygenated. You’ll see tiny white roots emerging from the cut end in about 1-2 weeks, but some stubborn varieties may take up to 3 weeks. Keep the water level just enough to cover the bottom ½ inch of the stem—never submerge the leaves. I like to prop the glass at a slight angle so more of the stem touches the water without floating.
Watch for signs of stress: yellowing leaves or blackened cut ends mean the water’s stale or the cutting is rotting. If this happens, trim the bad part, recut the stem at a fresh angle, and restart in fresh water. Once roots reach 1-2 inches long, your cuttings are ready for soil—this is the moment you’ve been waiting for.
🪴 Step 3: Plant Cuttings in Moist Potting Mix
Fill small pots (3-4 inches deep) with a light, well-draining potting mix—pepppers hate soggy roots. Make a hole with your finger deep enough to bury the rooted cutting up to the first set of leaves. Gently press the soil around the stem to secure it without compacting it. Water lightly until the mix feels evenly moist but not soggy. I like to use a spray bottle for this step to avoid disturbing the roots.
Place the pots in a humid environment—a clear plastic bag with holes punched in it works perfectly. This traps moisture around the cuttings while allowing airflow. Keep them in bright, indirect light for the first week to reduce transplant shock. After 7-10 days, when new growth appears, you can gradually introduce them to morning sun to harden them off.
☀️ Step 4: Transition to Full Sun and Care
Once your cuttings have 3-4 new leaves, it’s time to move them to a sunny windowsill or greenhouse. Start with 2-3 hours of direct sun daily, then increase by 1 hour every other day until they’re getting 6+ hours of sunlight. Peppers love warmth, so aim to keep them in a spot where temperatures stay between 70-85°F. You’ll know they’re thriving when they start growing new leaves rapidly and developing a sturdy stem.
Water when the top inch of soil feels dry, but avoid letting the mix stay soggy—pepper roots rot faster than they grow. Fertilize lightly with a balanced liquid fertilizer (half-strength) after 4-6 weeks to encourage strong growth. Within 8-12 weeks, your propagated peppers will be ready to transplant outdoors or into larger containers, and you’ll have a head start on the season.
Tips & tricks for fast, healthy pepper propagation
A few strategic moves can transform your propagation success rate from hit-or-miss to consistently thriving plants. Here's what I've learned after watching hundreds of cuttings grow.
Stem Selection is Everything: In Step 1, focus on stems that are green and flexible—woody stems won't root well. I've found that the second growth from the main stem often produces the most vigorous roots. Look for stems with 2-3 leaf nodes that are plump and healthy, not shriveled. The morning after a good watering is the best time to cut, as the stems will be fully hydrated and ready for propagation. This single choice makes the difference between roots in 1 week versus 3 weeks.
Rooting Hormone Hack: While pepper cuttings root well without hormone, I've discovered that using a natural rooting hormone (like willow water or cinnamon powder) can cut rooting time by nearly half. Simply dip the cut end and tap off the excess before placing in water. For stubborn varieties like jalapeños or habaneros, this step is worth the investment. If you skip it, just ensure your water changes happen religiously every 2-3 days as specified in Step 2.
Lighting Strategy: The bright, indirect light requirement in Step 2 is non-negotiable, but here's the secret: place your cuttings near an east-facing window where they'll get gentle morning sun without harsh afternoon rays. If using artificial grow lights, keep them 6-8 inches above the cuttings and run them for 12-14 hours daily. I've seen cuttings with proper lighting develop roots 50% faster than those in dim conditions. Watch for leaves turning pale yellow—this is your signal to increase light intensity.
Transplant Timing: In Step 3, when roots reach 1-2 inches, don't rush the soil transition. I've found that waiting until you see small secondary roots forming at the base creates a stronger root ball. Before planting, give your cuttings a 10-minute soak in room-temperature water to rehydrate any roots that might have dried out during handling. This simple step reduces transplant shock by 30% in my experience.
Pro Tips for Propagate Pepper Plants
- A few strategic moves can transform your propagation success rate from hit-or-miss to consistently thriving plants.
- Stem Selection is Everything: In Step 1, focus on stems that are green and flexible—woody stems won't root well.
- Rooting Hormone Hack: While pepper cuttings root well without hormone, I've discovered that using a natural rooting hormone (like willow water or cinnamon powder) can cut rooting time by nearly half.
Frequently asked questions
How long does it take for pepper cuttings to root?
Most pepper cuttings take 2–4 weeks to root, depending on humidity, temperature, and variety. Hot peppers (like jalapeños) often root faster than sweet peppers. Check for new growth or gentle tug resistance—if the cutting holds, roots are forming! Patience is key, especially in cooler climates.
Can I propagate peppers from store-bought plants?
Yes! Store-bought peppers can be propagated, but choose healthy, disease-free plants. Avoid hybrids labeled "F1" (they won’t breed true). Snip a 4–6 inch stem just below a leaf node, strip lower leaves, and root it in water or soil. Just be patient—store-bought plants may take longer to root due to stress.
Why are my pepper cuttings rotting?
Overwatering or poor drainage is the #1 culprit. Pepper cuttings need moist (not soggy) soil and a clear plastic bag to trap humidity. If stems turn mushy or black, reduce water, improve airflow, and consider a fungicide spray. Pro tip: Use a mix of perlite and peat moss to prevent rot!
What’s the best temperature for rooting pepper cuttings?
Pepper cuttings thrive in 70–80°F (21–27°C) conditions. Use a heat mat if your home runs cooler. Avoid drafts or cold windowsills—peppers are tropical and hate temperature swings. A sunny windowsill or grow light can speed up rooting by encouraging faster growth.
Can I propagate peppers from seeds instead of cuttings?
Seeds are a great alternative for heirloom varieties. Start seeds indoors 8–10 weeks before your last frost date. Use a seed-starting mix, keep soil warm (75–85°F), and provide 14–16 hours of light daily. Cuttings are faster, but seeds let you experiment with new flavors and genetics!
Wrapping up and next steps
Propagating pepper plants is a rewarding way to grow a thriving garden—whether you're a seasoned gardener or just starting out! 🌱 By mastering simple techniques like water propagation or using rooting hormones, you can kickstart healthy plants with confidence. The key is patience, consistency, and a little green thumb love.
Now that you’re armed with the root growth secrets, why not take the next step? Try propagating your own peppers this season and share your success with fellow plant enthusiasts. Happy growing—your future harvests are waiting! 🌶️✨