Propagation
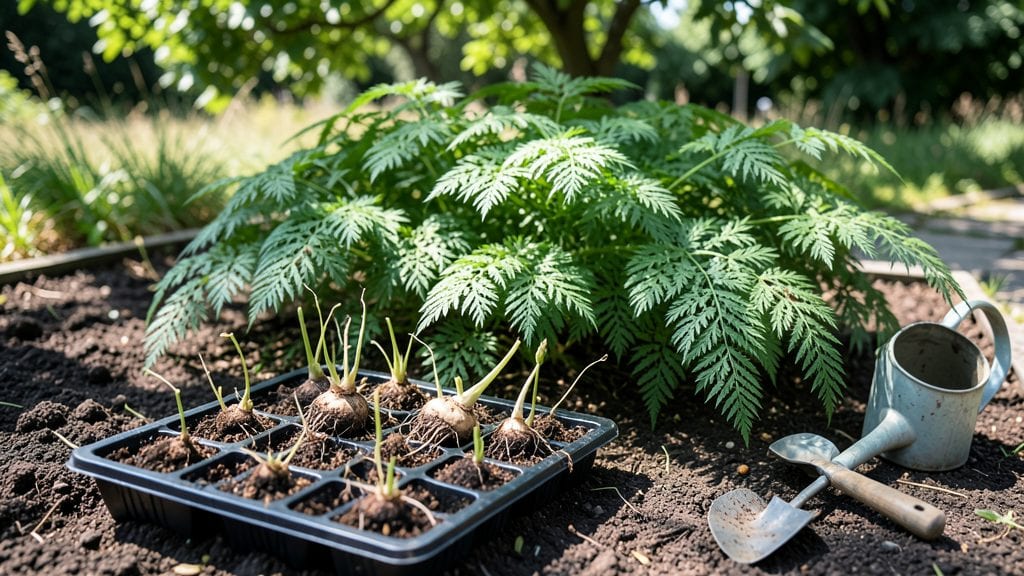
Propagating asparagus plants from crowns lets you grow your own harvests in just 3-4 years instead of waiting a decade for seeds. ✨ The secret lies in those thick, woody roots—when you divide them correctly, each section grows into a new, productive plant.
I’ve expanded my patch this way twice, and now I’ve got more spears than I know what to do with.
You’ll need a sharp spade, well-draining soil, and patience—this isn’t a quick fix, but it’s worth it. The best time to divide is in early spring or fall, when the plant isn’t actively growing.
Simply dig up a mature crown, slice it into 3-4 inch sections with at least one bud per piece, and plant them 6-8 inches deep. No fancy equipment needed, just elbow grease and a sunny spot.
Once planted, your new crowns will focus on root growth for the first year, sending up ferns in year two, and finally delivering those prized spears in year three. The soil stays loose and moist, and you’ll avoid the heartbreak of store-bought plants that never quite deliver.
By harvest time, you’ll have a thriving patch that keeps giving for decades.
Works in zones 3-9, though warmer climates may need winter protection. The key is keeping weeds at bay and watering consistently—no need for fancy fertilizers at first. Here’s how to make it happen without the guesswork.
📚 In This Guide
- What you need
- Instructions
- Tips and common mistakes
- Wrapping up and next steps
What you need
- ● Asparagus crowns: 1-2 healthy, disease-free crowns (preferably 1-year-old or older, with 3-5 strong ferns from the previous season).
- ● Shovel or spade: A sturdy garden tool for digging trenches (12-18 inches deep).
- ○ Garden fork: Optional but helpful for loosening soil before planting.
- ● Compost or well-aged manure: 2-3 gallons to enrich the soil (asparagus loves nutrients!).
- ● Organic mulch: Straw, wood chips, or compost (2-3 inches thick) to retain moisture and suppress weeds.
- ● Garden hose or watering can: For thorough watering after planting.
- ● Plant labels or markers: To track varieties (e.g., "Jersey Knight" or "Mary Washington").
- ● Gloves: To protect your hands while handling soil and crowns.
- ● Soil test kit: To check pH (ideal range: 6.5-7.5) and adjust if needed.
- ● Slow-release fertilizer: (e.g., 10-10-10) for a nutrient boost post-planting.
- ● Row cover or frost cloth: To protect young plants in early spring or late fall.
- ● Pruners: For trimming damaged ferns or removing weeds.
- ● Wheelbarrow: For mixing soil amendments if you’re planting multiple crowns.
Step-by-step instructions for propagating asparagus plants
Here's how to grow new asparagus plants from existing crowns—your future harvests start underground.
🌱 Step 1: Select and Prepare Healthy Asparagus Crowns
Choose a mature asparagus patch with plants that have produced well for at least 3 years. Look for crowns with thick, fleshy roots and multiple healthy shoots. In early spring, before new shoots emerge, carefully dig up a section of the crown with a sharp spade, keeping as much of the root system intact as possible.
Gently shake off excess soil to reveal the crown. You'll see a cluster of white, carrot-like roots and small buds—these are the growth centers. Cut the crown into 4-inch sections, ensuring each piece has at least 3-4 buds and some roots attached. This ensures each new plant has enough energy to establish itself.
✂️ Step 2: Divide and Treat Crown Sections
Use a clean, sharp knife to separate the crown into individual sections. Dip each cut section into a powdered rooting hormone to encourage faster root growth. This step isn’t mandatory, but it significantly boosts success rates, especially in cooler climates. Place the treated sections in a shaded, dry area for 24 hours to allow the cuts to callus over slightly.
Here’s the thing—don’t rush this step. If you plant immediately after cutting, the exposed roots can dry out or rot. The callusing process helps protect the crowns until they’re ready for planting. You’ll know they’re ready when the cut edges look slightly dry and firm to the touch.
🪴 Step 3: Plant the Crown Sections in a Nursery Bed
Prepare a well-draining nursery bed in a location that receives full sun but stays moist. Loosen the soil to a depth of 12 inches and mix in 2 inches of compost to provide nutrients without overwhelming the young roots. Dig a trench 6 inches deep and 12 inches wide, spacing the sections 18 inches apart in the trench.
Place each crown section in the trench with the buds facing upward and the roots spread out naturally. Cover the crowns with 2 inches of soil, leaving the buds exposed. Water gently but thoroughly to settle the soil around the roots. The goal is to keep the soil evenly moist but not soggy—you’ll see the first shoots emerge in 2-3 weeks if conditions are right.
☀️ Step 4: Maintain the Nursery Bed for Establishment
Keep the nursery bed consistently moist for the first 6-8 weeks, watering deeply every 2-3 days until the soil feels dry 1-2 inches below the surface. Avoid overhead watering, which can spread disease. Once the shoots reach 6 inches tall, gradually reduce watering to encourage deeper root growth.
Mulch the bed with 2 inches of straw to retain moisture and suppress weeds. Asparagus is a patient plant—it won’t produce spears for 2-3 years, but the roots will establish themselves fully if given the right conditions. You’ll know they’re thriving when you see healthy, dark green foliage and new shoots appearing in spring.
⏰ Step 5: Transplant to Permanent Location After 1 Year
After 1 growing season, the crown sections will have developed a strong root system. In early spring, carefully dig up the established plants and transplant them to their permanent location. Choose a spot with full sun and well-draining soil, amended with compost to a depth of 12 inches. Space the crowns 12-18 inches apart in rows 3 feet apart to allow for future growth.
Water deeply after transplanting and keep the soil moist but not waterlogged for the first 2 weeks. The first year in the new location is all about root development—do not harvest any spears during this time. Instead, let the plants focus on building a robust underground system for future harvests. You’ll see the payoff in years 3-5, when the plants reward you with abundant, tender spears.
Tips & tricks for propagating asparagus plants
These underground gardening secrets will help you grow thriving asparagus plants from crowns with minimal fuss.
The Right Time Matters: Timing is everything when dividing asparagus crowns. Aim for early spring, right before shoots emerge but while the ground is still workable. I've learned the hard way—dividing in late spring or summer stresses the plants and gives weeds a chance to take over your nursery bed. The 24-hour callusing period in Step 2 is non-negotiable for cooler climates, but in warmer areas, you can reduce this to 12 hours if you're working with fresh cuts.
Root Hormone Hack: While powdered rooting hormone isn't required, I've found it makes a noticeable difference in root development, especially for gardeners in cooler zones. If you don't have it, try this: Mix 1 tablespoon of honey with 1 cup of water and use that as a natural alternative. The sugar helps stimulate root growth while protecting against rot during that critical 24-hour callusing period.
Nursery Bed Setup: The 6-inch deep trench in Step 3 might seem shallow, but it's perfect for asparagus roots which naturally spread horizontally. I like to add a handful of perlite to the compost mix when preparing the bed—it improves drainage without compromising moisture retention. This small adjustment has helped me avoid soggy soil issues that can lead to root rot.
Watering Wisdom: Those first 6-8 weeks are critical for establishing new roots. I've found that using a soaker hose buried slightly below the surface keeps the soil evenly moist without wetting the foliage (which spreads disease). Once shoots reach 6 inches, I switch to watering at the base rather than overhead—this simple change has dramatically reduced fungal issues in my nursery beds.
Pro Tips for Propagating Asparagus Plants
- These underground gardening secrets will help you grow thriving asparagus plants from crowns with minimal fuss.
- The Right Time Matters: Timing is everything when dividing asparagus crowns.
- Root Hormone Hack: While powdered rooting hormone isn't required, I've found it makes a noticeable difference in root development, especially for gardeners in cooler zones.
Frequently asked questions
Got questions about propagating asparagus? You’re not alone!
Here are answers to the most common concerns—from timing to troubleshooting—so you can grow your own asparagus patch with confidence.
How long does it take for asparagus crowns to grow after planting?
Patience is key! Asparagus crowns take 2–3 years before producing harvestable spears. In the first year, focus on establishing roots—don’t harvest anything. By year two, you’ll see small shoots, and year three is when the real payoff begins. Think of it as an investment for future feasts!
What’s the best time of year to plant asparagus crowns?
Plant crowns in early spring (as soon as the soil is workable, around 50°F/10°C) or fall (6–8 weeks before the first frost). Avoid planting in summer heat—crowns need cool soil to root well. Pro tip: If your zone has harsh winters, spring planting gives crowns a head start.
Can I propagate asparagus from seed instead of crowns?
Yes, but it’s a much slower process! Seeds take 2–3 years just to produce crowns (vs. 1 year for crowns), and spears won’t appear until year 4 or 5. For most gardeners, buying established crowns is the smarter, faster choice. Save seeds for experimenting or heirloom varieties.
Why aren’t my asparagus crowns sprouting after planting?
Common culprits include too-deep planting (crowns need to sit just below the soil surface), poor drainage (root rot sets in quickly), or frost damage if planted too early. Check soil moisture (keep it evenly damp) and ensure crowns aren’t buried under mulch. If all else fails, test a new spot—some soils may not suit asparagus.
How do I know if my asparagus plants are healthy?
Healthy asparagus has vibrant green ferns (not yellowing), firm crowns (no mushy spots), and no pests like asparagus beetles or aphids. Monitor for spreading ferns—they signal strong growth! If ferns die back early, it could mean drought, disease, or over-harvesting. A quick soil test for pH (aim for 6.5–7.5) can also reveal hidden issues.
Wrapping up and next steps
Propagating asparagus from crowns is a rewarding way to expand your garden while enjoying delicious, homegrown harvests for years to come! 🌱 With patience and the right techniques, you’ll soon have lush, thriving plants ready to produce tender spears.
Now that you’re armed with the knowledge, take the next step—dig in, plant those crowns, and watch your asparagus patch grow into a bountiful future crop!
Happy gardening, and may your spears be plentiful! 🌿