Propagation
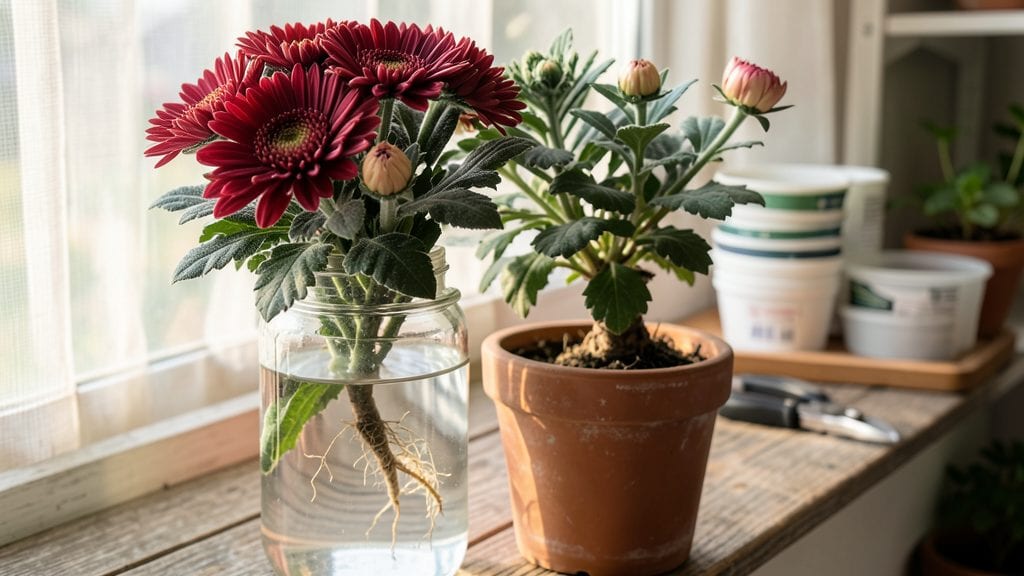
Propagating chrysanthemum plants through layering is the secret weapon for multiplying your favorite blooms without the stress of cuttings—no greenhouses or fancy tools required. 🌿 I’ve doubled my garden’s chrysanthemums in just one season using this foolproof method.
The key is timing it right when the plants are actively growing but before they flower, usually in early summer.
You’ll need a few basic supplies: sharp pruning shears, rooting hormone (optional but helpful), and a small pot for the rooted layer. The real magic happens when you bend a healthy stem down, make a small cut, and bury it just enough to encourage roots to form.
It’s like giving your plant a shortcut to grow new roots while staying connected to its original energy source.
Once rooted—usually in about 6-8 weeks—you’ll have a thriving new plant ready to transplant. The best part? These layered chrysanthemums bloom just as vibrantly as their parents, and they’re far hardier than cuttings because they’ve already established their own root system. No more wimpy new growth—just strong, reliable plants.
This method works equally well for indoor potted chrysanthemums or outdoor garden varieties. Just adjust your timing based on your climate—cooler regions might need to start a little later in the season. Ready to turn one plant into a dozen without the fuss?
📚 In This Guide
- What you need
- Instructions
- Tips and common mistakes
- Wrapping up and next steps
What you need
- ● Chrysanthemum plant: A healthy, non-flowering stem (6–12 inches long) with at least 3–4 leaf nodes.
- ○ Rooting hormone (optional but recommended): A powder or gel (e.g., Clonex or Rootone) to boost root growth.
- ● Plastic or metal tubing: A 1–2 inch diameter tube (e.g., plastic plant propagators or PVC pipes) to create a humid environment.
- ● Moisture-retentive medium: Perlite, vermiculite, or a mix of 50% peat moss + 50% perlite (sterilized).
- ● Sharp pruning shears or knife: Clean and sterilized to avoid disease.
- ● Twist ties or plant clips: To secure the stem in place (e.g., plastic plant ties).
- ● Spray bottle: With water to keep the cutting hydrated.
- ● Garden gloves: To protect your hands from soil and sharp edges.
- ● Small pot or tray: For the rooted cutting (4–6 inches in diameter).
- ○ Clear plastic wrap (optional): To create a mini greenhouse effect if tubing isn’t available.
- ● Fertilizer (low-nitrogen, e.g., 5-10-5): For post-rooting care (diluted to half-strength).
- ● Warmth: Ideal temperature range of 65–75°F (18–24°C) for rooting.
- ● Indirect light: Bright but not direct sunlight (e.g., a shaded windowsill or grow light).
- ● Humidity: High humidity (70–80%)—achieved naturally with tubing or plastic wrap.
Step-by-Step instructions for propagating chrysanthemum plants
Here's the simple layering method I use to multiply chrysanthemums without stressing the parent plant.
🌱 Step 1: Select Healthy Mums and Prepare for Layering
Choose a mature chrysanthemum plant with strong, flexible stems that haven't flowered yet. The best candidates have stems about 1/4 inch thick and several leaf nodes along their length. Avoid using stems that are woody or brittle—they won't root well.
Look for stems that naturally bend toward the ground. If none exist, gently bend a healthy stem downward until it touches the soil. You'll need 4 plants for this method, so select four stems per plant if possible. Remove any lower leaves from the stem that will touch the soil—this prevents rot when buried.
🌿 Step 2: Create the Layering Site
Dig a small trench about 2 inches deep along the edge of the plant's root zone. The trench should be just wide enough to accommodate the stem you're layering. Keep the soil moist but not soggy—chrysanthemums hate waterlogged roots. If your soil feels dry, water it lightly before proceeding.
Here's the trick: gently bend the selected stem downward into the trench, creating a gentle curve rather than a sharp bend. Secure the stem in place with a small U-shaped wire or a bent piece of rebar. This keeps the stem in contact with the soil without damaging it. Cover the buried portion with about 1 inch of soil.
💧 Step 3: Encourage Root Development
Water the entire plant thoroughly after layering to settle the soil around the buried stem. You'll want the soil to stay consistently moist but not waterlogged—think of it as damp like a wrung-out sponge. Check the moisture daily by sticking your finger about 1 inch into the soil. If it feels dry, water lightly.
In about 4-6 weeks, you should see new growth emerging from the buried stem. This is your signal that roots are forming. Watch for tiny leaves or shoots pushing through the soil—this is the moment you've been waiting for. If no growth appears after 6 weeks, gently uncover the stem and check for signs of rot or damage.
✂️ Step 4: Separate the New Plants
Once the layered stem has developed its own roots and shows 3-4 sets of leaves, it's ready to separate. Carefully dig around the base of the new plant to expose its roots. You'll see a network of fine white roots holding the stem in place. Use a small trowel to gently lift the new plant from the trench.
Shake off excess soil to check for root development. Healthy roots should be white or pale yellow and about 2-3 inches long. If the roots are sparse or brown, the plant may need more time. Once you're satisfied with root growth, transplant the new chrysanthemum to its permanent location, watering it thoroughly to help it establish.
☀️ Step 5: Maintain New Plants Through First Season
Keep the newly propagated chrysanthemums in partial shade for the first 2 weeks to reduce stress. Gradually introduce them to more sunlight over the next week. Mums need 6 hours of sunlight daily to thrive, but too much sun too soon can scorch young leaves.
Water the new plants when the top 1 inch of soil feels dry. Avoid getting water on the leaves to prevent fungal diseases. Fertilize lightly with a balanced, water-soluble fertilizer every 4-6 weeks during the growing season. By next year, your propagated mums will be as strong and vibrant as their parent plant.
Tips & tricks for perfect chrysanthemum propagation
Here's what I learned after propagating dozens of mums—these little tricks make all the difference between success and frustration.
Stem Selection Secret: In Step 1, look for stems with a slight bend already—these naturally root better. If you need to bend stems, do it gradually over a few days to avoid breaking them. I've found that stems with a slight curve already have a head start in root formation. Also, avoid stems with flowers or buds—they'll focus energy on blooming instead of rooting.
Layering Technique: When creating your 2-inch trench in Step 2, make it just wide enough for the stem to lie comfortably without being squeezed. The buried portion should have at least 2-3 leaf nodes covered with soil—this is where roots will form. I use a small garden fork to loosen the soil before digging the trench, which helps roots establish more easily.
Moisture Management: The key to root development in Step 3 is consistent moisture without waterlogging. I've had the best success using a spray bottle to mist the soil daily instead of watering from above. This keeps the soil evenly damp without disturbing the buried stems. You'll know you've got it right when the top inch of soil feels like a wrung-out sponge.
Root Development Timeline: Don't be discouraged if you don't see new growth by week 4—some mums take the full 6 weeks. I've had success with both early and late rooters. If you're in doubt after 6 weeks, gently uncover the stem and check for signs of rot. Healthy roots should be white and firm, not brown and mushy.
Pro Tips for Propagating Chrysanthemum Plants
- Here's what I learned after propagating dozens of mums—these little tricks make all the difference between success and frustration.
- Stem Selection Secret: In Step 1, look for stems with a slight bend already—these naturally root better.
- Layering Technique: When creating your 2-inch trench in Step 2, make it just wide enough for the stem to lie comfortably without being squeezed.
Frequently asked questions
Got questions about propagating chrysanthemums? You’re not alone! Here are some of the most common concerns—plus straightforward answers to help you succeed.
When is the best time to propagate chrysanthemums?
The ideal window is late spring to early summer (May–June in most regions). This gives young plants enough time to establish roots before winter. Avoid propagating in extreme heat or cold—aim for mild, stable temperatures (60–75°F) for best results.
What if my cuttings rot instead of rooting?
Rot is usually caused by too much moisture or poor airflow. Use a well-draining mix (like perlite + peat) and keep humidity high but not soggy. Dip cuttings in rooting hormone and avoid overwatering—let the top inch dry out between waterings.
Can I propagate chrysanthemums from store-bought flowers?
Yes! If the plant is healthy, snip a 4–6 inch stem just below a leaf node (where roots form). Remove lower leaves and place in water or moist soil. Store-bought mums often grow from cuttings, but avoid treated or diseased plants—they won’t root well.
How long does it take for chrysanthemum cuttings to root?
Most cuttings show roots in 2–4 weeks, but patience is key! Keep them in indirect light and maintain humidity (a plastic bag or propagator helps). Once roots are 1–2 inches long, transplant to soil—just don’t rush it!
Are there alternatives to layering for propagation?
Besides layering, try:
- Stem cuttings: Dip in rooting hormone, plant in moist soil, and cover with a plastic dome.
- Division: Split mature clumps in early spring and replant sections.
- Water propagation: Place cuttings in water until roots sprout (change water every 3 days).
Wrapping up and next steps
Propagating chrysanthemums through layering is a simple, stress-free way to expand your garden without breaking the bank! 🌱 By following these steps—selecting healthy stems, creating the perfect bend, and nurturing new roots—you’ll soon enjoy flourishing, identical plants that thrive with minimal effort.
Whether you’re a beginner or a seasoned gardener, this method proves that patience and a little creativity can yield beautiful results.
Now that you’re armed with the know-how, grab those shears and get layering! Start with just one plant, and soon, you’ll have a vibrant chrysanthemum family to share—or even sell at your local plant swap. Happy gardening! 🌸