Propagation
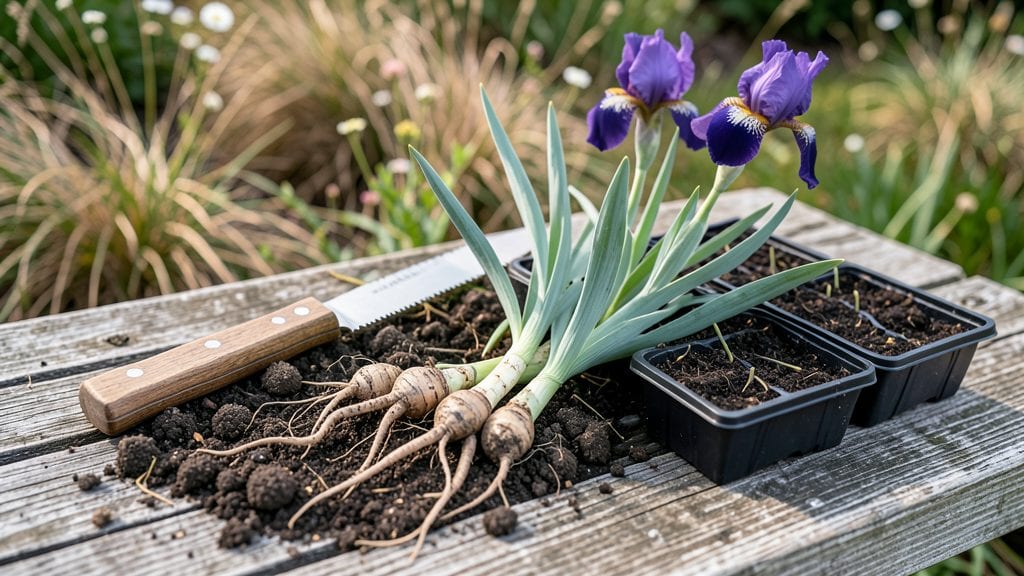
Propagating iris plants through rhizome division is how I turned a single clump into a showstopping border that blooms from spring through summer.
The key isn’t just digging up plants—it’s timing the division when the foliage has faded but before new growth starts, usually in late summer or early fall.
I’ve divided irises for years, and the secret lies in handling those thick, fleshy rhizomes with care to avoid damaging the delicate roots.
You’ll need just a few tools: a sharp spade, clean pruners, and a 50-50 mix of compost and sand for replanting. The process takes about 30 minutes for a mature clump, and you’ll end up with 3-5 healthy divisions ready to bloom next season.
The best part? Each division establishes quickly, so you won’t wait years to see those iconic sword-shaped leaves and vibrant blooms.
What you’ll get is a multi-season display of irises without buying new plants. The divisions take root within weeks, and by next spring, you’ll have lush foliage and dozens of blooms where there was once just one.
Just avoid overwatering—irises hate soggy roots—and plant the rhizomes so the tops peek above soil level for sunlight.
Works for bearded, Siberian, and Louisiana irises alike, and the same method applies whether you’re refreshing an old garden bed or expanding your collection. Here’s how to do it right the first time—no guesswork, just reliable results.
📚 In This Guide
- What you need
- Instructions
- Tips and common mistakes
- Wrapping up and next steps
What you need
- ● Mature iris rhizomes: Healthy, established rhizomes (at least 2–3 years old) with fan-like leaves and dormant buds (eyes). Aim for 3+ rhizomes per plant for successful division.
- ● Sharp, sterilized knife or pruners: A clean, stainless steel knife or pruning shears (disinfect with rubbing alcohol before use).
- ● Garden gloves: Heavy-duty gloves to protect hands from rhizome sap (which can irritate skin).
- ● Well-draining potting mix: A blend of 50% garden soil, 30% perlite, and 20% compost (or a cactus/succulent mix). Avoid heavy clay soil.
- ● Containers or garden bed: For pots: 6–8" diameter containers with drainage holes (one rhizome per pot).
- ● For in-ground planting: A sunny spot with 6+ hours of sunlight daily and loose, well-drained soil.
- ● Mulch: Organic mulch (straw, pine bark, or shredded leaves) to retain moisture and regulate soil temperature.
- ● Watering can or hose with a gentle spray nozzle: For hydrating rhizomes without displacing them.
- ● Rooting hormone: A powder or gel to boost root growth (especially useful for smaller rhizome sections).
- ● Shade cloth: Lightweight fabric (30–50% shade) to protect newly planted rhizomes from intense sun for the first 1–2 weeks.
- ● Soil solarizer: A plastic sheet to solarize soil (kill pathogens) before replanting if your garden soil is diseased.
- ● Labels & markers: To track iris varieties (especially if propagating multiple types).
Step-by-Step instructions for propagating iris plants
Here's how to multiply your iris garden effortlessly using rhizome division—no fancy tools or expensive supplies needed.
Choose Mature Rhizomes for Division
Select healthy iris rhizomes that are at least 3-4 years old and show signs of maturity. Look for thick, firm stems with multiple fan-shaped leaves and at least one dormant bud at the base. These are your best candidates for propagation. Avoid dividing any rhizomes that look diseased, mushy, or have fewer than three leaves—these won't regrow well.
Timing matters too. The best time to divide irises is in early spring, just as new shoots begin to emerge but before the foliage gets too tall. This gives the new divisions plenty of time to establish roots before winter. If you must divide later in the season, do it in early fall, allowing at least 6 weeks before the first frost.
Dig Up and Prepare the Rhizomes
Use a garden fork or spade to carefully dig up the entire clump of iris rhizomes. Work gently to avoid damaging the fleshy stems. Once unearthed, rinse off the soil with a gentle stream of water to reveal the full structure of the rhizome network. This helps you see where to make clean cuts for division.
Lay the rhizomes out on a clean, flat surface to examine. You'll notice some sections have multiple fans of leaves while others have just one or two. The goal is to separate each section so it has at least one healthy fan of leaves and one dormant bud. Use a sharp, sterilized knife to make clean cuts between these sections, ensuring each division has a portion of the rhizome attached.
Inspect and Trim Each Division
Examine each division closely. Trim away any rotted, soft, or discolored sections of the rhizome with your sterilized knife. Healthy rhizome tissue should feel firm and slightly leathery to the touch. If you see any signs of mold, slime, or insect damage, discard that division immediately to prevent spreading disease to your other plants.
Next, reduce the leaf fan on each division to about 6 inches in length. This might seem drastic, but shorter leaves help the plant focus its energy on root growth rather than supporting excessive foliage. Leave the dormant bud intact—this is where the new growth will emerge in spring.
Replant the Divisions Properly
Choose a sunny location with well-draining soil for replanting your iris divisions. Irises hate soggy roots, so if your soil is heavy clay, mix in 2-3 inches of coarse sand or perlite to improve drainage. Dig a hole that’s just deep enough to bury the top of the rhizome 1 inch below the soil surface. Planting too deep can cause rot, while planting too shallow may expose the rhizome to extreme temperatures.
Space each division 12-18 inches apart to give them room to grow. Water lightly after planting to settle the soil, but avoid overwatering. The key is to keep the soil moist but not soggy for the first 2-3 weeks while the roots establish. Once the new growth appears in spring, you can water normally, allowing the soil to dry out slightly between waterings.
Monitor and Maintain New Plants
In the first growing season, your newly divided irises may not bloom as heavily as mature plants. That’s normal—focus on helping them build strong roots and foliage. Fertilize lightly with a balanced, low-nitrogen fertilizer in early spring to encourage healthy growth without promoting excessive leaf production at the expense of blooms.
Watch for signs of stress, like yellowing leaves or wilted foliage, which can indicate overwatering or poor drainage. If you notice any divisions struggling, gently loosen the soil around them to encourage root growth. By the second or third year, your propagated irises should establish fully and produce vibrant blooms just like their parent plants.
Tips & tricks for perfect iris propagation
These simple yet essential tips will help you avoid common pitfalls and maximize your success when dividing iris rhizomes.
Timing is Everything: Early spring is ideal for dividing irises because the new growth hasn't yet demanded too much energy from the rhizomes. If you must divide in fall, schedule it at least 6 weeks before the first frost to allow roots to establish before winter dormancy. I've learned the hard way that rushing this process can leave your new divisions vulnerable to cold damage.
The Technique That Changed Everything: When making your cuts in Step 2, use a sterilized knife to ensure clean divisions. Each section should have at least one healthy fan of leaves and one dormant bud. I recommend laying the rhizomes on a clean towel to examine them—this makes it easier to spot the natural separation points between sections. Avoid tearing the rhizome, as this can introduce disease and slow down root growth.
Healthy Roots Start Here: In Step 3, trimming the leaves to about 6 inches might seem counterintuitive, but it's crucial. Shorter leaves reduce the plant's focus on foliage and redirect energy toward root development. I've seen dramatic differences in establishment rates when I followed this step versus leaving leaves full-length—it's worth the slight shock to the plant.
Planting Depth Matters: Burying the top of the rhizome just 1 inch below the soil surface in Step 4 is critical. Too deep and you risk rot; too shallow and the rhizome may be exposed to temperature extremes. I like to use a small ruler to measure the depth—it's a small detail that makes a big difference in survival rates.
Pro Tips for Propagating Iris Plants
- These simple yet essential tips will help you avoid common pitfalls and maximize your success when dividing iris rhizomes.
- Timing is Everything: Early spring is ideal for dividing irises because the new growth hasn't yet demanded too much energy from the rhizomes.
- The Technique That Changed Everything: When making your cuts in Step 2, use a sterilized knife to ensure clean divisions.
Frequently asked questions
Got questions about propagating iris plants? You’re not alone! Here are some of the most common queries—plus straightforward answers to help you grow like a pro.
When is the best time to divide iris rhizomes?
The ideal window is late summer to early fall (August–September in most climates) when foliage has died back but before the first frost. This gives rhizomes time to establish roots before winter. If you miss this, spring (March–April) is a backup option—just be ready for slightly slower growth.
Why aren’t my new iris divisions blooming?
Patience is key! Iris rhizomes need 1–2 years to mature and bloom after division. Focus on healthy foliage first—well-established plants (with plump rhizomes and strong roots) will reward you with vibrant blooms next season. Overcrowding or poor soil can also delay flowers, so ensure your irises have space to thrive.
Can I propagate iris from seeds instead of rhizomes?
Yes, but it’s a slower process! Seeds take 3–5 years to flower, while rhizome division yields blooms in 1–2 years. If you’re eager for color, stick with divisions. For fun or rare hybrids, try seeds—just plant them in pots first to control germination conditions (they need cold stratification for best results).
How do I know if my iris rhizomes are healthy enough to divide?
Healthy rhizomes are firm, plump, and 1–2 inches thick, with no soft spots or mold. Look for fan-shaped leaves (a sign of vitality) and white, fibrous roots at the base. Avoid dividing rhizomes that feel shriveled or hollow—they won’t regrow well. A quick sniff test helps too: rotten rhizomes smell funky!
What’s the best soil mix for newly divided iris rhizomes?
Irises love well-draining soil—mix equal parts garden soil, coarse sand, and compost (or perlite) to prevent rot. Avoid heavy clay or waterlogged spots. Plant rhizomes partially exposed (top should peek above soil) in a sunny location. Mulch lightly after planting to retain moisture without smothering them.
Wrapping up and next steps
Propagating iris plants through rhizome division is a rewarding way to expand your garden while ensuring vibrant, year-round blooms! 🌸 With the right tools, timing, and care, you can easily multiply your irises and share them with fellow gardening enthusiasts.
Whether you're a beginner or a seasoned green thumb, this method is simple, cost-effective, and incredibly satisfying.
Now that you’re armed with the secrets to successful iris propagation, why not take the next step? Try dividing your irises this season and watch your garden flourish with bold colors and lush foliage. Happy gardening—your future blooms will thank you! 🌿