Pruning
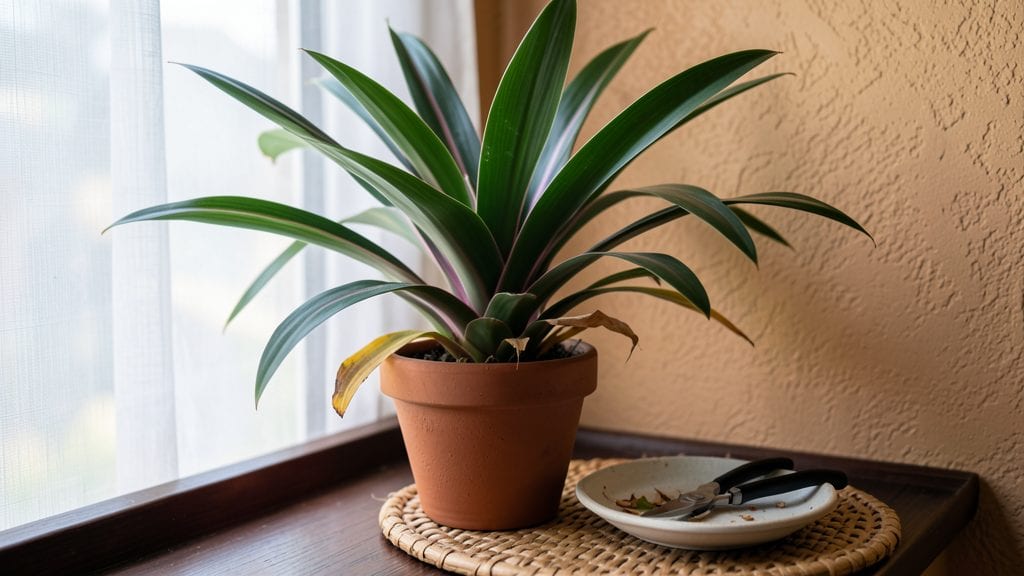
Pruning a ti plant transforms it from a scraggly mess into a year-round showstopper with just three well-placed cuts. 🌿 I’ve watched my own ti plant go from a tangled, overgrown nightmare to a lush, balanced beauty—all by following a few simple rules.
The key isn’t how much you cut, but where and when you do it.
You’ll need sharp pruners, a clean cutting surface, and about 15 minutes of focused work. Timing matters: prune in late winter to encourage fresh spring growth, or lightly trim leggy branches in summer to keep it compact.
Avoid cutting into old wood—focus on new, flexible stems where the plant can regrow fastest.
The results are shocking: thicker foliage, more vibrant leaves, and a shape that actually fits your space. My ti plant now has three distinct tiers of branches instead of one lanky trunk, and the leaves stay glossy and healthy all year.
The best part? You can even propagate those cuttings to grow new plants.
This method works for both young and mature ti plants, whether you’re shaping a small potted tree or training a larger landscape specimen. The only mistake to avoid? Over-pruning—ti plants bounce back, but they won’t forgive repeated harsh cuts. Start small, observe how it responds, and adjust as you go.
📚 In This Guide
- What you need
- Instructions
- Tips and common mistakes
- Wrapping up and next steps
What you need
- ● Sharp pruning shears – Bypass-style (clean cuts, no crushing!), 6-8" blades for medium stems.
- ● Hand pruners – For thinner stems (2-3" blades), sterilized with rubbing alcohol.
- ● Rubbing alcohol (70% or higher) – 4 oz (120ml) for sterilizing tools.
- ● Disposable gloves – 1 pair (nitrile or latex-free) to protect hands from sap.
- ○ Pruning saw (optional but helpful) – For thick, woody stems (10" blade, fine-tooth).
- ○ Horticultural sealant (optional) – Fast-drying (e.g., tree wound pruning paste), 4 oz (120ml) for sealing cuts.
- ● Newspaper or drop cloth – 1 large sheet to contain debris.
- ● Rooting hormone – Gel or powder for propagating cuttings (e.g., Clonex).
- ● Small pots with drainage – 4-6" diameter for cuttings (cactus/succulent pots work!).
- ● Spray bottle – For misting cuttings (8 oz, fine-mist nozzle).
- ● Garden twine or clips – To secure props for air-layering (if expanding your plant collection!).
- ● Digital timer – For tracking light exposure (if propagating indoors).
Instructions for pruning your ti plant for year-round growth
This is how I keep my ti plant full and vibrant—no dead branches, just lush, healthy foliage.
✂️ Step 1: Identify and Remove Dead or Damaged Leaves
Start by scanning your ti plant for any leaves that look crispy, brown, or yellowed at the edges. These are your first targets—they’re not coming back, and keeping them only stresses the plant. Use clean, sharp pruning shears to snip off these leaves at the base of the stem, making a clean cut just above a leaf node if possible.
I always check the undersides of leaves too—sometimes pests or disease start there before spreading. If you spot any black spots or webbing, remove that leaf immediately and isolate it from the plant. Healthy leaves should feel firm and slightly leathery, with a vibrant green color. If a leaf feels mushy or falls off with the slightest touch, it’s time to go.
✂️ Step 2: Trim Leggy or Overgrown Stems
Ti plants can get leggy, especially if they’re not getting enough light. Look for stems that are stretching too far between leaves or growing in a weak, sprawling manner. These stems won’t support new growth well, so you’ll want to cut them back to encourage bushier, stronger growth.
Make your cuts just above a leaf node—this is where new growth will sprout. Aim to trim back about one-third of the leggiest stems to start, but don’t go overboard. You’ll see new shoots emerging within 2-4 weeks if the plant is healthy. If you’re unsure where to cut, err on the side of leaving a little extra stem—you can always trim more later.
✂️ Step 3: Shape the Plant for Fullness and Airflow
Now it’s time to shape your ti plant like a pro. Step back and look at the overall form—do you see any bare spots or uneven growth? Focus on filling those gaps by trimming back overcrowded areas. Cut back the longest stems in the center to allow light and air to reach the inner leaves, which prevents mold and encourages even growth.
I like to aim for a balanced shape, almost like a rounded bush. You don’t need to be perfect—ti plants are forgiving. Just avoid cutting into the thick, woody stems; focus on the softer, leafier growth. After shaping, your plant should look fuller and more compact. Water lightly afterward to help it recover from the pruning.
⏰ Step 4: Maintain Year-Round with Seasonal Adjustments
Ti plants don’t have a strict "pruning season," but I like to do a light trim every 3-4 months to keep them looking their best. In the warmer months, you might need to prune more often because growth speeds up. In winter, when growth slows, a minimal trim is enough—just remove any dead or tired leaves.
Here’s the thing—ti plants are tough, but they respond best to consistent care. After pruning, give your plant a little extra attention for a week or two. Keep the soil lightly moist but not soggy, and place it in bright, indirect light. You’ll see new leaves emerging within 4-6 weeks, and your plant will look thicker and more vibrant than ever.
Tips & tricks for pruning your ti plant
A few simple tricks will help you transform your ti plant from sparse to spectacular with minimal effort.
Tool Prep Matters: Always disinfect your pruning shears with rubbing alcohol before and after use—this prevents spreading disease between cuts. I also like to sharpen my shears regularly; dull blades crush stems instead of making clean cuts, which stresses the plant. For larger stems, I use a small hand saw to avoid tearing the bark.
Leaf Health Check: In Step 1, don't just rely on color—run your fingers along the leaf edges. Healthy leaves should feel slightly waxy and resist gentle pressure. If you notice black spots or sticky residue on the undersides (common with spider mites), isolate the plant and treat with neem oil before pruning. This prevents spreading pests to healthy leaves during the process.
Pruning Strategy: When trimming leggy stems in Step 2, focus on cutting back to the nearest outward-facing leaf node. This encourages branching outward rather than continuing the leggy growth pattern. I find that making angled cuts (about 45 degrees) just above a node helps water run off better, reducing rot risk in the cut area.
Recovery Care: After pruning, give your ti plant a gentle boost by applying a diluted seaweed fertilizer (half-strength) to the soil. The plant will focus energy on new growth rather than repairing damaged areas. I also avoid heavy watering for 3-4 days post-prune to let small cuts heal before introducing moisture.
Pro Tips for Prune Ti Plant
- A few simple tricks will help you transform your ti plant from sparse to spectacular with minimal effort.
- Tool Prep Matters: Always disinfect your pruning shears with rubbing alcohol before and after use—this prevents spreading disease between cuts.
- Leaf Health Check: In Step 1, don't just rely on color—run your fingers along the leaf edges.
Frequently asked questions
Got questions about pruning your prune ti plant? We’ve got answers!
Whether you're a newbie or a seasoned plant parent, these FAQs will help you keep your Prune Ti thriving year-round.
When is the best time to prune my prune ti plant?
Prune your prune ti plant during its active growing season—typically spring or early summer. This timing encourages bushier growth and helps maintain its signature lush, layered look. Avoid heavy pruning in fall or winter, as the plant may struggle to recover.
How much can I trim back my prune ti plant?
You can trim up to one-third of the plant’s height in a single session, but avoid over-pruning. Focus on shaping rather than drastic cuts. For best results, prune gradually over a few months to avoid shocking the plant. Think of it like giving your prune ti a stylish haircut—not a buzz cut!
What should I do if my prune ti looks leggy after pruning?
Leggy growth happens when your plant isn’t getting enough light. After pruning, move it to a brighter spot (but avoid harsh direct sun). Rotate the pot occasionally for even growth, and consider pinching back new growth tips to encourage bushiness. Patience is key—your prune ti will bounce back!
Can I propagate prune ti from my pruning cuttings?
Prune ti cuttings root easily in water or soil. Just dip the cut end in rooting hormone (optional), place in water or moist potting mix, and keep in bright, indirect light. Roots should form in 4-6 weeks. It’s a great way to multiply your collection!
How often should I prune my prune ti plant?
Light maintenance pruning (removing dead or yellowing leaves) can happen anytime, but structured pruning every 3-6 months keeps your plant looking its best. Adjust based on growth—if it’s getting too tall or sparse, it’s time for a trim! Think of it like a spa day for your plant.
Wrapping up and next steps
Growing a thriving prune ti plant is all about understanding its rhythm—timing those three strategic cuts to keep it lush year-round! 🌿 Whether you’re shaping for aesthetics, encouraging fuller growth, or reviving leggy stems, the key is patience and precision.
With the right tools, a little knowledge, and a watchful eye, your ti plant will reward you with vibrant, healthy foliage that’s the envy of any plant lover.
Ready to elevate your green thumb game? Start small—pick one pruning session this week, and observe how your plant responds. Before you know it, you’ll be a pruning pro, and your ti plant will thank you with nonstop lushness! 🌟