Pruning
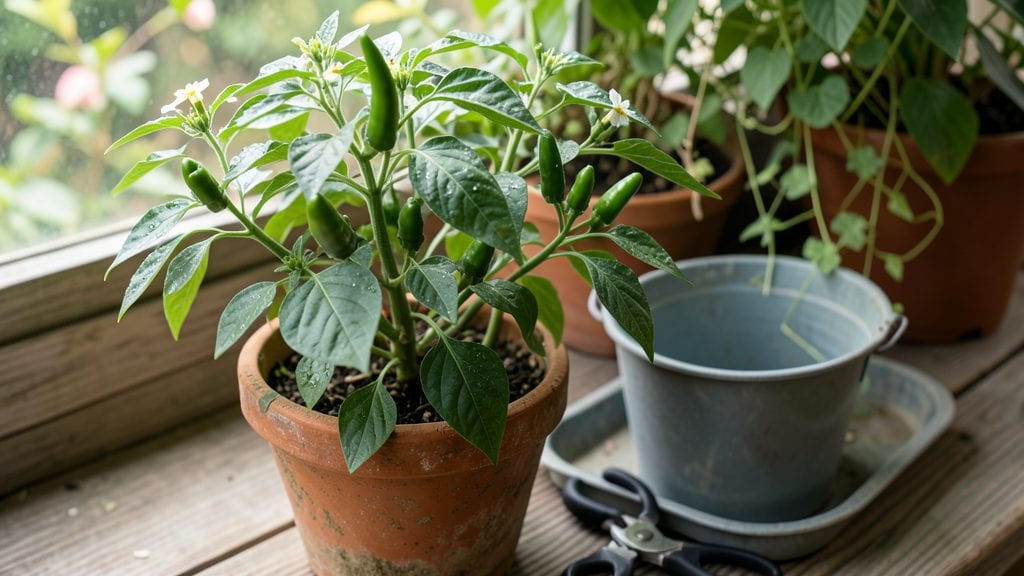
Pruning chilli plants isn't just about keeping them tidy—it's the secret to bigger peppers and plants that stay healthy all season. 🌿 I learned this the hard way after my first chilli harvest turned out small and sparse, despite my best efforts.
The right cuts redirect energy where you want it: more fruit, not just leaves.
You only need sharp pruning shears, a clean cutting surface, and about 20 minutes to transform a leggy plant into a bushy powerhouse. Start when plants are 6-8 inches tall, cutting just above leaf nodes to encourage branching.
This isn't about harsh trimming—think of it as giving your plant a haircut that boosts its confidence (and pepper production).
By mid-summer, you'll see the payoff: thicker stems, more blossoms, and peppers that grow plump instead of skinny. The air circulates better too, so diseases like powdery mildew stay away. It's the difference between a handful of peppers and a basketful—without needing a greenhouse or fancy fertilizers.
Works for both indoor pots and outdoor beds, and the same principles apply whether you're growing jalapeños or monster-sized bell peppers. Here's how to do it without stressing your plants—or yourself.
📚 In This Guide
- What you need
- Instructions
- Tips and common mistakes
- Wrapping up and next steps
What you need
- ● Pruning shears or scissors: Use sharp, sterilized bypass pruners (avoid anvil pruners—they crush stems). Example: Felco F-2 or Gonicc pruning shears (5-7 inches).
- ○ Garden gloves: A pair of nitrile-coated or heavy-duty fabric gloves to protect your hands from thorns and bacteria. Optional: Cut-resistant gloves if your chillies are spiky.
- ● Rubbing alcohol (70% or higher) or bleach solution: For sterilizing tools between cuts (1 part bleach to 9 parts water).
- ○ Small garden trowel or knife: For trimming larger stems or roots if needed (optional for above-ground pruning).
- ● Disposable containers or paper towels: To hold pruned stems and dispose of them safely (avoid composting diseased plant parts).
- ● Rooting hormone: If you plan to propagate cuttings (e.g., Clonex or powdered hormone).
- ● Plant tie or soft twine: To support heavy branches post-pruning (especially for large varieties like 'Mammoth' or 'Monarch').
- ● Spray bottle with water: To mist pruning wounds and reduce shock (especially in hot climates).
- ● Labeling tags: If saving cuttings for future propagation.
Instructions for pruning chili plants: how to encourage healthier growth
Here’s the method I’ve used to double pepper production—focused on strategic cuts that redirect energy to fruit.
✂️ Step 1: Identify and Remove Suckers for Stronger Structure
Suckers are the small shoots that grow in the crotch where a branch meets the main stem. These divert energy from fruit production. Use clean, sharp pruning shears to snip them off at the base—don’t leave stubs, or they’ll rot. I prune suckers when they’re about 1-2 inches long, before they siphon too much energy.
Watch for new growth emerging from leaf axils (the spot where leaves meet the stem). These are future suckers. Removing them early keeps the plant’s focus on developing peppers rather than extra foliage. If you miss a sucker, it’ll grow into a weak branch that competes with your main harvest.
🌿 Step 2: Thin Overcrowded Branches for Better Airflow
Chili plants thrive when they have space for airflow. If branches grow too close together, humidity builds up, inviting fungal diseases like powdery mildew. Look for areas where leaves rub against each other—these are prime spots for moisture retention. Use your fingers to gently separate branches if they’re not too thick, or prune the smaller, weaker branch entirely.
I aim to leave 3-4 main branches per plant, spaced evenly around the stem. This creates a balanced shape that supports more flowers and fruit. If a branch is growing straight up with no lateral growth, it’s a candidate for pruning—vertical growth often means fewer peppers.
☀️ Step 3: Prune Lower Leaves to Improve Sun Exposure
Lower leaves block sunlight from reaching the plant’s core, where most peppers develop. Remove any leaves that are yellowing or shading the lower fruit clusters. Start about 6-8 inches from the soil and work upward, keeping only the healthiest, most vigorous leaves. This also reduces the risk of soil-borne diseases splashing onto the plant.
Don’t overdo it—leave enough foliage to photosynthesize. A good rule is to maintain a canopy of leaves that still allows light to filter through to the middle of the plant. You’ll see a difference within 2-3 weeks: fewer yellow leaves, more direct sunlight on developing peppers, and a stronger, sturdier plant.
⏰ Step 4: Encourage Flowering with Strategic Trimming
If your chili plant is putting all its energy into leaves instead of flowers, it’s time to prune back some of the top growth. Cut just above a leaf node (the bump where leaves and branches grow) to promote branching. This is where new flower clusters often form. I prune the top 2-3 inches of the main stem when the plant is about 12-18 inches tall, depending on the variety.
After pruning, the plant will redirect its energy toward producing more side branches, each of which can bear flowers and peppers. Within 1-2 weeks, you should see new growth emerging from the nodes below the cut. This is your signal that the plant is responding well to the pruning.
🌱 Step 5: Maintain and Monitor Post-Pruning
After pruning, your chili plant will need extra care to recover. Water deeply every 2-3 days until new growth appears, keeping the soil evenly moist but not soggy. Avoid fertilizing immediately—wait until you see new leaves emerging before adding nutrients. Too much fertilizer right after pruning can stress the plant further.
Keep an eye out for signs of stress, like wilting or yellowing leaves. If you see this, reduce watering slightly and ensure the plant is getting 6-8 hours of sunlight daily. Pruning is a shock to the plant, but with proper care, it’ll bounce back stronger and more productive than before.
Tips & tricks for pruning chili plants
A few strategic cuts can transform your chili plants from scraggly underperformers to fruit-loaded powerhouses. Here's what I've learned after years of trial and error in the garden.
Timing is Everything: The best time to prune is in the morning after the dew has dried but before the heat of the day. This gives your plants time to recover and prevents stress from afternoon sun. I also avoid pruning during flowering or fruiting stages—wait until you've harvested existing peppers before making major cuts. This ensures your plant isn't already diverting energy to fruit when you're trying to reshape its structure.
Tool Selection Matters: Never use dull or dirty pruning shears—they can tear plant tissue and introduce diseases. I sterilize my tools with rubbing alcohol between plants, especially if I've been working with diseased foliage. For larger branches, use pruning shears with a bypass blade rather than anvil-style cutters, which can crush stems. Remember, clean cuts heal faster and reduce infection risk.
Visual Cues for Pruning Success: When pruning lower leaves in Step 3, look for the "light test"—hold your hand about 6 inches from the plant. If you can't see through the foliage to the center, you need to remove more leaves. Aim for a balanced canopy where sunlight can reach all branches. After pruning, you should see more direct light hitting the main stem where flowers and fruit develop. This visual check helps prevent over-pruning while ensuring optimal light exposure.
Post-Pruning Recovery Strategy: After your strategic cuts, the plant will go through a recovery phase that typically takes 2-3 weeks as mentioned in Step 5. During this time, I monitor for new growth emerging from leaf nodes—this is your confirmation that the plant is responding well. If you see wilting or yellowing, it's often a sign of over-pruning or stress. In this case, reduce watering slightly and provide afternoon shade until the plant stabilizes. The key is patience—the plant will reward you with bushier growth and more flowers.
Pro Tips for Pruning Chilli Plants
- A few strategic cuts can transform your chili plants from scraggly underperformers to fruit-loaded powerhouses.
- Timing is Everything: The best time to prune is in the morning after the dew has dried but before the heat of the day.
- Tool Selection Matters: Never use dull or dirty pruning shears—they can tear plant tissue and introduce diseases.
Frequently asked questions
Got questions about pruning your chilli plants?
You’re not alone! Here are some of the most common concerns—and straightforward answers—to help you trim like a pro.
When is the best time to start pruning chilli plants?
Prune your chilli plants after they’ve established 4-6 true leaves and are at least 6-8 inches tall. Early pruning (like pinching off the first few leaves) encourages bushier growth, while later trims (after flowering) redirect energy to fruit production. Avoid heavy pruning too late in the season—focus on shaping before harvest time!
How much should I trim off a chilli plant?
Start conservatively! Remove no more than 25-30% of the plant’s foliage in a single session. Focus on:
- Dead or yellowing leaves ( always snip these off!)
- Suckers (small shoots growing between the main stem and branches)
- Overcrowded branches to improve airflow
Can I prune chilli plants during flowering or fruiting?
Yes, but lightly! Prune only to remove dead leaves or branches blocking sunlight. Avoid heavy trimming during flowering/fruiting, as it can stress the plant and reduce yield. Save aggressive pruning for the early growth stages or post-harvest cleanup.
What if my chilli plant looks sad after pruning?
Don’t panic! Mild wilting or slowed growth is normal—your plant is adjusting. To help it recover:
- Water consistently (but don’t overdo it)
- Fertilize with a balanced 10-10-10 or fish emulsion to boost energy
- Provide bright, indirect light (6+ hours daily)
Do I need to sterilize my pruners between cuts?
Absolutely!
Sterilizing pruners with rubbing alcohol (70%+) or a bleach solution (1 part bleach to 9 parts water) prevents spreading disease (like bacterial spot or fungal infections). Wipe them down before and after each plant, especially if you’re working with multiple varieties.
Are there chilli varieties that don’t need pruning?
Some compact or determinate varieties (like ‘Jalapeño M’ or ‘Shishito’) grow bushy naturally and need minimal pruning. Others, like indeterminate types (e.g., ‘Cayenne’ or ‘Habanero’), benefit more from trimming to encourage branching and higher yields. Research your specific variety—if it’s tall and leggy, pruning is your friend!
Wrapping up and next steps
Pruning your chilli plants isn’t just about keeping them tidy—it’s a game-changer for healthier growth, bigger yields, and stronger plants! 🌱 With the right tools, timing, and techniques, you’ll encourage bushier foliage and more vibrant peppers.
Whether you’re a seasoned gardener or just starting, every snip brings you closer to a bountiful harvest.
Ready to put your new skills to work? Start with one plant this season, experiment with different pruning styles, and watch your chilli garden thrive. Happy growing—your future spicy creations are waiting! 🌶️✨