Pruning
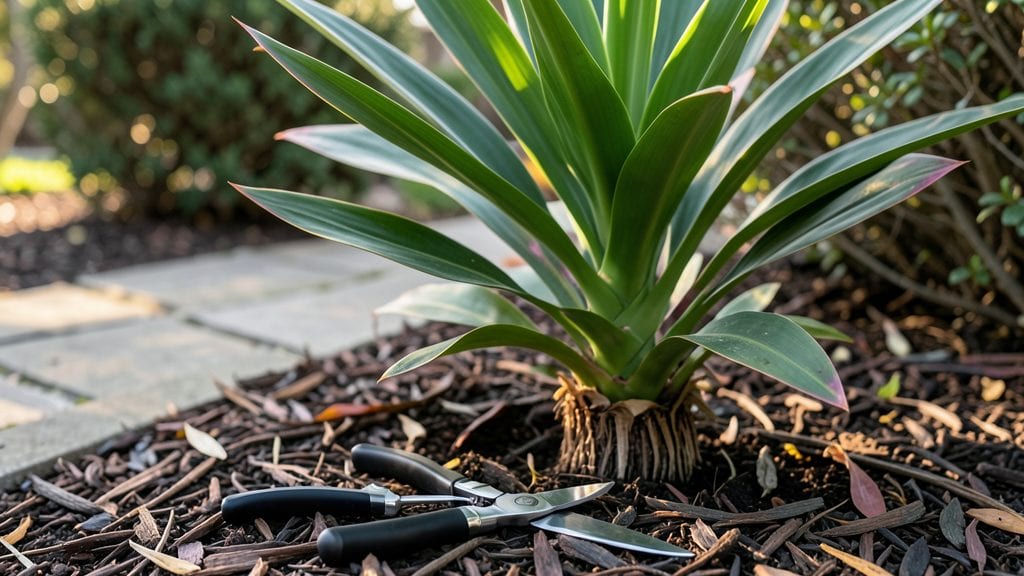
Pruning cordyline plants keeps them looking sharp and thriving year-round—something I learned the hard way after letting mine get leggy and sparse last summer. 🌿 These tropical-looking plants reward you with dense, colorful foliage when you trim them properly, but get it wrong and you’ll end up with bare stems or stressed plants.
You’ll need just a few tools: sharp pruners for clean cuts, gloves (especially for spiky varieties like Cordyline fruticosa), and rubbing alcohol to sterilize your tools between cuts.
The key is timing—prune in late winter or early spring before new growth starts, but you can also trim dead leaves anytime. Never cut more than one-third of the plant at once, or you’ll shock it.
Start by removing any brown, yellow, or damaged leaves at the base, cutting just above a healthy node. For shaping, trim back overgrown stems to encourage bushier growth, always cutting at a 45-degree angle to prevent water from pooling.
After pruning, give your plant a light drink of water and keep it in bright, indirect light for a few days to recover.
Common mistakes include over-pruning or cutting too close to the stem, which can leave ugly scars. If you accidentally go too far, don’t worry—cordylines are forgiving. Just focus on maintaining a balanced shape, and you’ll have a lush, vibrant plant that stays healthy for years.
The results? A fuller, more vibrant plant that keeps blooming like clockwork.
📚 In This Guide
- What you need
- Instructions
- Tips and common mistakes
- Wrapping up and next steps
What you need
- ● Pruning shears or bypass pruners – Sharp, clean, and sterilized (alcohol or bleach wipe). Choose bypass (not anvil) for cleaner cuts.
- ● Garden gloves – Heavy-duty, cut-resistant gloves (e.g., nitrile-coated) to protect against thorns and sap.
- ● Disinfectant solution – 1 part bleach to 9 parts water (or 70% isopropyl alcohol) to sterilize tools between cuts.
- ● Rubbing alcohol or hydrogen peroxide – For wiping down tools and cleaning wounds on the plant.
- ○ Pruning sealant (optional but helpful) – Pruning wax or tree sealant to coat large cuts and prevent disease.
- ● Bucket or trash bag – For collecting pruned fronds (compost or discard based on health).
- ● Ladder or step stool – If your Cordyline is taller than 6 feet, prioritize safety!
- ● Sharp utility knife or loppers – For thicker stems (if your plant is mature).
- ● Hand sanitizer – For before/after tool handling.
- ● Plant food or fertilizer – A balanced 10-10-10 or organic compost to replenish nutrients post-pruning.
- ● Mulch – Shredded bark or pine straw to protect the base after trimming.
- ● Camera or phone – Snap photos before and after for reference!
- ● Safety glasses – If dealing with large, thorny fronds.
Step-by-Step guide to pruning cordyline plants
Revitalize your cordyline with these simple, science-backed techniques for year-round health.
🌿 Step 1: Assess Growth and Identify Pruning Zones
Start by examining your cordyline for signs of overgrowth or dead foliage. Look for yellowed leaves at the base—these are the first to go, as they’re no longer contributing to the plant’s energy. Healthy growth typically emerges from the top third of the plant, so focus your cuts just above leaf nodes where new shoots will sprout.
Run your fingers along the stem to feel for small buds or bumps—these are your pruning targets. Avoid cutting into woody sections without buds, as these won’t regenerate. If your cordyline has multiple stems, prioritize the thickest, healthiest ones for pruning to encourage stronger regrowth.
✂️ Step 2: Make Clean Cuts at the Right Angle
Use sharp, sterilized pruning shears to make your cuts at a 45-degree angle, about ½ inch above a leaf node or bud. This angle helps water run off the cut, preventing rot. Never tear leaves or stems—clean cuts heal faster and reduce stress on the plant.
If you’re removing a large section of growth, cut back to a healthy bud or side shoot rather than bare stem. For dead or diseased foliage, remove the entire stem down to the base if it’s not producing new growth. Wipe your shears with rubbing alcohol between cuts to avoid spreading any potential pathogens.
💧 Step 3: Water and Fertilize After Pruning
Give your cordyline a deep watering immediately after pruning to help it recover. Water until it drains from the bottom of the pot, ensuring the roots stay hydrated during the healing process. Avoid overwatering, though—soggy soil can lead to root rot, especially in the days following pruning when the plant is vulnerable.
Apply a balanced, water-soluble fertilizer (like 10-10-10) at half strength two weeks after pruning. This gives your cordyline the nutrients it needs to produce new growth. If you’re pruning in late summer or fall, hold off on fertilizing until spring to avoid encouraging tender new shoots before winter.
☀️ Step 4: Monitor Light and Adjust Care
Place your pruned cordyline in bright, indirect light for the first week after trimming. This helps it recover without the stress of harsh sunlight. If you notice new growth leaning toward the light, rotate the pot a quarter turn every few days to keep it growing straight and sturdy.
Resume normal light exposure after 2-3 weeks, when you see fresh leaves emerging. If your cordyline is outdoors, bring it inside if temperatures drop below 50°F—cold snaps can stunt new growth. Watch for pale or limp leaves, which signal underwatering, or yellowing between veins, which may indicate overwatering.
⏰ Step 5: Plan for Year-Round Maintenance
Prune lightly every 3-4 months to maintain shape and encourage bushiness. In spring, focus on removing dead leaves and thinning crowded stems. In fall, prune back by ⅓ to encourage compact growth before winter dormancy. Avoid heavy pruning in winter unless your cordyline is struggling—it’s already conserving energy.
Here’s the thing—cordylines thrive on routine. Mark your calendar for spring and fall pruning sessions to keep your plant looking its best. With consistent care, your cordyline will reward you with vibrant new growth and a fuller appearance year after year.
Tips & tricks for pruning cordyline plants
Here's what I learned after years of pruning my own cordylines—these little details make all the difference in keeping your plant thriving.
Pruning Targets: In Step 1, when you're feeling for those small buds along the stem, remember that these are your growth points. I've made the mistake of cutting too close to the bud—aim for that ½ inch above mark. This gives the new shoot enough room to emerge without competition from the old growth. Think of it like giving your plant a clean starting line for new growth.
Clean Cuts Matter: The 45-degree angle in Step 2 isn't just about looks—it's about function. That sloped cut prevents water from pooling on the wound, which could lead to rot. I always sterilize my shears between cuts too, using rubbing alcohol. One time I skipped this and ended up with a fungal issue that took months to clear up. Don't make my mistake!
Post-Pruning Care: After you've made your cuts, that deep watering in Step 3 is crucial. I like to water until I see it draining from the bottom, then let it sit for 10 minutes before emptying the saucer. This ensures the roots get hydrated without sitting in water. And remember—bright, indirect light for the first week helps your plant recover without stress. I've seen cordylines go into shock when moved to direct sunlight too soon after pruning.
Seasonal Timing: The 3-4 month maintenance schedule in Step 5 works best when timed right. Spring pruning helps the plant gear up for summer growth, while fall's ⅓ reduction prepares it for winter. I mark my calendar with reminders because cordylines really appreciate that routine. Between us, I've let my pruning slip in winter before—big mistake if you're not dealing with a struggling plant.
Pro Tips for Pruning Cordyline Plants
- Here's what I learned after years of pruning my own cordylines—these little details make all the difference in keeping your plant thriving.
- Pruning Targets: In Step 1, when you're feeling for those small buds along the stem, remember that these are your growth points.
- Clean Cuts Matter: The 45-degree angle in Step 2 isn't just about looks—it's about function.
Frequently asked questions
Got questions about pruning your Cordyline plants? You’re not alone! Here are some of the most common concerns—and straightforward answers—to keep your plants thriving.
When is the best time to prune Cordyline plants?
Prune your Cordyline in late winter or early spring, just as new growth begins. This timing promotes healthy regrowth and avoids stressing the plant during dormancy. Avoid heavy pruning in summer or fall, as it can hinder recovery before winter. Light trimming to remove dead leaves can happen year-round, though!
Can I prune Cordyline plants too much?
Yes! Over-pruning—especially cutting into the main stem or removing more than ⅓ of the foliage at once—can stress the plant and stunt growth. Stick to strategic cuts: remove only dead, yellowed, or damaged leaves, and avoid trimming more than 10-15% of the plant’s height in a single session. Patience pays off!
What should I do with the cuttings after pruning?
Don’t toss those cuttings! Propagate them in water or moist potting mix. Place cuttings in indirect light until roots form (usually 2-4 weeks). Once rooted, transplant them into well-draining soil. It’s a great way to expand your Cordyline collection or share plants with friends!
Why is my Cordyline turning brown after pruning?
Brown tips or leaves after pruning can signal stress from over-trimming, poor hydration, or fungal issues. Ensure you’re using clean, sharp tools to avoid tearing leaves. Water lightly after pruning and avoid wetting the stems. If browning persists, check for pests or fungal infections and treat accordingly.
Do Cordyline plants need pruning in cold climates?
In colder regions, prune minimally in late winter—focus on removing only dead or damaged growth. Avoid heavy cuts, as Cordyline plants are tropical and sensitive to cold stress. If your plant is potted, move it indoors or to a sheltered spot before temperatures drop below 40°F (4°C) to prevent frost damage.
Wrapping up and next steps
Pruning your Cordyline plants isn’t just about aesthetics—it’s a year-round ritual to keep them thriving, healthy, and full of life! 🌿 With the right tools, timing, and techniques, you’ll encourage lush growth, prevent disease, and even propagate new plants.
Remember, confidence comes with practice, so don’t hesitate to get your hands dirty and experiment.
Now that you’re armed with knowledge, take the next step! Grab those shears, pick a sunny day, and give your Cordylines the care they deserve. Watch them reward you with vibrant foliage and maybe even a few new plant babies to share. Happy pruning—your garden will thank you! 🌟