Vegetables
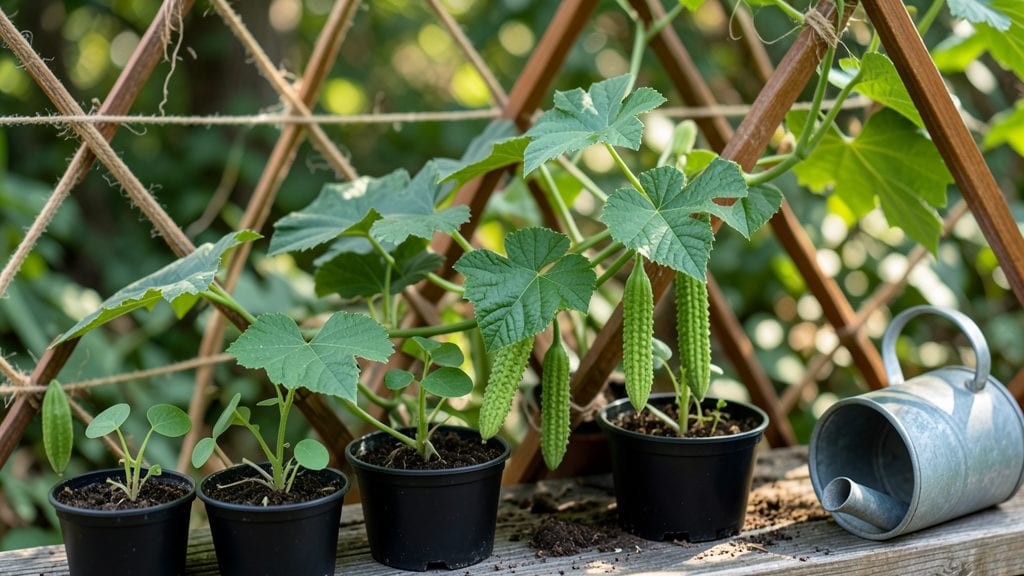
Planting ridge gourds opens the door to a low-maintenance harvest that thrives in heat while others wilt. 🌿 I learned the hard way that these vining wonders need just the right soil prep and spacing to avoid tangled messes—something I now do differently every season.
The key is warm soil and patience, because these gourds grow fast once they get started.
You’ll need well-draining soil mixed with compost, stakes or trellis for support, and a sunny spot with at least 6 hours of direct light daily. Ridge gourds love heat but hate soggy roots, so raised beds or containers work beautifully if your ground stays damp.
Start seeds indoors 4-6 weeks before last frost or transplant young plants after soil warms to 70°F—that’s when they really take off.
Within 6-8 weeks, you’ll watch those ribbed fruits grow from tiny blossoms into crisp, cucumber-like treats perfect for stir-fries or curries. The vines spread fast, so give them 10-12 feet of space or train them upward.
Water at the base, not the leaves, to prevent mildew—a lesson I learned after losing a whole patch to fungal spots.
For year-round harvests in warm climates, succession plant every 2-3 weeks after the first frost. In cooler zones, grow them as annuals and save seeds for next year.
The real secret? Companion planting with marigolds keeps pests away, and a light mulch keeps moisture steady. Now go plant—your kitchen will thank you!
📚 In This Guide
- What you need
- Instructions
- Tips and common mistakes
- Wrapping up and next steps
What you need
- ● Ridge Gourd Seeds: 10–15 seeds per plant (or 50–100 seeds for a small garden). Choose heirloom or hybrid varieties like Pusa Sadabahar or Arka Swarna.
- ● Potting Soil or Garden Bed: Well-draining, loamy soil (pH 6.0–7.0). Mix with compost (20–30%) for nutrients.
- ○ Optional: Coco peat or vermiculite for seedling trays (if starting indoors).
- ● Support Structures: Trellis or bamboo poles (3–4 ft tall) for vines (1–2 per plant).
- ○ Nylon mesh or wire netting (optional, for heavy gourds).
- ● Fertilizers: Organic: Cow dung manure (1 kg per sq. yard) or vermicompost.
- ○ Synthetic (optional): NPK 10:10:10 (20–30 g per plant) at planting + fruiting stage.
- ● Watering Tools: Watering can (1–2 gallons) or drip irrigation kit (for large gardens).
- ● Pesticides (preventive): Neem oil (1 tsp/liter water) or chili spray (for pests like aphids).
- ● Copper-based fungicide (to prevent powdery mildew).
- ● Seedling Trays (if sowing indoors before transplanting).
- ● Mulch (straw or dry leaves) to retain moisture and suppress weeds.
- ● Pruning Shears for trimming overgrown vines.
- ● Garden Gloves (to protect hands from thorns or soil).
- ○ Growth Regulator (like MorStop) to control excessive vine growth (optional).
Step-by-Step instructions for ridge gourd planting
Here’s how to grow these prolific vines with minimal fuss—once established, they’ll produce for months.
🌱 Step 1: Choose the Right Spot and Prepare the Soil
Ridge gourds thrive in well-draining, fertile soil with a pH between 6.0 and 7.0. Pick a location that gets full sun (6-8 hours daily)—they’ll wilt in shade. I always test soil moisture first by digging a 6-inch hole and checking for drainage; if water pools, amend with 2-3 inches of compost and a handful of perlite to loosen the mix.
Work the first 12 inches of soil deeply with a broadfork or tiller, breaking up compacted layers. Ridge gourds have shallow roots but need room to spread. If your soil is heavy clay, mix in 1 part sand to improve aeration. The goal is loose, crumbly soil that holds moisture without staying soggy—think of it as giving the roots a fluffy bed to stretch out in.
🌱 Step 2: Plant Seeds or Transplants at the Right Time
Sow seeds 2-3 weeks after your last frost date when soil temperatures reach 70°F or warmer. Ridge gourds are heat-lovers and won’t germinate in cool soil. I plant 4-5 seeds per hill, spacing hills 3-4 feet apart in rows 5-6 feet apart. Press each seed 1 inch deep—deeper planting delays germination, and these seeds need warmth to break dormancy.
If using transplants, wait until they’ve developed 3-4 true leaves and harden off for 7-10 days before moving them out. Bury the stem up to the first set of leaves—this encourages stronger root growth. Water the soil to 1 inch deep the day before planting to reduce transplant shock. You’ll know it’s working when new leaves appear within 7-10 days of planting.
💧 Step 3: Water Deeply and Mulch for Consistent Moisture
Water deeply 2-3 times per week—ridge gourds hate dry spells but despise soggy roots. Aim for 1-1.5 inches of water per week, delivered at the base of the plant. I use a soaker hose to keep foliage dry, which prevents fungal diseases like powdery mildew. The key is consistent moisture: let the top 2 inches of soil dry out between waterings, but never let the roots bake in dry dirt.
Spread 2-3 inches of organic mulch (like straw or shredded leaves) around the base, keeping it 6 inches away from the stem to prevent rot. Mulch locks in moisture and keeps soil temperatures stable—critical for these tropical vines. You’ll notice fewer weeds and less water evaporation, which means less work for you. Just refresh the mulch every 4-6 weeks as it breaks down.
☀️ Step 4: Train Vines and Provide Support Early
Ridge gourds grow 10-20 feet long, so install a 5-6 foot tall trellis or sturdy fence at planting time. I use galvanized wire mesh stretched between posts—it’s sturdy and lets vines climb naturally. Train the main stem along the trellis, tying it loosely with soft plant ties every 12 inches as it grows. Never tie too tightly; you want to guide, not strangle.
Prune side shoots to 2-3 leaves per vine to encourage stronger fruit production. Remove any yellow or diseased leaves immediately—ridge gourds are susceptible to powdery mildew, and once it sets in, it spreads fast. You’ll see the first fruits form 6-8 weeks after planting, and they’ll keep coming if you keep the vines healthy and supported.
✂️ Step 5: Harvest and Extend the Season
Harvest when gourds are 6-8 inches long and the ridges are fully developed but still firm. Use pruning shears to cut the stem, leaving 1 inch of stem attached to the fruit. Check vines every 3-4 days—these guys produce fast, and overripe gourds turn seedy and tough. The more you pick, the more they’ll produce; I’ve had plants keep going until frost if I stay on top of harvesting.
For a year-round harvest, start a new batch every 2-3 months in warm climates. In cooler areas, grow them in large containers and bring them indoors during frost. Ridge gourds are surprisingly cold-hardy for vines—just protect them from below 50°F, and they’ll keep producing until the first hard freeze. Store harvested gourds in a cool, dry place for up to 2 months if you can’t use them all at once.
Tips & tricks for perfect ridge gourd planting
Growing ridge gourds successfully comes down to a few key strategies that prevent common pitfalls. These proven techniques will help you maximize your harvest with minimal effort.
Soil Preparation Strategy: In Step 1, when amending your soil with 2-3 inches of compost and perlite, mix in a handful of aged manure (like cow or chicken manure) for an extra nutrient boost. Ridge gourds are heavy feeders, and this gives them the phosphorus they need for strong root development. I've found that adding a slow-release organic fertilizer at planting time—like a 5-10-10 blend—gives plants an immediate energy boost for that critical first month of growth. The goal is soil that's loose enough for roots to spread but rich enough to support continuous production.
Timing Secret: The 70°F soil temperature requirement in Step 2 is non-negotiable—these tropical vines won't germinate below this threshold. I've learned the hard way that waiting for true warmth pays off: use a soil thermometer to verify temperatures before planting. For cooler climates, consider using black plastic mulch 1-2 weeks before planting to warm the soil naturally. The 2-3 week window after last frost gives you flexibility, but don't rush—waiting an extra week for perfect conditions prevents the most common germination failures.
Watering Wisdom: In Step 3, the 2-3 times per week watering schedule assumes average rainfall conditions. In hotter climates (or during summer months), you may need to water daily to maintain that 1-1.5 inches per week target. The key is consistency: I set up a simple drip irrigation system on a timer to deliver water directly to the base of plants. This prevents fungal issues while ensuring roots get the deep hydration they need. Remember that ridge gourds are drought-sensitive—they'll wilt dramatically when thirsty but bounce back quickly when properly watered.
Support System: When installing your 5-6 foot trellis in Step 4, position it so the main vine can grow vertically without competing with side shoots. I've had success with a modified "fan trellis" system where the main vine climbs straight up while allowing a few strong side branches to spread horizontally for better fruit distribution. Use soft plant ties every 12 inches but leave room for growth—you don't want to restrict the vine's natural expansion. This vertical growing habit not only saves space but also makes harvesting easier and reduces disease risk by improving air circulation around the foliage.
Pro Tips for Ridge Gourd Planting
- Growing ridge gourds successfully comes down to a few key strategies that prevent common pitfalls.
- Soil Preparation Strategy: In Step 1, when amending your soil with 2-3 inches of compost and perlite, mix in a handful of aged manure (like cow or chicken manure) for an extra nutrient boost.
- Timing Secret: The 70°F soil temperature requirement in Step 2 is non-negotiable—these tropical vines won't germinate below this threshold.
Frequently asked questions
Got questions about growing ridge gourd? You're not alone! Here are some of the most common concerns—plus clear, practical answers to help you succeed.
When is the best time to plant ridge gourd?
Ridge gourd thrives in warm weather, so plant seeds 2-3 weeks after the last frost in spring (when soil reaches 60°F/15°C). For year-round harvests, you can also plant in late summer (August-September) for a fall/winter crop. In tropical climates, plant during monsoon breaks or cooler months to avoid heat stress.
How long does it take for ridge gourd to grow?
From seed to harvest, ridge gourd takes 3-4 months (90-120 days). The vines grow quickly in the first 4-6 weeks, and fruits appear 6-8 weeks after planting. With proper care, you can enjoy a steady harvest for 6-8 months per planting.
Why aren’t my ridge gourd plants producing fruits?
Common reasons include poor pollination (hand-pollinate with a soft brush if bees are scarce), overcrowding (space vines 3-4 feet apart), or nutrient deficiency. Ensure plants get balanced fertilizer (high in potassium) and consistent watering. If flowers drop without fruiting, check for temperature stress—ridge gourds prefer 70-85°F (21-29°C).
Can I grow ridge gourd in containers?
Yes! Ridge gourd is a great container vegetable. Use a 5-gallon pot or larger with drainage holes, and provide a trellis or sturdy support for vines. Choose a lightweight potting mix and water regularly. Containers work well for balconies or patios, but ensure the pot gets 6+ hours of sunlight daily.
What pests should I watch for with ridge gourd?
Keep an eye out for aphids, spider mites, and fruit borers. Use neem oil or insecticidal soap for soft-bodied pests. For borers, remove infested fruits and apply organic borer sprays. Copper-based fungicides can help prevent powdery mildew in humid conditions. Healthy plants resist pests better, so prioritize proper spacing and airflow.
Wrapping up and next steps
Ridge gourd planting is your ticket to a low-maintenance, high-reward harvest—whether you're a seasoned gardener or just starting out! 🌱 With the right soil, spacing, and a little patience, you’ll enjoy crisp, nutritious gourds all year long.
The best part? This versatile veggie thrives in containers or open ground, making it perfect for small spaces or urban gardens.
Ready to grow your green thumb? Start small—try a few plants in pots or a dedicated patch—and experiment with varieties to see what works best in your climate. Soon, you’ll be savoring homegrown ridge gourds in soups, stir-fries, or fresh salads. Happy planting! 🌟