Propagation
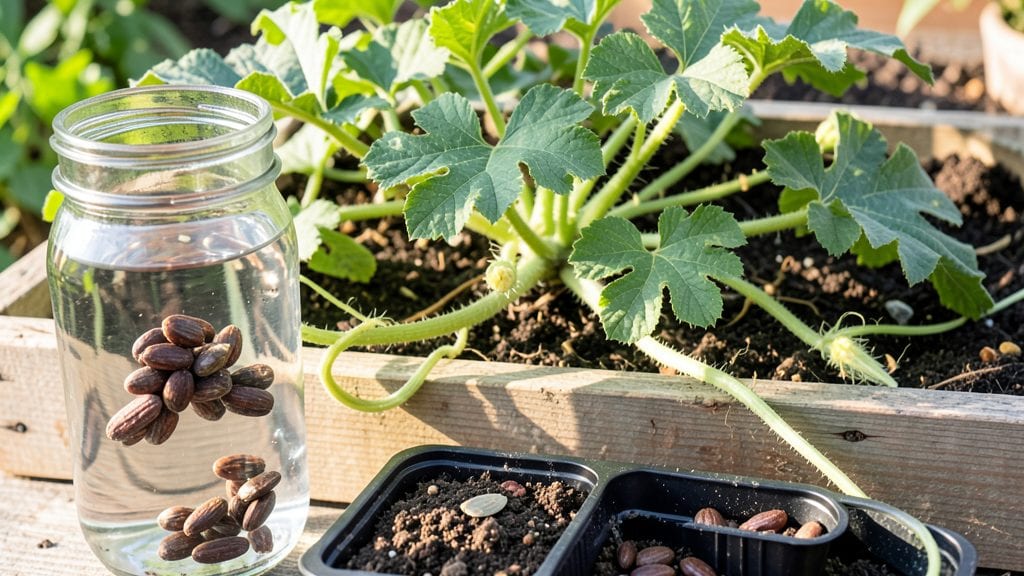
Soaking watermelon seeds in warm water before planting cuts germination time in half—from weeks to days. 🌱 I learned this trick after struggling with slow, spotty sprouts, and now my seedlings emerge strong and uniform every season.
The warm water softens the seed coat, letting moisture and nutrients rush in where they’re needed most.
All you need is a bowl of warm (not hot) water, a paper towel or clean cloth, and a few hours of patience. Soak seeds for 4-6 hours, then drain and let them dry slightly before planting.
This method works especially well for heirloom seeds, which often have tougher outer shells. The key is consistency—over-soaking can damage delicate embryos.
What you’ll get is a head start on the growing season, with seedlings popping up in 3-5 days instead of the usual two weeks. The roots develop faster, too, meaning stronger plants that resist disease better. Just avoid planting seeds that float—they’re likely empty or nonviable.
Works for both indoor starts and direct sowing in warm soil. Once sprouted, keep seeds moist but not soggy, and plant them just below the soil surface. Here’s how to do it right the first time—no more waiting around for germination to happen.
📚 In This Guide
- What you need
- Instructions
- Tips and common mistakes
- Wrapping up and next steps
What you need
- ● Watermelon seeds: Fresh, viable seeds (10–20, depending on your planting plan). Pro tip: Save seeds from organic watermelons for best results! 🌱
- ● Clean container: A small bowl, glass jar, or seedling tray (wide enough to hold seeds comfortably).
- ○ Warm water: 80–90°F (27–32°C). Optional: Add a pinch of hydrogen peroxide (3%) or seaweed extract to disinfect and encourage growth. ✨
- ● Paper towels or coffee filters: 2–3 sheets (cut to fit your container).
- ● Plastic wrap or lid: To create a humid environment (e.g., a ziplock bag or a jar lid).
- ○ Spray bottle: For misting (optional, if using an open container).
- ● Heating mat: Keeps seeds warm (70–85°F / 21–29°C is ideal). 🌡️
- ● Seedling heat mat: Speeds up germination in cooler climates.
- ● Labeling tags: To track seed varieties if testing multiple types.
- ● Grow lights: For pre-sprouting indoors before transplanting.
- ● Patience! Seeds typically sprout in 2–7 days after soaking.
- ● A warm, draft-free spot (e.g., near a sunny window or under grow lights).
- ● Access to a sink for rinsing seeds post-soak (if needed).
Step-by-step guide to soaking watermelon seeds for faster germination
Here’s how to jumpstart your watermelon seeds—this simple warm water trick cuts germination time in half.
💧 Step 1: Gather and Prepare the Seeds
Start by extracting the seeds from a ripe watermelon. Rinse them thoroughly under cool water to remove any pulp residue—this prevents mold and rot during soaking. I like to spread them on a clean paper towel to dry slightly before handling. Wet seeds stick to everything, and you’ll thank yourself later when they don’t slip through your fingers.
Use only fresh seeds for best results. Older seeds may not respond as well to soaking. If you’re unsure of the seed age, test a few first—sometimes the trickiest part is knowing when they’re ready to plant after soaking.
🌱 Step 2: Soak in Warm Water for Optimal Germination
Fill a clean container with warm water (not hot—around 80°F). The water should be warm enough to feel comfortable in a baby bath, but not scalding. Place the seeds in a mesh bag or small cloth sack to keep them contained while soaking. This prevents them from sinking to the bottom or getting lost.
Let the seeds soak for 12-24 hours. You’ll know they’re ready when they begin to plump up and some show tiny white roots peeking out. If you’re in a hurry, 12 hours is enough, but 24 hours gives them an extra boost. Don’t skip this step—it’s what breaks the seed’s dormancy and speeds up germination.
☀️ Step 3: Plant the Soaked Seeds Immediately
After soaking, drain the seeds and plant them within 1-2 hours to keep them from drying out. Use a lightweight, well-draining soil mix—watermelons hate soggy roots. I dig holes about 1 inch deep and place 2-3 seeds per spot, spacing them 6 inches apart in rows. Planting multiple seeds ensures at least one will sprout, since not all soaked seeds germinate perfectly.
Cover the seeds lightly with soil and water gently to settle it around them. Avoid overwatering at this stage—you want the soil moist but not waterlogged. A light misting is all you need. Keep the planting area warm, ideally between 70-85°F, to encourage quick germination.
⏰ Step 4: Monitor and Maintain Moisture
Germination should begin in 3-7 days, depending on temperature and seed freshness. Watch for the first tiny sprouts pushing through the soil. Once they appear, keep the soil consistently moist but not soggy. I like to use a spray bottle for gentle watering—it prevents disturbing the delicate seedlings.
If the soil surface dries out too quickly, cover the area with a thin layer of mulch to retain moisture. Watermelon seeds need warmth and consistency to thrive, so avoid letting the soil dry completely between waterings. You’ll see strong, healthy seedlings emerge faster than with dry-seeded watermelons.
Tips & tricks for perfectly soaked watermelon seeds
Here's what I've learned from years of experimenting with watermelon seeds—these tricks will help you avoid common pitfalls and get the best germination results every time.
Temperature Matters: That 80°F warm water is crucial—too hot and you'll cook the seeds, too cold and they won't activate properly. Test your water temperature by dipping your wrist in; it should feel like a warm bath, not scalding. If your kitchen is cold, place the water container in a slightly warmer area (like near a sunny window) before adding seeds. I've ruined batches by using water that was too hot, so always double-check!
The Soaking Time Factor: The 12-24 hour window is perfect, but don't exceed 24 hours unless you're dealing with particularly old seeds. After 24 hours, seeds can start to deteriorate. I've found that 18 hours gives ideal results for most fresh seeds—plump but not over-soaked. Watch for tiny white roots emerging; that's your signal they're ready to plant. If you're in a hurry, 12 hours will still give you better germination than planting dry seeds.
Container Choice: Using a mesh bag or small cloth sack isn't just about keeping seeds contained—it also prevents them from floating to the surface where they might dry out. I've tried using regular bowls and ended up with seeds stuck to the sides or floating away. A simple cheesecloth or even an old nylon stocking works perfectly. Just make sure the container has enough water to fully submerge all seeds.
Planting Timing Secret: That 1-2 hour window after draining is critical. Seeds dry out quickly once exposed to air. I keep a spray bottle handy to give them a quick mist if I'm running behind. Planting immediately after soaking gives you the best germination rates. If you must delay planting, store the drained seeds in a damp paper towel in a sealed container in the fridge for up to 24 hours—just don't let them dry out completely.
Pro Tips for Soak Watermelon Seeds Before Planting
- Here's what I've learned from years of experimenting with watermelon seeds—these tricks will help you avoid common pitfalls and get the best germination results every time.
- Temperature Matters: That 80°F warm water is crucial—too hot and you'll cook the seeds, too cold and they won't activate properly.
- The Soaking Time Factor: The 12-24 hour window is perfect, but don't exceed 24 hours unless you're dealing with particularly old seeds.
Frequently asked questions
Got questions about soaking watermelon seeds before planting? You’re not alone! Here are some of the most common concerns—and quick, expert-backed answers to help you grow like a pro.
Why should I soak watermelon seeds at all?
Soaking seeds in warm water speeds up germination by softening the seed coat and kickstarting hydration. Watermelon seeds naturally have a hard outer shell, so soaking helps them sprout faster—often in just 3–7 days instead of weeks. Plus, it’s a simple way to boost your success rate, especially in cooler climates!
How long should I soak watermelon seeds before planting?
For best results, soak seeds in warm (not hot!) water for 4–12 hours. Any longer risks overhydration or mold. Pro tip: Use a paper towel method—wrap seeds in a damp towel overnight for gentler hydration. Drain and plant immediately after soaking to avoid soggy seeds.
What’s the ideal water temperature for soaking?
Aim for 80–90°F (27–32°C)—lukewarm to slightly warm. Too hot (above 100°F/38°C) can damage the seed, while cold water slows germination. If your tap water isn’t warm enough, place the container in a sunny spot or use a seedling heat mat for extra warmth.
Can I plant soaked seeds directly in the ground?
Yes! Once seeds are plump and swollen (after soaking), you can plant them ½ inch deep in well-draining soil. For faster sprouting, start indoors in biodegradable pots 2–3 weeks before the last frost, then transplant outdoors. Just keep soil consistently moist—not soggy—to prevent rot.
What if my soaked seeds don’t sprout?
Don’t panic! Try these fixes:
- Check viability: Float-test seeds—sinkers are viable; floaters are likely dead.
- Adjust moisture: Too dry? Mist seeds lightly. Too wet? Let them dry slightly before replanting.
- Warmth matters: Seeds need 70–90°F (21–32°C) to germinate. Use a seedling heat mat if your soil is cool.
- Patience: Some varieties take up to 2 weeks—label your seeds and track progress!
Can I reuse leftover soaking water?
Nope! The water becomes saturated with nutrients and can harbor bacteria. Always use fresh, warm water for each soak. For sustainability, repurpose the leftover water to hydrate potted plants or compost—just avoid overwatering!
Wrapping up and next steps
Soaking watermelon seeds before planting is a simple yet powerful trick to boost germination speed and give your plants a head start! 🌱 By following the right method—warm water, proper soaking time, and gentle drying—you’ll unlock healthier, faster-growing seedlings.
Whether you’re a seasoned gardener or just starting, this technique makes the process easier and more rewarding.
Now that you’re armed with the know-how, grab those seeds and get growing! 🌞 Try this method with your next batch, and watch your watermelon vines thrive. Ready to plant? Start soaking today!