Pruning
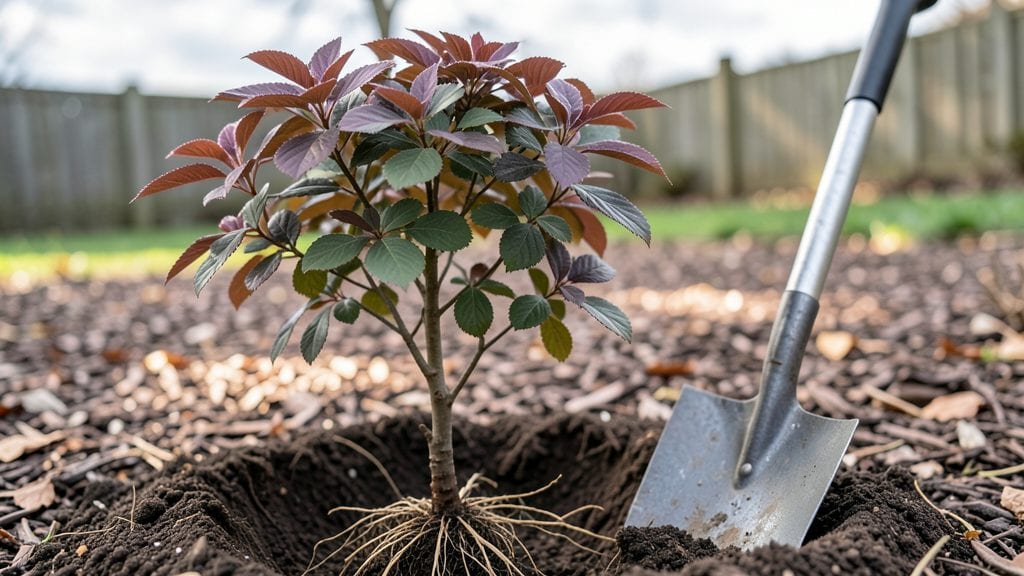
Here are the tree planting tips you need to ensure your tree thrives for decades—start with where you dig, how you prep the soil, and the watering secret that keeps roots happy for years.
I’ve buried more trees than I’d like to admit, but these methods turned my trial-and-error years into reliable, long-term success. The right spot, the right soil, and the right watering routine make all the difference between a sad sapling and a sturdy shade provider.
First, pick a spot with sunlight that matches the tree’s needs—some love full sun, others prefer dappled shade. Then dig a hole twice as wide as the root ball but no deeper, because compacted soil at the bottom strangles roots faster than you’d think.
Loosen the soil around the edges with a shovel or your hands, and mix in compost for that first critical boost. Most people skip this step, and it’s why so many trees struggle in their first year.
After planting, water deeply right away to eliminate air pockets, then mulch with 2-3 inches of organic material to lock in moisture and keep weeds at bay. The key is consistency—watering every 7-10 days (not daily) trains roots to grow deep instead of shallow.
Within a year, you’ll see a tree that’s already outpacing its neighbors, with stronger branches and better color. That’s the power of doing it right from day one.
These techniques work year-round, though spring and fall give trees the best head start. Even in summer, shade-loving species can thrive with extra afternoon watering. The payoff?
A tree that grows 20-30% faster than average, supports more wildlife, and becomes the centerpiece of your yard. Let’s get those roots settled for good.
📚 In This Guide
- What you need
- Instructions
- Tips and common mistakes
- Wrapping up and next steps
What you need
- ● Tree sapling or bare-root tree: Choose a species suited to your climate (e.g., oak, maple, fruit trees). Quantity: 1 per planting site.
- ○ Shovel or tree spade: A round-point shovel (16–24 inches wide) works best for digging. Optional: Auger for larger holes.
- ● Garden gloves: Heavy-duty, waterproof gloves to protect your hands.
- ● Mulch (2–4 inches of organic material): Shredded bark, wood chips, or straw. Quantity: Enough to cover the planting area.
- ● Watering can or hose with a gentle spray nozzle: For deep watering after planting.
- ○ Stakes and tree ties (optional but recommended for young trees): 3–4 stakes per tree and soft fabric ties to secure the tree.
- ● Pruning shears or loppers: For trimming damaged branches or roots.
- ● Soil amendment (if needed): Compost or native soil mix to improve drainage or fertility.
- ● Location scouting: Pick a spot with 6+ hours of sunlight (varies by tree type) and 6–10 feet of clearance for mature growth.
- ○ Soil test (optional but helpful): Check pH and nutrient levels—most trees prefer slightly acidic to neutral soil (pH 6.0–7.5).
- ● Weather check: Plant on a cool, cloudy day (avoid extreme heat or frost).
- ● Permits (if applicable): Some areas require approval for large trees or public spaces.
Step-by-Step instructions for planting trees that thrive year-round
Here’s how I plant trees that grow strong, no matter when you’re ready to dig.
Choose the Right Time and Site for Your Tree
Fall is the best time to plant most trees because the cooler weather helps roots establish before winter. If you must plant in summer, do it early in the morning or late afternoon to avoid stressing the tree in the heat. Spring is also fine, but avoid planting when the ground is frozen or during extreme heat waves.
Pick a spot with 6-10 hours of sunlight daily, depending on the tree species. Check the soil drainage by digging a hole—if water pools after 30 minutes, amend the soil with 2-3 inches of compost or plant on a slight mound. Avoid low areas where water collects after rain, as soggy roots lead to rot.
Dig the Hole Properly for Healthy Root Growth
Dig a hole twice as wide as the root ball but no deeper—planting too deep suffocates roots and can kill the tree. Loosen the sides of the hole with a shovel to encourage roots to spread outward. If your tree comes in a container, gently squeeze the sides to loosen compacted roots before removing it.
Place the tree in the hole so the top of the root ball sits 1-2 inches above ground level. This prevents soil from settling and burying the trunk, which can cause disease. Step back and check—if the hole looks uneven, adjust before filling it in. Never amend the backfill soil with fertilizer; fresh roots need time to establish before competing for nutrients.
Backfill and Water for Strong Establishment
Fill the hole with the original soil, tamping lightly every 4-6 inches to remove air pockets. Avoid compacting too hard—roots need space to expand. Once the hole is half-filled, water deeply to settle the soil and eliminate gaps. Finish filling the hole, then create a 2-3 inch deep basin around the base to direct water toward the roots.
Water the tree slowly and deeply until the soil is moist 12 inches down. A newly planted tree needs 10-15 gallons of water the first week, depending on soil type. Mulch with 2-3 inches of wood chips, keeping it 6 inches away from the trunk to prevent rot. Mulch retains moisture and regulates soil temperature, but too much can smother roots.
Stake and Protect Only When Necessary
Stake the tree only if the site is windy or the tree is top-heavy. Use two stakes placed diagonally from the tree, tied loosely with soft fabric strips (never wire, which can girdle the trunk). The goal is to stabilize the tree without restricting movement—roots strengthen faster when the tree sways slightly in the wind.
Protect young trees from animals with a tree guard or wire mesh if rabbits or deer are a problem. Avoid plastic wraps, which trap heat and moisture, inviting pests. Water once a week during the first year, adjusting for rain—1 inch per week is ideal. After that, most mature trees only need watering during droughts.
Tips & tricks for perfect tree planting year-round
Planting a tree that thrives isn't just about digging a hole—it's about creating the perfect environment for roots to flourish from day one. Here are the key techniques that make all the difference.
Sunlight and Soil Timing: When checking soil drainage in Step 1, remember that the 30-minute water pooling test should be done after a good rain or thorough watering. If your soil drains too quickly, it may not hold enough moisture for young roots. In this case, mix in some organic matter like composted leaves or coconut coir to improve water retention without suffocating roots.
Root Ball Prep: In Step 2, don't skip loosening the container roots if you're planting a potted tree. I've seen too many trees struggle because compacted roots can't spread properly. After squeezing the container sides, gently tease the outer roots with your fingers—this encourages them to grow outward rather than circling, which can strangle the tree as it matures.
Watering Wisdom: The 10-15 gallons of water in the first week might sound like a lot, but it's crucial. In Step 3, water slowly to avoid runoff—aim for a steady drip that lets moisture penetrate deeply. A good test is to stick your finger 12 inches down; if it feels dry, keep watering. For clay soils, you might need closer to 15 gallons, while sandy soils may only need 10.
Mulching Matters: That 2-3 inch layer of wood chips in Step 3 isn't just decoration—it's insulation. Spread it evenly but keep it 6 inches from the trunk to prevent rot. I like to use shredded bark mulch because it breaks down slowly and improves soil structure over time. Just avoid fresh wood chips, which can draw nitrogen from the soil and stress your young tree.
Pro Tips for Tree Planting Tips
- Planting a tree that thrives isn't just about digging a hole—it's about creating the perfect environment for roots to flourish from day one.
- Sunlight and Soil Timing: When checking soil drainage in Step 1, remember that the 30-minute water pooling test should be done after a good rain or thorough watering.
- Root Ball Prep: In Step 2, don't skip loosening the container roots if you're planting a potted tree.
Frequently asked questions
Got questions about planting trees? You’re not alone! Here are some of the most common concerns—and straightforward answers—to help you plant with confidence.
What’s the best time of year to plant a tree?
For most regions, fall and early spring are ideal—when soil is workable but not frozen, and trees can establish roots before extreme heat or cold. However, bare-root trees (sold without soil) must be planted immediately after purchase. If you’re planting in summer, prioritize deep watering and shade protection to reduce stress.
How often should I water a newly planted tree?
Water deeply 2–3 times per week for the first year, aiming for 1–1.5 inches of water per session. Use a soaker hose or dig a small trench around the root ball to encourage deep root growth. Mulch heavily (3–4 inches) to retain moisture—just keep it away from the trunk to avoid rot. Pro tip: Water less frequently but more thoroughly to prevent shallow roots.
Can I plant a tree in a small yard or container?
Choose dwarf varieties (like Japanese maples or columnar fruit trees) or container-friendly species such as dwarf citrus, olive, or fig trees. For in-ground planting, opt for smaller root systems (e.g., serviceberry or flowering crabapple) and prune regularly. Containers need well-draining soil, large pots (15+ gallons), and winter protection in cold climates.
What should I do if my tree’s leaves turn yellow or wilt?
Yellow leaves often signal overwatering, underwatering, or nutrient deficiency. Check the soil—it should be moist but not soggy. Wilted leaves could mean root stress (too much sun, compacted soil, or poor drainage). Troubleshoot:
Yes! Prioritize native, drought-tolerant species like:
If issues persist, consult a local arborist.
Are there low-maintenance trees for beginners?
These trees thrive with basic care and add beauty with minimal effort. Bonus: Check your USDA Hardiness Zone to pick the best match for your climate!
Wrapping up and next steps
Planting trees is a rewarding way to boost your landscape, support the environment, and even increase your property’s value! 🌱 The key to year-round success lies in proper site selection, soil preparation, and ongoing care—whether you’re planting in spring, summer, fall, or winter.
By following these three techniques, you’ll give your trees the best chance to thrive for decades to come.
Now that you’re armed with expert tips, take the next step! Start small—even a single tree makes a difference. Research native species for your region, gather your tools, and get planting. Your future self (and the planet) will thank you! 🌍✨