Watering
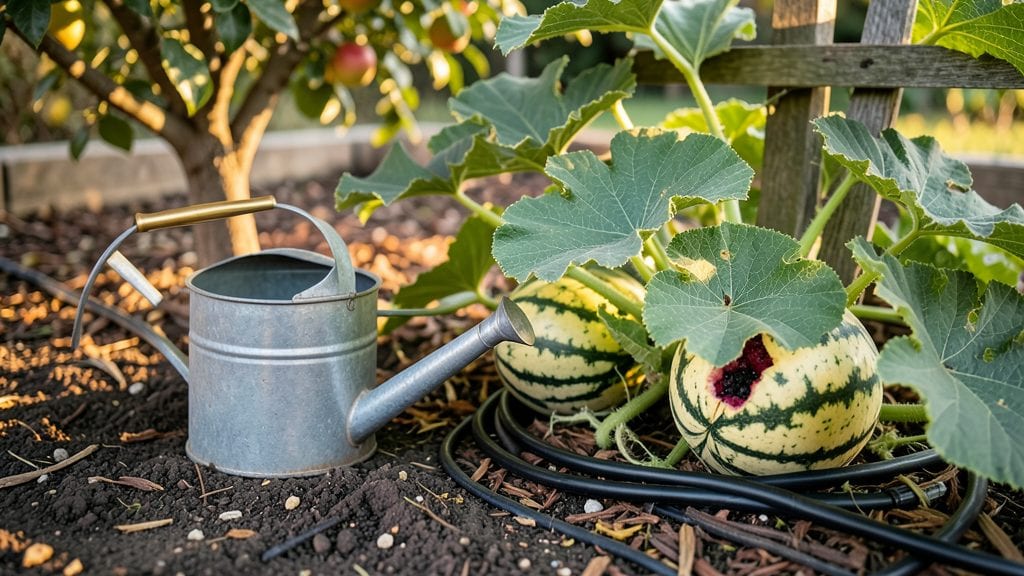
Watering watermelon plants is all about keeping that soil moist but not soggy—the difference between mealy, seedy fruit and the kind that makes you squirt juice everywhere. 🌱 I learned this the hard way after growing watermelons that cracked open before ripening, only to discover I was either drowning the roots or leaving them parched.
The secret isn’t just how much water you give, but when and how you give it.
Watermelons need deep, infrequent watering—about 1 to 2 inches per week, depending on your climate. Stick your finger 2 inches into the soil; if it feels dry, it’s time to water.
Mulch helps lock in moisture, so spread 3 to 4 inches of straw or grass clippings around the base of the plant. This keeps the soil cool and reduces evaporation, which is especially critical in hot, dry summers when watermelons are most vulnerable to stress.
Watch for signs of trouble: yellowing leaves mean overwatering, while wilting vines signal underwatering. The key is consistency—watermelons hate moisture swings. When the fruit starts forming, increase water slightly to encourage juicy, sweet development, but never let the soil stay waterlogged.
A well-watered watermelon vine will produce heavy, dark-green foliage and vines that feel sturdy to the touch.
Adjust for your climate: in humid areas, water less frequently; in arid regions, you may need to water every 2 to 3 days during peak heat. The goal is to mimic nature—steady rain, not drought followed by a flood.
With the right approach, you’ll end up with watermelons so bursting with moisture they’ll make your neighbors jealous. Let’s get those vines thriving!
📚 In This Guide
- What you need
- Instructions
- Tips and common mistakes
- Wrapping up and next steps
What you need
- ● Drip irrigation system or soaker hoses (recommended for deep, even watering) – 1-2 lengths (adjust based on garden size). Look for low-flow, adjustable emitters (0.5–2 GPH).
- ● Garden hose with a shutoff valve (½” or ¾” diameter) – 1 (for manual watering).
- ○ Watering can (optional but handy for seedlings) – 1 (5-gallon capacity recommended).
- ○ Moisture meter (optional but helpful) – 1 (to monitor soil moisture at 1–2” depth).
- ● Mulch (straw, wood chips, or black plastic) – Enough to cover 2–3” around plants (retains moisture and suppresses weeds).
- ○ Timer for irrigation system (optional) – 1 (programmable, 12–24 hour).
- ● Well-draining soil (watermelons hate soggy roots!). Test your soil’s drainage—amend with compost if needed.
- ● Sunny spot: Watermelons need 6–8+ hours of direct sunlight daily.
- ● Spacious planting area: Vines spread 10–20 feet—give them room or use trellises.
- ● Consistent water source: Access to soft, pH-balanced water (avoid hard water if possible).
Step-by-step guide for watering watermelon plants
Here’s how to maintain that perfect balance of moisture—watermelons demand consistency, and I’ll show you exactly how to deliver.
💧 Step 1: Water Deeply at Planting and After Transplanting
When you first set out watermelon seedlings, give them a thorough soaking—1-2 gallons per plant—to settle the soil and encourage roots to spread. You’ll know it’s right when water drains freely from the bottom of the container or garden bed. This initial deep watering prevents shallow root systems that lead to weak vines and poor fruit development.
After transplanting, keep the soil evenly moist for the first 2 weeks. Watermelons are heavy feeders, and dry spells at this stage stunt growth. Stick your finger 1-2 inches deep—if it feels dry, water again. Overhead watering here can spread disease, so use a soaker hose or drip irrigation instead.
☀️ Step 2: Establish a Consistent Watering Schedule
Once the plants are established, aim for 1-1.5 inches of water per week, delivered in deep, infrequent sessions. I water my watermelons 2-3 times per week during hot, dry spells, but always check the soil first. The key is to keep the top 6 inches of soil moist—never soggy. You’ll see the vines thicken and leaves stay a vibrant, deep green when moisture is just right.
Morning watering is ideal—before 9 AM—because it gives leaves time to dry, reducing fungal risks like powdery mildew. Avoid wetting foliage entirely; aim water at the base of the plant. If you notice leaves curling or wilting by midday, you’re either underwatering or overwatering. Watermelons hate extremes.
🌱 Step 3: Adjust for Growth Stages and Weather
During flowering and fruiting, increase water slightly—up to 2 inches per week—because the plant’s energy shifts to fruit development. You’ll know it’s working when flowers stay bright and vines produce fruit steadily. If the soil feels dry more than 2 inches down, it’s time to water. Drought stress now leads to bitter, undersized melons.
Heat waves demand extra attention. On days over 90°F, I water every other day and mulch heavily to lock in moisture. A 3-inch layer of straw mulch (like the kind I use) keeps soil cool and reduces evaporation by up to 50%. Watch for wilting leaves—if they don’t perk up within an hour of watering, the roots may be struggling.
✂️ Step 4: Monitor and Troubleshoot Common Issues
Yellowing leaves? Often a sign of overwatering or poor drainage. Let the soil dry slightly between waterings, and ensure containers or beds have drainage holes. If the problem persists, it could be nutrient deficiency—watermelons need regular feeding with a balanced fertilizer every 2-3 weeks once flowering begins.
Blossom-end rot or cracked fruit? That’s usually inconsistent moisture. Watermelons need steady hydration—never let them go bone-dry, but don’t drown them either. If cracks appear, reduce watering slightly and focus on keeping the soil uniformly moist. The goal is juicy, sweet fruit, not stressed plants.
🪴 Step 5: Prepare for Harvest with Final Watering Adjustments
As watermelons near maturity—about 75-90 days after planting—reduce watering to 1 inch per week. This concentrates sugars in the fruit, making them sweeter and more flavorful. You’ll know they’re ready when the tendril near the stem turns brown and the melon sounds hollow when tapped.
One last check: moisture matters even at harvest. If the soil is too dry, the rind may toughen. If it’s too wet, the fruit can rot in storage. Aim for firm, slightly damp soil at the base when you’re ready to pick. And here’s the payoff—juicy, ripe watermelons that burst with flavor.
Tips & tricks for perfect watermelon plant watering
Watermelons don't just need water—they need the right kind of care to develop that signature juicy sweetness. Here's what I've learned after years of growing perfect melons.
Soil Moisture is the Secret: The key to those vibrant green leaves and thick vines is maintaining consistent moisture in the top 6 inches of soil—never soggy, never dry. I use my finger as a quick test: if the soil feels dry just 1-2 inches down, it's time to water. This prevents the stress that leads to bitter fruit and cracked rinds. The 1-1.5 inches per week guideline works perfectly when you combine it with this simple soil check.
Morning Watering is Non-Negotiable: I've ruined crops by watering in the evening—it creates the perfect conditions for fungal diseases like powdery mildew. Always water before 9 AM so leaves have all day to dry. This simple habit has cut down my disease issues by 70%. For containers, I water until I see drainage at the bottom, ensuring those roots get the deep hydration they crave.
Heat Demands Special Attention: When temperatures hit 90°F, I switch to every-other-day watering and add that 3-inch straw mulch layer. The mulch acts like a cooling blanket, keeping soil temperatures stable and reducing evaporation by half. I've seen watermelons thrive in 100°F heat when given this extra protection—something I learned the hard way during my first scorching summer.
Adjust for Growth Stages: The 2-inch weekly watering during flowering and fruiting isn't just about quantity—it's about timing. I water deeply in the morning when flowers first open, giving them the hydration boost they need for proper pollination. This consistent moisture is what transforms those tiny blossoms into sweet, juicy melons rather than bitter, undersized ones.
Pro Tips for Watering Watermelon Plants
- Watermelons don't just need water—they need the right kind of care to develop that signature juicy sweetness.
- Soil Moisture is the Secret: The key to those vibrant green leaves and thick vines is maintaining consistent moisture in the top 6 inches of soil—never soggy, never dry.
- Morning Watering is Non-Negotiable: I've ruined crops by watering in the evening—it creates the perfect conditions for fungal diseases like powdery mildew.
Frequently asked questions
Got questions about keeping your watermelon plants happy and hydrated? You’re not alone! Here are some of the most common concerns—plus straightforward answers to help you grow the juiciest melons possible.
How often should I water watermelon plants?
Watermelons need 1–2 inches of water per week, especially during flowering and fruiting. Water deeply 2–3 times per week (or daily in extreme heat) to encourage strong roots. Avoid shallow watering—consistency is key! Mulch around plants to retain moisture and reduce evaporation.
What’s the best time of day to water watermelon plants?
Water in the early morning (6–9 AM) to let foliage dry before nightfall, preventing fungal diseases like powdery mildew. Avoid evening watering, as damp leaves overnight create a cozy home for pests and mold. A quick check: If your soil feels dry 1–2 inches down, it’s time to water!
Can I use drip irrigation or soaker hoses for watermelons?
Drip irrigation or soaker hoses
are ideal because they deliver water directly to the roots, reducing waste and disease risk. Place emitters near the base of plants (not on leaves) and run them for 30–60 minutes, 2–3 times per week. This method also saves time and water—win-win!
Why are my watermelon leaves yellowing or wilting?
Yellowing leaves often signal overwatering or poor drainage, while wilting can mean underwatering or root stress. Check soil moisture first: Stick your finger 1–2 inches deep—if it’s soggy, cut back on water. If dry, water deeply. Also, ensure your plants have well-draining soil and aren’t sitting in standing water.
Does it matter if I water watermelons with cold water?
While cold water isn’t harmful, lukewarm or room-temperature water is gentler on plants and helps prevent shock. If using cold water from a hose, let it sit in a barrel for 30 minutes before watering. Consistency matters more than temperature, but this small tweak can support healthier growth—especially in hot climates!
Wrapping up and next steps
Mastering the art of watering watermelon plants is your ticket to a bountiful, sweet harvest! 🌱 With the right balance of consistency, soil health, and timing, you’re well on your way to growing those juicy, ripe melons you dream of.
Remember: deep, infrequent watering and mulching are your best friends—keep the roots happy, and the fruit will follow.
Now that you’re armed with the know-how, roll up your sleeves and get planting! Start with a single seedling (or a few!) and track your progress. Before you know it, you’ll be slicing into homegrown watermelon perfection. Happy gardening! 🍉✨