Pruning
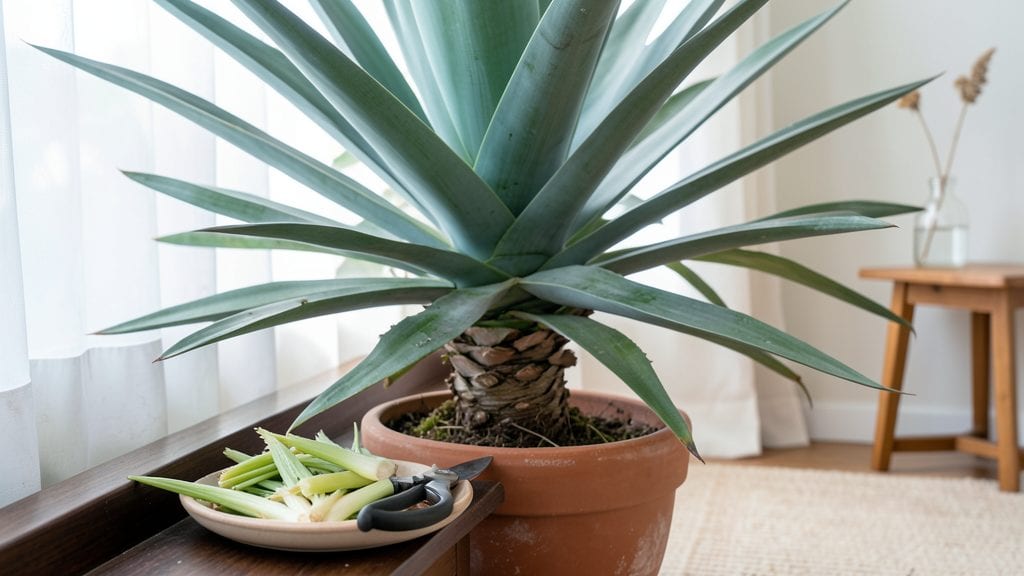
Yucca plant trimming transforms a scraggly mess into a sleek, year-round showstopper—if you do it right. I’ve cut back more yuccas than I can count, and the difference between a healthy plant and one that looks like it’s giving up starts with when and how you make those cuts.
The best time? Right after flowering or in late winter, before new growth kicks in. That’s when your yucca is ready to reset without stress.
You’ll need just three things: sharp pruners (sterilized with rubbing alcohol), gloves to protect from those razor-sharp leaves, and a clear goal—whether it’s removing dead fronds, thinning crowded stems, or encouraging bushier growth.
The key is precision: cut 1-2 inches above the base of the stem you’re removing, never at the main trunk. Over-trimming here is how you accidentally kill a plant, and nobody wants that drama.
After trimming, your yucca will thank you with new shoots within weeks—sometimes even months if it’s been neglected. Hold off on fertilizing for 4-6 weeks to let those cuts heal, but keep water light until you see fresh growth.
That first flush of vibrant green leaves is worth every snip, and you’ll notice pests disappearing faster too, since healthy yuccas repel them naturally.
Here’s the secret most people miss: save those cuttings. The bottom 3-4 inches of any trimmed stem can root in water or dry soil, giving you free yuccas for friends—or future replacements.
Just don’t rush it; yuccas heal slower than they look like they should. Patience pays off with a plant that stays lush, upright, and drought-proof for decades.
📚 In This Guide
- What you need
- Instructions
- Tips and common mistakes
- Wrapping up and next steps
What you need
- ● Sharp pruning shears – Bypass pruners (for clean cuts on smaller stems) or sterilized shears (for larger branches). Size: 6-8 inches (ideal for most yucca trims).
- ● Handsaw or pruning saw – For thick, woody stems (e.g., mature yucca trunks). Blade type: Fine-toothed for clean cuts.
- ● Rubbing alcohol (70% or higher) – Quantity: Small bottle (for sterilizing tools between cuts).
- ● Garden gloves – Type: Heavy-duty (to protect from sharp edges and sap).
- ● Disposable pruning bags or bucket – Size: 5-gallon (to collect trimmings and debris).
- ● Horticultural sealant – Use: To coat large cuts and prevent disease (e.g., Tanglefoot or pruning paste).
- ● Ladder or step stool – For tall yucca plants (ensure it’s stable and rated for your weight).
- ● Spray bottle with water – To mist cuts and reduce sap bleeding.
- ● Disinfectant spray (e.g., bleach solution) – Mix: 1 part bleach to 9 parts water (for cleaning tools post-trimming).
- ● Choose a dry, sunny day (yucca sap is less sticky when plants are hydrated).
- ● Work during early morning or late afternoon to avoid stressing the plant in peak heat.
- ● Have a clear plan for dead/diseased areas vs. shaping cuts (sketch it out if needed!).
Step-by-Step instructions for yucca plant trimming
Here’s how to revive your yucca’s growth and keep it thriving with clean, strategic cuts.
Assess the Plant for Trimming Needs
Examine your yucca for dead, damaged, or overgrown foliage. Focus on stems with brown, crispy leaves or those that have lost their rigid structure—these are prime candidates for removal. Healthy yucca leaves should feel firm and leathery, not brittle. I always start by identifying the oldest, most woody stems, as these often signal the plant’s natural cycle of renewal.
Look for the growth rings near the base of the plant, where new shoots emerge. These rings indicate where the plant is actively pushing out energy. If you see dry, blackened leaves clustered at the top, these are ready for trimming. Avoid cutting into healthy green tissue—this is where the plant’s energy resides. A sharp pair of pruning shears will make clean cuts without tearing the plant.
Remove Dead or Damaged Stems
Using sterilized pruning shears, make a clean cut just above a growth node—this is where new shoots will emerge. Angle the cut slightly downward to prevent water from pooling on the wound, which could lead to rot. If the stem is thick, I like to cut in stages, removing a few inches at a time to reduce shock to the plant.
For severely damaged stems, you can trim them back to the base if they’re no longer producing new growth. Yuccas are resilient and will often send up new shoots from the base or nearby nodes. After trimming, discard the removed stems immediately—never leave them lying against the plant, as they can harbor pests or disease.
Thin Overcrowded or Leggy Growth
If your yucca has developed multiple thin, leggy stems reaching outward, it’s time to thin. Focus on the outermost stems first, as these often compete with the central growth for nutrients. Cut these back to the base, leaving only the strongest, most upright stems. This encourages the plant to redirect its energy toward fewer, healthier stems.
Watch for new shoots emerging from the base or along the stem—these are signs of vigorous growth. If you see multiple shoots competing, remove all but the two or three strongest to avoid overcrowding. Yuccas thrive when given space to grow, so don’t hesitate to be bold with thinning. The goal is to create an open, airy structure that allows light and air to circulate freely.
Prune for Shape and Aesthetic Balance
Once you’ve removed the dead and overgrown stems, step back and assess the plant’s shape. Yuccas have a natural architectural form, but sometimes they develop uneven growth. To maintain balance, trim any stems that are growing at odd angles or disrupting the plant’s symmetry. Cut back to a growth node where the stem branches naturally.
If your yucca has become too tall or top-heavy, you can head it back by cutting the main stem just above a lower growth node. This will encourage bushier growth from below. Be patient—it may take a few weeks for new shoots to emerge, but the result will be a fuller, more compact plant. Avoid over-pruning, as yuccas can take time to recover from aggressive cuts.
Clean Up and Encourage New Growth
After trimming, clean the area around the base of the plant to remove any debris or fallen leaves. This reduces the risk of pests and disease. I like to apply a light layer of compost around the base to provide nutrients for the new growth. Water the plant deeply but sparingly—yuccas prefer dry conditions, so avoid overwatering, which can lead to rot.
Place the trimmed yucca in a location with bright, indirect light for a few weeks to allow the wounds to heal. You’ll notice new shoots emerging from the base or along the stems within 4-6 weeks. If you’ve trimmed heavily, the plant may enter a dormancy-like state, so be patient. Once new growth appears, gradually reintroduce it to full sun to harden off the tender shoots.
Tips & tricks for precision yucca trimming
A few strategic techniques will transform your yucca from overgrown to thriving. These insights will help you navigate the trimming process with confidence and precision.
Growth Node Identification: The growth nodes are your most important reference points during trimming. These small, bump-like structures along the stem are where new shoots emerge. When making cuts in Step 2 or Step 4, always aim to cut just above a growth node—never between them. This ensures you're not removing potential future growth. I recommend using a magnifying glass if your yucca has particularly small nodes, as precision here makes all the difference in encouraging robust regrowth.
Timing for New Growth: While the instructions mention new shoots appearing within 4-6 weeks in Step 5, I've found that patience pays off. In my experience with desert-adapted yuccas, the first signs of new growth often appear around the 3-week mark, but full recovery can take up to 8 weeks, especially after heavy pruning. During this time, resist the urge to trim again—let the plant redirect its energy to establishing new roots and shoots. The dormancy period is crucial for rebuilding strength.
Tool Sterilization: Sterilizing your pruning shears between cuts in Step 2 is more important than most gardeners realize. I use a 1:10 bleach-to-water solution to wipe down the blades after each cut, especially when working with multiple stems. This prevents cross-contamination that could introduce fungal infections or bacterial diseases. For those without bleach, rubbing alcohol works equally well. Clean tools mean healthier cuts and faster healing for your yucca.
Light Transition Strategy: The bright, indirect light recommendation in Step 5 is essential, but the transition back to full sun requires careful timing. After 2-3 weeks in indirect light, I gradually reintroduce my yuccas to morning sun for 2 hours daily, then increase by 1 hour each subsequent week. This slow acclimation prevents sunburn on the tender new growth. The goal is to harden off the shoots over 4-6 weeks before full sun exposure, mirroring the plant's natural seasonal adaptation.
Pro Tips for Yucca Plant Trimming
- A few strategic techniques will transform your yucca from overgrown to thriving.
- Growth Node Identification: The growth nodes are your most important reference points during trimming.
- Timing for New Growth: While the instructions mention new shoots appearing within 4-6 weeks in Step 5, I've found that patience pays off.
Frequently asked questions
Got questions about keeping your yucca plant looking its best? You’re not alone! Here are some of the most common queries—and straightforward answers—to help you trim with confidence.
When is the best time to trim a yucca plant?
The ideal time to trim your yucca is in late winter or early spring, just before new growth begins. This timing ensures you’re not removing buds that could become flowers. Avoid trimming in fall or winter, as the plant may struggle to recover before dormancy.
How do I trim a yucca plant without killing it?
Always use sterilized pruners and cut just above a leaf node (the bump where leaves grow). Avoid cutting into the thick, woody stem—this can expose the plant to rot. If you’re removing dead fronds, trim them at the base to keep the plant tidy and healthy.
Can I propagate my yucca plant from trimmings?
After trimming, you can root the cuttings in well-draining soil or water. Let the cut end callous over for 1–2 days first, then place it in soil or a jar of water. Keep it in bright, indirect light until roots form—usually in 4–6 weeks.
Why is my yucca plant turning brown after trimming?
Brown tips or fronds after trimming are often normal, especially if the cuts were made in dry conditions. To prevent further damage, water lightly and avoid over-fertilizing. If browning spreads or the stem softens, it may signal rot—trim affected areas immediately and improve drainage.
Do I need to trim my yucca plant every year?
Not necessarily! Trim only when you see dead, damaged, or overcrowded fronds. Mature yuccas may go years between trims, but removing old growth promotes airflow and prevents pests. If your plant looks leggy or sparse, a light trim can encourage fresh, vibrant growth.
Wrapping up and next steps
Trimming your yucca plant isn’t just about aesthetics—it’s the secret to keeping it thriving year-round! 🌿 With the right tools, timing, and techniques, you’ll encourage lush growth, prevent disease, and maintain that stunning architectural shape.
Whether you’re a seasoned gardener or just starting out, a little precision goes a long way.
Ready to give your yucca the TLC it deserves? Grab your pruners and head outside—your plant is waiting for its next big glow-up! For extra confidence, bookmark this guide or snap a photo of your progress. Happy trimming!