Picking
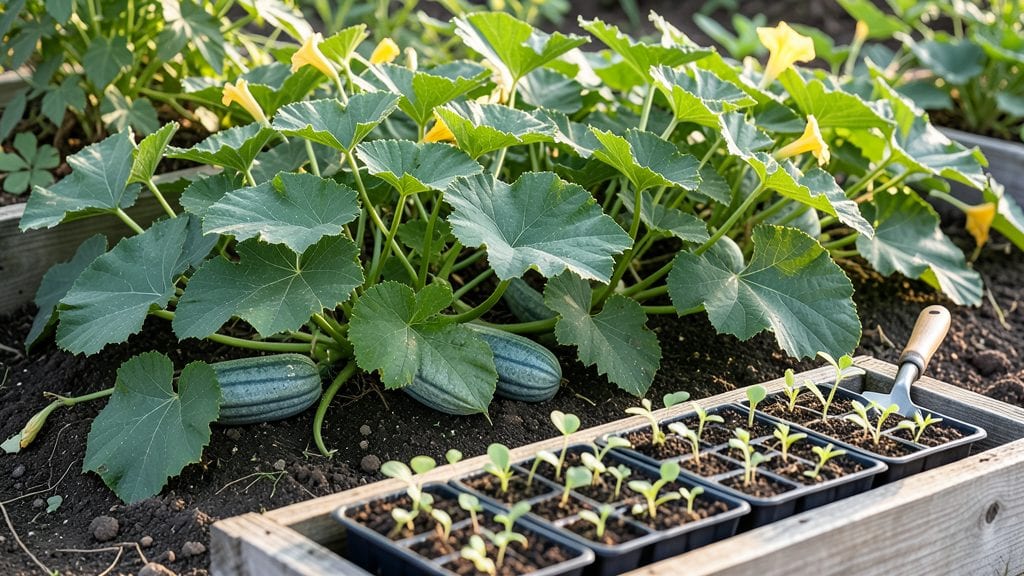
Planting Hubbard squash fast means starting with warm soil and a little patience—these big guys need the right conditions to pop up in 7-10 days instead of weeks. I learned the hard way that cold, damp soil makes them sulk, but once they break through, they grow like crazy.
The secret? Wait until nighttime temperatures stay above 60°F before digging in.
You’ll need a spot with full sun (6+ hours daily) and rich, well-draining soil mixed with compost—Hubbards hate soggy roots. Space seeds 3-4 feet apart in hills (mound soil) to prevent disease, and plant them 1 inch deep, 2-3 seeds per hill.
Thin to the strongest sprout later. Companion plants like beans or marigolds help keep pests away while they grow.
Once those first leaves appear, keep the soil moist but not soggy—Hubbards need steady water, especially when they start vining. Within 4-6 weeks, you’ll see foot-long stems and those iconic warty fruits forming.
The key to fast germination? Consistency—water at the base, avoid overhead spraying, and watch for squash vine borers lurking in the heat.
This method works best in zones 3-10, but if you’re in cooler areas, start seeds indoors 4-6 weeks before your last frost. The payoff? A harvest of 10-15 pound squash by late summer—just don’t let them sit on the vine too long, or they’ll turn to mush.
Ready to grow these giants?
📚 In This Guide
- What you need
- Instructions
- Tips and common mistakes
- Wrapping up and next steps
What you need
- ● Hubbard squash seeds: Choose heirloom or hybrid varieties (e.g., 'Blue Hubbard' or 'Long Island Cheese'). Aim for 3-5 seeds per plant (thin to 1-2 strong seedlings per hill).
- ● Well-draining potting mix or garden soil: 50 lbs (for in-ground planting) or 1-2 gallons (for containers). Opt for a mix with compost (20-30%) for nutrients.
- ● Compost or aged manure: 2-3 lbs per planting area to enrich soil fertility (avoid fresh manure—it can burn seedlings!).
- ● Organic mulch (straw or shredded leaves): 3-4 inches to retain moisture and suppress weeds.
- ● Garden trowel or hand shovel (for transplanting seedlings).
- ● Gloves (to protect hands while handling soil and seeds).
- ● Watering can or hose with a gentle spray nozzle (Hubbard squash needs 1-2 inches of water weekly).
- ○ Optional: Row cover or lightweight fabric (to protect seedlings from pests like squash bugs in early stages).
- ● Warm soil: Hubbard squash thrives in 70-90°F soil temps. Wait until all frost danger has passed (typically after last spring frost).
- ● Sunlight: Full sun (6-8 hours daily) is a must—choose a south-facing spot if possible.
- ● Space: Plant seeds 2-3 feet apart in hills, with 5-6 feet between hills (vines spread 3-5 feet).
Instructions for planting Hubbard squash with rapid germination
Here's my battle-tested method for getting Hubbard squash seeds to sprout quickly and grow into vigorous plants.
Prepare the Planting Site for Optimal Germination
Hubbard squash thrives in warm soil, so wait until the ground reaches at least 60°F before planting. Choose a location with full sun exposure—these plants need 8+ hours of direct sunlight daily to produce heavy fruit. Work the soil to a depth of 12 inches, incorporating 2-3 inches of compost from your materials list into the top 6 inches. This improves drainage and provides the nutrients these hungry plants crave.
Here's the thing—Hubbard squash roots spread aggressively, so avoid planting where you grew squash, pumpkin, or zucchini in the past two years. The soil-borne diseases from those crops can linger and devastate your seedlings before they even emerge. If your garden space is limited, use raised beds filled with fresh soil mix to minimize disease risk.
Plant Seeds at the Correct Depth and Spacing
Plant 3-4 seeds per hill, placing them 1 inch deep and 4-6 inches apart within the hill. I like to make small hills of soil about 6 inches high and 3 feet apart—this helps prevent soil-borne diseases by keeping foliage off the ground. The seeds contain a lot of energy, so they'll push through the soil quickly once conditions are right.
Don't be tempted to plant deeper than 1 inch. Hubbard squash seeds need light to germinate properly, and planting too deep forces the seedlings to work harder to reach the surface, which can delay emergence by 3-5 days. Cover the seeds lightly with soil and water gently to settle the earth around them without displacing the seeds.
Maintain Consistent Moisture for Fast Germination
Keep the planting area consistently moist but never soggy during germination. Hubbard squash seeds typically emerge in 7-14 days when soil temperatures are ideal, but they can take 2-3 weeks in cooler conditions. Water the soil to a depth of 2 inches every 2-3 days, checking by inserting your finger into the soil—it should feel damp but not waterlogged.
Real talk: Overwatering is a common mistake that leads to rot before seeds even sprout. If the soil surface looks glistening or you see standing water, you've gone too far. Instead, water deeply but infrequently, allowing the top inch to dry slightly between waterings. This encourages strong root development from the start.
Thin Seedlings to Strong Plants
Once seedlings reach 2 inches tall, thin them to 2-3 plants per hill, keeping the strongest, most vigorous specimens. Use scissors to snip unwanted seedlings at soil level—this prevents disturbing the roots of the plants you're keeping. Hubbard squash plants need space to spread, and thinning ensures each has enough nutrients and sunlight to produce large fruit.
You'll know you've thinned correctly when the remaining plants have bold stems and deep green leaves. Weak, leggy seedlings won't recover, so don't hesitate to remove them. The goal is to give your chosen plants room to grow into 6-foot-wide vines with plenty of energy for fruit production.
Provide Support and Monitor for Pests Early
As plants grow, they'll need strong trellises or cages to support their heavy fruit. Install these within 2-3 weeks of planting to prevent damaging vines later. Hubbard squash fruits can weigh 20+ pounds, so sturdy support is critical. Water at the base of the plant in the morning to keep foliage dry, which reduces the risk of fungal diseases like powdery mildew.
Watch for squash bugs and cucumber beetles—they target Hubbard squash early in the season. I like to handpick eggs from the undersides of leaves and drop them into soapy water. If you notice wilting or yellowing leaves, check for these pests immediately. A neem oil spray applied weekly can prevent infestations before they become unmanageable.
Tips & tricks for fast Hubbard squash germination
Speeding up germination with Hubbard squash means paying attention to details most gardeners overlook. These targeted strategies will help you achieve those rapid emergence times while avoiding common pitfalls that stall growth.
Soil Temperature is Everything: The 60°F minimum soil temperature isn't just a suggestion—it's a biological requirement. Use a soil thermometer to verify conditions before planting, especially in spring. I've found that warming the soil with black plastic mulch 2-3 days before planting can shave critical days off germination time. For cooler climates, consider using a seedling heat mat under your planting area to maintain consistent warmth.
Light Exposure Trumps Depth: Remember that 1-inch depth guideline? That's the maximum—any deeper and your seeds will struggle. I've seen germination delayed by 5-7 days when seeds were planted just 1.5 inches deep. For fastest results, create shallow furrows or use a seed starter kit that allows light penetration while maintaining moisture. This is particularly important in dense soils where seeds might get buried deeper than intended during watering.
Watering Strategy Makes the Difference: The 2-inch deep watering every 2-3 days is about more than just moisture—it's about creating the right environment. I recommend using a moisture meter to verify soil dampness rather than relying on a schedule. The top inch should dry slightly between waterings, but never let the soil dry completely. For containers, I've found that drip irrigation systems provide the most consistent moisture without overwatering.
Thinning Timing is Critical: Waiting until seedlings reach 2 inches tall before thinning gives you the best window to assess plant strength. I've noticed that thinning too early can damage emerging roots while waiting too long creates overcrowding that stresses remaining plants. Use sharp scissors to cut at soil level rather than pulling seedlings—this prevents disturbing the root systems of your chosen plants and reduces transplant shock.
Pro Tips for Planting Hubbard Squash
- Speeding up germination with Hubbard squash means paying attention to details most gardeners overlook.
- Soil Temperature is Everything: The 60°F minimum soil temperature isn't just a suggestion—it's a biological requirement.
- Light Exposure Trumps Depth: Remember that 1-inch depth guideline?
Frequently asked questions
about planting Hubbard squash—because even the best gardeners need a little guidance! Here are answers to the most common questions to help you grow like a pro.When is the best time to plant Hubbard squash?
Hubbard squash thrives in warm soil, so wait until after the last frost when temperatures stay above 60°F (15°C). For most regions, this means planting in late spring to early summer (May–June in the Northern Hemisphere). Start seeds indoors 2–3 weeks earlier if your growing season is short.
How long does it take for Hubbard squash seeds to germinate?
With the right conditions—warm soil (70–90°F/21–32°C) and consistent moisture—Hubbard squash seeds typically germinate in 7–14 days. For faster results, soak seeds overnight or use a heat mat. Patience is key, but don’t overwater once sprouted!
Can I grow Hubbard squash in containers? What size pot do I need?
Yes! Hubbard squash has sprawling vines, so choose a large container (at least 18–24 inches wide and deep) with drainage holes. Use a lightweight potting mix and place the pot in full sun. Trellising can save space, but expect smaller fruits compared to in-ground planting.
Why aren’t my Hubbard squash seeds sprouting? Troubleshooting tips.
Seeds may fail to sprout due to cold soil, poor drainage, or old seeds. Try these fixes:
- Test soil temperature with a thermometer—aim for 70°F+ (21°C+).
- Ensure seeds are planted 1 inch deep in well-draining soil.
- Use fresh seeds (1–2 years old) for best germination rates.
- Try a seedling heat mat or cover with black plastic to warm the soil.
What can I plant alongside Hubbard squash to improve growth?
Hubbard squash benefits from companion planting! Try these pairings:
- Nasturtiums (repel pests like squash bugs).
- Bush beans (fix nitrogen in the soil).
- Marigolds (deter insects naturally).
Avoid planting near potatoes or pumpkins, as they compete for nutrients. Give vines plenty of space (3–4 feet apart) to thrive!
Wrapping up and next steps
Growing hubbard squash is a rewarding journey that starts with patience and the right techniques—especially when you want those fast germination results! By choosing healthy seeds, preparing nutrient-rich soil, and mastering timing and care, you’ll be well on your way to a bountiful harvest of sweet, nutritious squash. 🌱
Now that you’re armed with expert tips, take the next step: grab your gardening tools, mark your calendar for planting, and get ready to enjoy the fruits of your labor. Happy planting—your future harvest is waiting! 🎉