Flowers
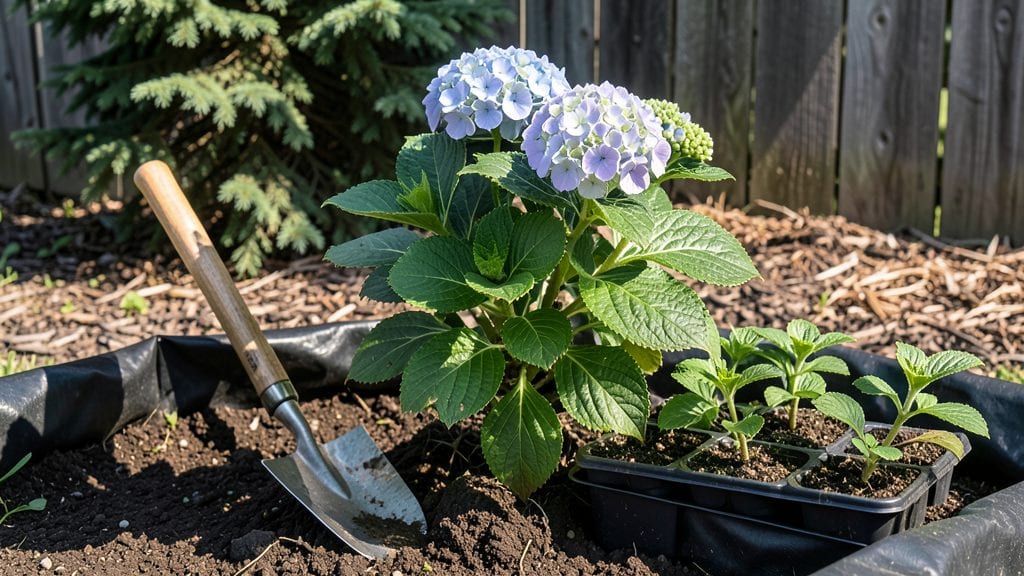
Planting hydrangea flowers in the right soil is what turns floppy stems into vibrant, foot-wide blooms that last all summer. 🌸 I learned the hard way—my first hydrangeas flopped because I planted them in alkaline soil, and no amount of watering could fix the sad, stunted growth.
The secret isn’t just the soil type; it’s the pH, drainage, and organic matter that hydrangeas crave like a gourmet meal.
You’ll need a spot with morning sun and afternoon shade, a shovel, composted pine needles or peat moss, and a soil test kit (or vinegar—yes, really).
Hydrangeas thrive in acidic soil (pH 5.2–6.0), so if your yard’s soil tests higher, amend it with sulfur or organic matter like coffee grounds.
Plant in early spring or fall when roots establish before extreme heat or cold, and space them 4–6 feet apart—they spread more than you’d expect.
Dig a hole twice as wide as the root ball but no deeper, then mix the native soil with compost and a handful of sulfur. Set the plant so the top of the root ball sits 1 inch above soil level—this prevents rot.
Water deeply right after planting, then keep the soil consistently moist (not soggy) for the first month. The payoff? By midsummer, you’ll have blooms so bold they’ll make your neighbors ask for cuttings.
Here’s the kicker: if your blooms stay green instead of turning blue or pink, your soil might be too alkaline. Test it again in a year—hydrangeas reward patience with three seasons of color if you get the soil right. Let’s get those roots happy!
📚 In This Guide
- What you need
- Instructions
- Tips and common mistakes
- Wrapping up and next steps
What you need
- ● Hydrangea plants: Choose between bare-root (dormant, no soil) or container-grown (potted) varieties. For a full garden bed, plan for 3–6 plants per 100 sq. ft. (spacing depends on variety).
- ● Well-draining, acidic soil: Test soil pH (ideal range: 5.2–5.5 for blue blooms; 6.0+ for pink). Use a blank">soil pH test kit.
- ● Peat moss or pine bark fines (1–2 bags, 1–2 cubic feet per plant) to lower pH.
- ● Compost or aged manure (1 bag per plant) for nutrients.
- ● Fertilizer: Acid-loving plant fertilizer (e.g., blank">Miracle-Gro Azalea, Camellia & Rhododendron; 1 lb per 10 plants).
- ○ Aluminum sulfate (optional, ½ lb per 100 sq. ft.) for blue blooms.
- ● Gardening tools: Trowel or spade (for digging holes).
- ● Garden gloves (to protect your hands).
- ● Watering can or hose (with a gentle spray nozzle).
- ● Mulch (e.g., pine straw or shredded bark; 2–3 inches per plant).
- ● Epsom salt (magnesium sulfate) (1 tbsp per gallon of water) for lush foliage (use sparingly).
- ● Slow-release granules (e.g., Osmocote Smart-Release Plant Food) for long-term nutrition.
- ● Support stakes or cages (for large varieties like Hydrangea macrophylla).
- ● Rain gauge or moisture meter to monitor soil hydration.
Step-by-Step instructions for planting hydrangeas
Here's how to plant these showstoppers for maximum blooms—soil prep is where the magic happens.
🪴 Step 1: Choose the Perfect Spot and Dig the Hole
Hydrangeas thrive in partial shade—think morning sun with afternoon shade in hotter climates. Dig a hole twice as wide as the root ball but only as deep as the container's base. This prevents burying the stem too deeply, which can rot over time.
Loosen the sides of the hole with a shovel to encourage root spread. If your soil tests neutral or alkaline, you'll need to amend it later, but for now, just focus on creating a spacious, undisturbed planting area. The wider hole gives roots room to establish without circling, which is a common mistake that stunts growth.
🌱 Step 2: Prepare the Soil with Acid-Loving Amendments
Hydrangeas crave acidic soil (pH 5.2-6.0). Mix 3 gallons of peat moss or 2 gallons of sulfur-based compost into the hole's native soil. Work it in thoroughly—this ensures the roots have the right environment from day one. If you're planting in containers, use a pre-mixed acid-loving potting mix instead.
For extra insurance, sprinkle a handful of hydrangea-specific fertilizer (like aluminum sulfate if you want blue blooms) around the hole's edges. Avoid mixing this directly into the soil—it can burn roots if too concentrated. Water the amended soil lightly to help it settle before planting.
🌿 Step 3: Plant and Water for Immediate Stability
Gently remove the hydrangea from its container and place it in the hole so the top of the root ball sits level with the surrounding soil. Fill in around the roots with the amended soil, pressing lightly to eliminate air pockets. Hydrangeas hate dry soil, so water deeply (about 1 gallon) right after planting to encourage roots to spread outward.
Mulch the base with 2-3 inches of pine bark or pine needles—this keeps soil acidic and retains moisture. Avoid wood chips from deciduous trees (like oak), as they can raise soil pH over time. Water again in 3-4 days to check drainage; if water pools, dig a small trench to improve runoff.
☀️ Step 4: Monitor Light and Soil for First Season Success
Watch for yellowing leaves—this usually means your soil pH isn’t acidic enough. Test it with a soil pH kit after 6-8 weeks and adjust with aluminum sulfate (for blue flowers) or lime (for pink flowers) as needed. Hydrangeas can take 1-2 years to fully establish, so don’t expect instant blooms.
Prune only dead or crossing branches in the first year. Wait until late winter or early spring to shape the plant—cutting back now can remove next year’s flower buds. Water once a week during dry spells, aiming for 1-2 inches of moisture per week. You’ll know you’re on track when new growth appears by mid-spring.
Tips & tricks for planting hydrangeas with big blooms
Here's what I learned the hard way after planting hydrangeas that either flopped or never bloomed—these tricks make all the difference.
The Hole Depth Secret: In Step 1, that "only as deep as the container's base" rule is critical. I once buried a stem too deeply, and it took two years for that plant to recover. Use a level to check—your hydrangea's crown should sit just above soil level. If you're unsure, dig a bit deeper and mound soil around the base to compensate.
Soil pH Test Timing: The 6-8 week wait in Step 4 might feel long, but testing too early gives false readings. Mark your calendar now! I recommend testing again at 6 weeks, then again at 8 weeks—this helps track if your amendments are working. If pH is still off, you may need to reapply aluminum sulfate or lime, but do this gradually to avoid shocking the roots.
Mulch Choice Matters: That 2-3 inches of pine bark or needles in Step 3 isn't just for looks—it's your acidity insurance. Avoid cedar mulch, which can actually raise pH over time. I've seen gardeners use oak mulch thinking it's fine, only to watch their hydrangeas turn brown from alkaline stress. Stick to evergreen mulches for consistent acidity.
Watering Wisdom: The "1 gallon deeply" rule in Step 3 is your foundation for success. I learned this after seeing hydrangeas with roots that never spread beyond their planting hole. For the 3-4 day check in Step 3, use a rain gauge or tuna can (marked with measurements) to ensure you're really getting 1-2 inches of water per week. Shallow watering encourages shallow roots that can't support big blooms.
Pro Tips for Planting Hydrangea Flowers
- Here's what I learned the hard way after planting hydrangeas that either flopped or never bloomed—these tricks make all the difference.
- The Hole Depth Secret: In Step 1, that "only as deep as the container's base" rule is critical.
- Soil pH Test Timing: The 6-8 week wait in Step 4 might feel long, but testing too early gives false readings.
Frequently asked questions
Got questions about planting hydrangeas? You’re not alone! Here are answers to the most common queries to help you grow stunning blooms with confidence.
When is the best time to plant hydrangeas?
Plant hydrangeas in early spring or fall when soil temperatures are cool (50–60°F). Avoid extreme heat or frost—roots need time to establish. Container-grown plants can be planted year-round in mild climates.
How much water do hydrangeas need after planting?
Water deeply 2–3 times per week for the first month, keeping soil consistently moist but not soggy. Once established, hydrangeas tolerate short dry spells but thrive with 1–1.5 inches of water weekly. Mulch helps retain moisture!
Can I plant hydrangeas in pots instead of the ground?
Container hydrangeas are perfect for patios or small spaces. Use a large pot (15+ gallons) with acidic potting mix and ensure it has drainage holes. Move pots to partial shade in summer to prevent leaf scorch.
Why aren’t my hydrangeas blooming?
Bloom issues often stem from over-fertilizing with high phosphorus (encourages leaves, not flowers) or pruning at the wrong time. Prune old wood varieties (like Bigleaf) in late winter or new growth types (like Panicle) after blooming. Check soil pH too—hydrangeas love acidic soil (5.2–6.0).
Do hydrangeas need full sun or shade?
Most hydrangeas prefer partial shade (morning sun + afternoon shade), especially in hot climates. Bigleaf hydrangeas tolerate shade better, while Panicle or Oakleaf varieties can handle more sun. Watch for leaf burn if exposed to harsh afternoon rays.
How do I change my hydrangea flower color?
Flower color shifts with soil pH! For blue/purple blooms, add aluminum sulfate (lower pH to <5.5). For pink/red blooms, use lime (raise pH to 6.0+). Test soil annually—hydrangeas are divas about their pH!
Wrapping up and next steps
Planting hydrangeas is a rewarding journey that blends patience with beauty—especially when you unlock their full potential with the right acid-loving soil and care. 🌸 Whether you’re a seasoned gardener or a beginner, these blooms will thrive with your newfound knowledge, gifting you lush, vibrant flowers that steal the show.
Now that you’re armed with soil secrets, why not take the next step? Snap a photo of your hydrangea’s progress, share it with fellow plant lovers, or even experiment with blue vs. pink blooms by tweaking your soil’s pH!
- Pro Tip: Mark your calendar for fall—it’s the perfect time to prune and prep for next year’s even bigger blooms! ✂️