Blooming
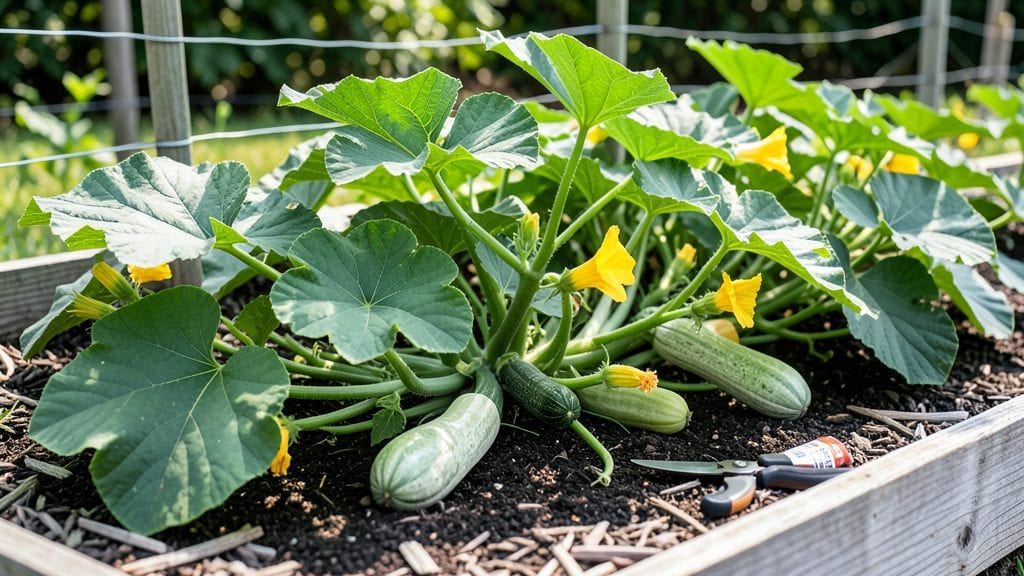
Growing squash blossoms that actually produce fruit starts with the right variety and a little patience. 🌻 I learned the hard way that not all squash plants bloom reliably—some need hand-pollination or specific growing conditions to set fruit.
The key is choosing varieties like 'Butternut', 'Zucchini', or 'Acorn' that thrive in your climate and giving them the right care from day one.
These plants crave full sun—at least 6-8 hours daily—and rich, well-draining soil mixed with compost. Water consistently at the base (not the leaves) to avoid fungal issues, and mulch heavily to keep roots cool.
The first blooms appear in 4-6 weeks, but wait until flowers open fully before harvesting them for eating or pollinating. Male blossoms (with long stems) appear first and are edible—fry them up like tempura!
Here’s the game-changer: hand-pollination when bees are scarce. Use a small paintbrush to transfer pollen from male to female flowers (female flowers have tiny squash bumps at their base).
With this trick, even urban gardeners can get a steady harvest without relying on pollinators. Just be patient—it takes 7-10 days after pollination for fruit to set.
Watch for blossom drop, a common frustration caused by uneven watering or temperature swings. If your plants look stressed, adjust care immediately. Once established, these vines reward you with edible blooms, fruit, and a buzzing pollinator party all season long. Ready to grow your own?"
📚 In This Guide
- What you need
- Instructions
- Tips and common mistakes
- Wrapping up and next steps
What you need
- ● Seeds or Seedlings: Choose Cucurbita pepo (e.g., zucchini, acorn squash) or Cucurbita moschata (e.g., butternut squash) varieties known for edible blossoms.
- ● Quantity: 3–5 plants (ensures cross-pollination and a bountiful harvest).
- ● Growing Medium: Well-draining potting mix (for containers) or loamy garden soil (for in-ground planting).
- ● Amend soil with compost (1 part compost to 3 parts soil) for nutrients.
- ○ Container (Optional but Helpful): 5-gallon fabric grow bags or plastic pots with drainage holes (if not planting in-ground).
- ● Hand Trowel – For planting seeds or seedlings.
- ● Garden Gloves – Protects hands from prickly vines.
- ● Watering Can or Hose with Spray Nozzle – Gentle watering prevents blossom drop.
- ● Pruning Shears – For trimming excess vines or deadheading spent blooms.
- ○ Trellis or Cage (Optional) – Supports vines and saves space (e.g., 4’x4’ tomato cage).
- ○ Mulch (Optional) – Straw or shredded leaves to retain moisture and suppress weeds.
- ● Sunlight: Full sun (6–8 hours daily).
- ● Warmth: Soil temperature of 60°F (15°C) or higher for germination.
- ● Space: Vines spread 3–6 feet; allow 3–5 feet between plants.
- ● Water: Consistent moisture (1–2 inches per week).
How to grow a thriving squash blossom plant for pollinators and edible flowers
Here's how to cultivate a squash blossom plant that attracts bees, hummingbirds, and butterflies while giving you edible blooms all season.
🌱 Step 1: Select and Prepare the Right Variety and Site
Choose a summer squash variety like 'Straightneck,' 'Zucchini,' or 'Yellow Crookneck'—their vibrant blossoms are the most pollinator-friendly. Squash plants need full sun (at least 6-8 hours daily) and well-draining soil with a pH of 6.0-6.8. Amend heavy clay soil with 2-3 inches of compost to improve drainage and fertility.
I always plant seeds 1 inch deep and 2-3 feet apart in hills of 3-4 seeds each. This spacing gives vines room to sprawl without competing for nutrients. If using transplants, harden them off for 7-10 days before setting them out after the last frost date. Watch for first true leaves—they signal it's safe to transplant.
💧 Step 2: Water Deeply and Maintain Consistent Moisture
Squash plants demand 1-2 inches of water weekly, but deep watering (soaking the root zone) is better than frequent shallow drinks. Water at the base of the plant in the morning to prevent fungal diseases like powdery mildew. You’ll know moisture is right when the top 2 inches of soil feel dry to the touch but not bone-dry.
Mulch with 2-3 inches of straw or shredded leaves to retain moisture and suppress weeds. Avoid wet foliage—it invites pests and disease. If blossoms drop without fruiting, your plant may be stressed from inconsistent watering or nutrient deficiency. A balanced 5-10-10 fertilizer applied every 4-6 weeks keeps blooms abundant.
☀️ Step 3: Encourage Pollination for Maximum Blossoms
Squash plants are heavily reliant on pollinators, but you can give them a boost. Hand-pollinate in the morning by gently brushing stamens (the male parts) onto female flowers (they have tiny squash bumps at their base). Alternatively, attract bees by planting companion flowers like marigolds or nasturtiums nearby.
Prune suckers (side shoots) early to redirect energy into main vines and blossoms. Remove any yellowing or diseased leaves immediately to prevent spread. If your plant produces mostly male flowers (long stems with no squash bump), it may need more sunlight or phosphorus-rich fertilizer. Female flowers appear later in the season—patience pays off!
✂️ Step 4: Harvest Blossoms and Manage Growth
Pick male blossoms (no squash bump) for culinary use when fully open but still vibrant. Harvest female blossoms (with tiny squash) only if you’re not growing squash—leave them to develop fruit. Use clean pruners to avoid damaging stems. Harvest in the early morning when flavors peak.
As vines mature, train them along a trellis or fence to save space and improve air circulation. Stop harvesting squash when vines flower heavily—this signals the plant is shifting energy from fruit to seeds. Save seeds from your best squash for next year’s garden. If pests like squash bugs appear, handpick them or spray with neem oil at dusk.
🪴 Step 5: Extend the Season with Seasonal Care
In late summer, reduce watering slightly to harden off plants before frost. If you live in a mild climate, protect plants with row covers to extend blooming into fall. In colder regions, harvest all remaining blossoms and compost the vines—don’t leave diseased plants in the soil.
For year-round blooms, start a second planting in early summer once the first crop is harvested. Succession planting ensures a continuous supply of edible flowers and pollinator support. Store seeds in a cool, dry place until next spring—properly dried seeds keep for 3-5 years. Your garden will buzz with life, and your kitchen will thank you!
Tips & tricks for perfect squash blossom plant growth
A few strategic moves will transform your squash blossom plant from a struggling vine into a pollinator paradise with abundant edible blooms.
Sunlight Strategy: That 6-8 hours of daily sun is non-negotiable, but here's the secret: position your plants to capture morning sunlight first—it's when temperatures are cooler and the light is most beneficial for photosynthesis. I've found that planting on the east side of structures often gives that extra hour of morning light that makes all the difference. For container growers, rotate pots weekly to ensure even sun exposure all around the plant.
Soil Science: The 2-3 inches of compost recommendation is perfect, but don't stop there—work in 1 cup of bone meal at planting time for that phosphorus boost that encourages more robust flowering. I've seen blossom production double when I combine the compost with this extra phosphorus source. Remember, squash plants are heavy feeders, so maintain that 6.0-6.8 pH range—test your soil if you're unsure, as even slight deviations can stress the plants.
Watering Wisdom: When checking that top 2 inches of soil for moisture, I like to use a soil probe—it gives a more accurate reading than just feeling the surface. The key is consistency: aim for that 1-2 inches weekly, but adjust based on your microclimate. Container plants will dry out faster than in-ground ones, so check them daily during hot spells. Morning watering is critical—it prevents fungal spores from lingering on wet foliage overnight.
Pollination Pro Tip: For hand-pollination, I've found using a small paintbrush works better than fingers—it's more precise and avoids damaging delicate stamens. Do this in the morning when flowers are fully open and bees are most active. Pro tip: if you notice more male flowers than female, it's often a sign the plant needs more phosphorus. A side dressing of 5-10-10 fertilizer can help rebalance this ratio within a few weeks.
Pro Tips for Squash Blossom Plant
- A few strategic moves will transform your squash blossom plant from a struggling vine into a pollinator paradise with abundant edible blooms.
- I've found that planting on the east side of structures often gives that extra hour of morning light that makes all the difference.
- Soil Science: The 2-3 inches of compost recommendation is perfect, but don't stop there—work in 1 cup of bone meal at planting time for that phosphorus boost that encourages more robust flowering.
Frequently asked questions
Got questions about growing and enjoying squash blossoms?
Here are answers to the most common queries—from planting to harvest—to help you make the most of these edible, pollinator-friendly flowers!
How long does it take for squash blossom plants to produce edible flowers?
Most squash varieties (like zucchini, butternut, or pumpkin) start blooming 4–6 weeks after transplanting in warm soil (60°F+). Early blooms may be male flowers (non-edible), but female blossoms—with tiny squash at their base—appear shortly after. For faster results, choose fast-maturing varieties like 'Eight Ball' zucchini!
When is the best time to harvest squash blossoms for eating?
Pick blossoms in the morning when they’re fully open but still tender. Male flowers (long stems, no squash) are best harvested 1–2 days after opening for peak flavor. Female flowers (with a tiny fruit bump) should be picked before the squash swells—they’re most delicate then!
Why aren’t bees visiting my squash blossoms? Troubleshooting tips?
If bees skip your flowers, check these fixes:
- Timing: Bees are most active in morning sun (7–10 AM)—plant near early-blooming herbs (basil, dill) to attract them.
- Pesticides: Avoid sprays while flowers are open; opt for neem oil or insecticidal soap after dusk.
- Water: Lightly water soil at the base early in the day to avoid wetting petals.
- Hand-pollinate: Gently transfer pollen with a paintbrush if needed!
Can I grow squash blossoms in containers? What’s the best setup?
Yes! Use a 5-gallon+ container with well-draining soil and support (like a trellis for vining types). Choose bush varieties (e.g., 'Patio Star' zucchini) for smaller spaces. Place in full sun (6+ hours/day) and fertilize lightly with balanced 10-10-10 every 2 weeks. Containers dry faster—water deeply when the top inch feels dry!
What’s the best way to cook or preserve squash blossoms?
Blossoms are delicate—use them fresh or preserve quickly! Popular methods:
- Frying: Dip in batter or tempura, then fry until golden (30 sec). Serve with lemon!
- Stuffing: Fill with cheese, herbs, or breadcrumbs, then bake at 375°F for 10–12 mins.
- Freezing: Blanch for 30 sec, shock in ice water, then freeze in a single layer before bagging.
- Pickling: Use a vinegar brine with garlic and dill for tangy snacks.
Pro tip: Harvest stems 1 inch below the flower to encourage more blooms!
Wrapping up and next steps
Growing a squash blossom plant is a rewarding journey that brings beauty, pollinators, and delicious rewards to your garden year-round! 🌸 Whether you're a seasoned gardener or just starting, these vibrant blooms add charm while attracting bees and butterflies—nature’s little helpers.
Now that you’re equipped with the basics, why not plant one today? Start small, experiment with varieties, and enjoy the sweet satisfaction of harvesting your own edible flowers. Happy gardening! 🌱