Picking
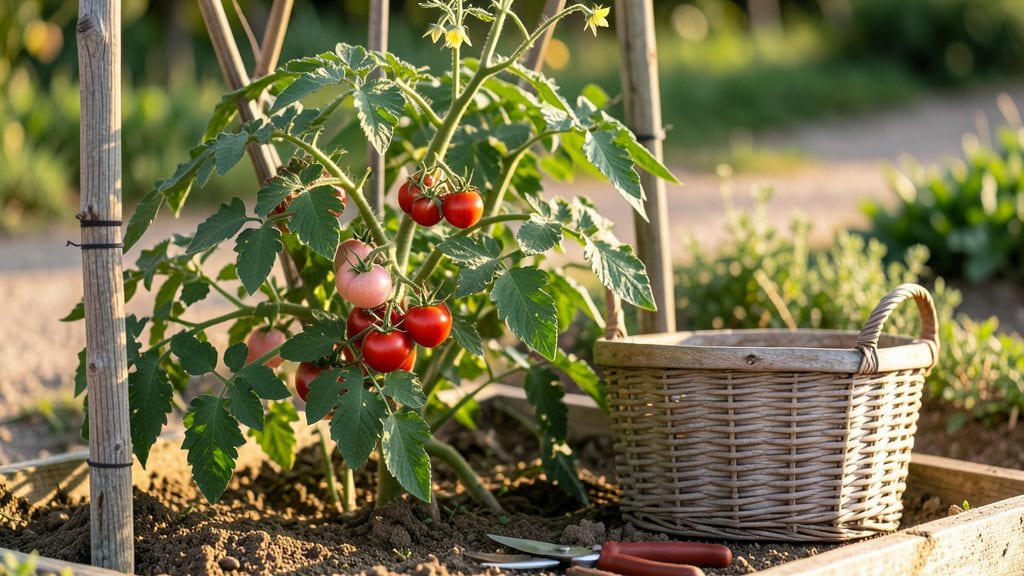
The art of tomato plant harvesting transforms a simple garden task into the key to a meal that lingers like a memory. 🌱 I’ve learned that waiting for the perfect shade of red—or even yellow—is worth every extra day, because that’s when the flavor explodes.
The trick isn’t just picking them; it’s knowing when to pick them so they taste like summer in every bite.
You’ll need just a few basics: sharp pruners or a knife for clean cuts, a bowl or basket to avoid bruising, and a sunny spot to let them finish ripening indoors if needed.
The real secret? Checking for give—gentle pressure should yield slightly, like a ripe peach. Overripe tomatoes? They’ll squish like jelly, and the flavor goes flat.
Once you start harvesting, the rewards come fast. Within days, you’ll have a countertop full of tomatoes at their peak—some still firm, others softening into jammy perfection. Store them stem-side down in a cool, dry place, and they’ll keep sweetening for weeks.
The key is consistency: pick regularly to encourage more fruit, and you’ll have a harvest that lasts.
This works for all tomato types—cherry, beefsteak, or heirloom—no matter your growing space. Whether you’re a balcony gardener or have a full plot, these steps turn a simple harvest into a season-long celebration. Let’s make sure every tomato you pick is worth the wait.
📚 In This Guide
- What you need
- Instructions
- Tips and common mistakes
- Wrapping up and next steps
What you need
- ● Harvesting tools: Sharp pruners or garden shears (1 pair) – Look for bypass-style pruners to avoid crushing stems.
- ● Clean, sturdy harvesting baskets or buckets (2-3) – Large enough to hold 5-10 lbs of tomatoes comfortably.
- ○ Gloves (optional but recommended) – Nitrile or leather gloves protect against thorns and stains.
- ● Harvesting containers: Plastic crates or wooden boxes (1-2) – For sorting and transporting tomatoes.
- ● Paper towels or newspaper (1 roll) – For gentle drying and preventing bruising.
- ● Preservation supplies (if storing long-term): Food-grade plastic bags or breathable produce bags (5-10) – For short-term storage (3-5 days).
- ● Canning jars or vacuum-sealed bags (if canning or freezing) – For long-term preservation.
- ● A sunny, dry day – Harvesting in wet conditions can spread disease and bruise tomatoes.
- ● Knowledge of your tomato variety’s ripening timeline – Check seed packets or plant tags for days to maturity.
- ● Access to clean water and a cutting surface – For rinsing and prepping tomatoes post-harvest.
- ● A harvesting knife (for larger tomatoes) – Useful for slicing through thick stems without damaging the plant.
- ● Labeling tags – To track varieties and ripening stages if growing multiple types.
- ● A portable scale – For weighing your harvest and tracking yield progress.
- ● Compost bin or bag – For disposing of overripe or damaged tomatoes.
Step-by-Step guide for harvesting tomatoes at peak ripeness
Here’s how I pick tomatoes for maximum flavor and shelf life—no guesswork involved.
🍅 Step 1: Identify Ripeness by Color and Texture
Tomatoes ripen gradually, so timing matters. For classic red varieties, look for a deep, even red color—no green patches at all. Yellow or orange tomatoes should be fully golden with no green. Gently squeeze the fruit: ripe tomatoes yield slightly to pressure but don’t feel mushy. A firm, heavy tomato is sweeter than a light one.
Check the stem end too. A ripe tomato will separate easily from the vine when you twist gently. If it resists, it’s not ready yet. I always harvest in the morning when temperatures are cooler—this preserves flavor and prevents sunscald on the vine.
🌿 Step 2: Pick the Right Tools and Technique
Use clean, sharp pruning shears or scissors to avoid damaging the plant. Cut the stem about ¼ inch above the fruit—this prevents disease from entering the plant. Never pull tomatoes off the vine; you’ll tear the stem and leave an open wound that invites rot.
Work quickly but carefully. A single tomato can weigh up to 1 pound, so support larger fruits with your other hand to avoid bruising. I lay a small basket or tray beneath the plant to catch fallen tomatoes—this keeps them from getting dirty or cracked.
⏰ Step 3: Harvest at the Optimal Time of Day
Morning is best for harvesting because cooler temperatures slow the breakdown of sugars and acids, locking in flavor. Avoid picking after a hot afternoon—tomatoes left in the sun can overripen and develop a mealy texture. If you must harvest later in the day, store them in a cool, shaded spot until you can process them.
Watch for signs of overripeness: wrinkled skin, soft spots, or a fermented smell mean the tomato’s past its prime. These are best used immediately for sauces or cooking. I always leave a few slightly underripe tomatoes on the vine to finish ripening indoors if frost threatens.
🪴 Step 4: Store and Preserve for Long-Term Use
Ripe tomatoes last about 5-7 days at room temperature, but they’ll keep longer in the fridge—though cold storage dulls flavor. For short-term storage, place them stem-side down on a counter away from direct sunlight. If you have a surplus, slice and freeze them for later use in soups or sauces.
For long-term preservation, canning is the gold standard. I use a pressure canner for whole tomatoes or a water bath for sauces. Sterilize jars and lids first, and always follow a trusted recipe to prevent botulism. Alternatively, dry slices in a dehydrator or oven at 140°F for 6-8 hours until leathery.
✂️ Step 5: Prune and Maintain the Plant After Harvest
After harvesting, inspect the plant for damaged or diseased leaves. Remove any yellowed or spotted foliage with clean pruners to improve airflow and prevent fungal growth. Pinch off suckers—those little shoots that form in the leaf axils—to redirect the plant’s energy into fruit production rather than foliage.
Water deeply after harvesting to replenish moisture lost during the day. Avoid overhead watering, which can spread disease. A 1-inch weekly watering (more in extreme heat) keeps the plant healthy and encourages new fruit to set. If your tomatoes are still green when frost arrives, pick them and ripen indoors in a paper bag with a banana for a few days.
Tips & tricks for perfect tomato plant harvesting
Here's what I've learned after years of harvesting tomatoes—these little tricks make all the difference in flavor and yield.
The Color Test: In Step 1, when checking for ripeness, focus on the color transition at the stem end. That's where ripening starts, so look for a deep red (or golden) blush there first. I also check the underside of the tomato—it should be uniformly colored, not blotchy. This tells me the tomato ripened evenly in the sun.
Tool Technique: For Step 2, I've found that using a small serrated knife works better than pruning shears for larger tomatoes. The serrations give you more control when cutting that ¼ inch above the fruit. And here's a pro move: twist the tomato gently while cutting to prevent crushing. The stem should come away cleanly, leaving a tiny nub on the tomato.
Preservation Timing: When drying tomatoes in Step 4, I always start checking for doneness at the 5-hour mark, even though the full time is 6-8 hours at 140°F. The drying time depends on your oven's heat distribution. Look for leathery texture and slightly wrinkled skin—these are your cues. If they're still pliable, return them for another hour.
Post-Harvest Care: After harvesting, I give my plants a ½-inch deep watering immediately to compensate for moisture loss. This is especially important in Step 5 when you're dealing with large, heavy tomatoes that can stress the plant. I also avoid pruning more than 20% of the foliage at once—gradual removal prevents shock to the plant.
Pro Tips for Tomato Plant Harvesting
- Here's what I've learned after years of harvesting tomatoes—these little tricks make all the difference in flavor and yield.
- The Color Test: In Step 1, when checking for ripeness, focus on the color transition at the stem end.
- Tool Technique: For Step 2, I've found that using a small serrated knife works better than pruning shears for larger tomatoes.
Frequently asked questions
Got questions about tomato harvesting?
You’re not alone! Here are answers to the most common queries—from timing tricks to troubleshooting—so you can pick perfect tomatoes like a pro.
How do I know when tomatoes are fully ripe for harvesting?
Look for uniform color (deep red, yellow, or purple—depending on the variety), a slight give when gently squeezed, and a fragrant aroma near the stem. Avoid harvesting green tomatoes unless you’re saving them for sauces or ripening indoors. Pro tip: Morning harvests prevent overripening and bruising!
What’s the best time of day to pick tomatoes?
Harvest in the early morning (before 9 AM) when temps are cool and tomatoes are firmest. Avoid midday heat, which can cause sunscald or split fruit. If you must pick later, choose shady spots first to reduce stress on the plant.
Can I pick tomatoes before they’re fully ripe?
Yes! Green tomatoes can ripen indoors with a paper bag trick: Place them in a bag with a ripe banana (ethylene gas speeds ripening) and store at room temp for 3–7 days. For heirloom varieties, partial ripeness is fine—just avoid hard, pale green ones.
How should I cut tomatoes to avoid damaging the plant?
Use clean pruners or scissors (not your hands!) and cut the stem 1–2 inches above the fruit. Leave the calyx (leafy top) intact to prevent rot. Twisting or tearing stems can stress the plant and invite disease—so be gentle!
Why are my tomatoes cracking or splitting?
Splitting happens when tomatoes grow too fast after heavy rain or inconsistent watering. To prevent it:
- Water deeply but evenly (1–1.5 inches per week).
- Mulch around plants to retain moisture.
- Harvest overripe tomatoes immediately to stop water uptake.
Wrapping up and next steps
Harvesting your tomato plants at peak ripeness ensures the best flavor, texture, and nutritional benefits—plus, it keeps your garden thriving! With the right tools, timing, and storage techniques, you’ll enjoy homegrown tomatoes that rival (or even beat) store-bought.
Now that you’re armed with pro tips, it’s time to roll up your sleeves and savor the rewards of your hard work.
🌱 Next step: Grab those baskets, head outside, and start harvesting! Share your bounty with friends, freeze extras for winter, or experiment with new recipes—your garden’s success story is just beginning. Happy harvesting! 🍅✨