Pruning
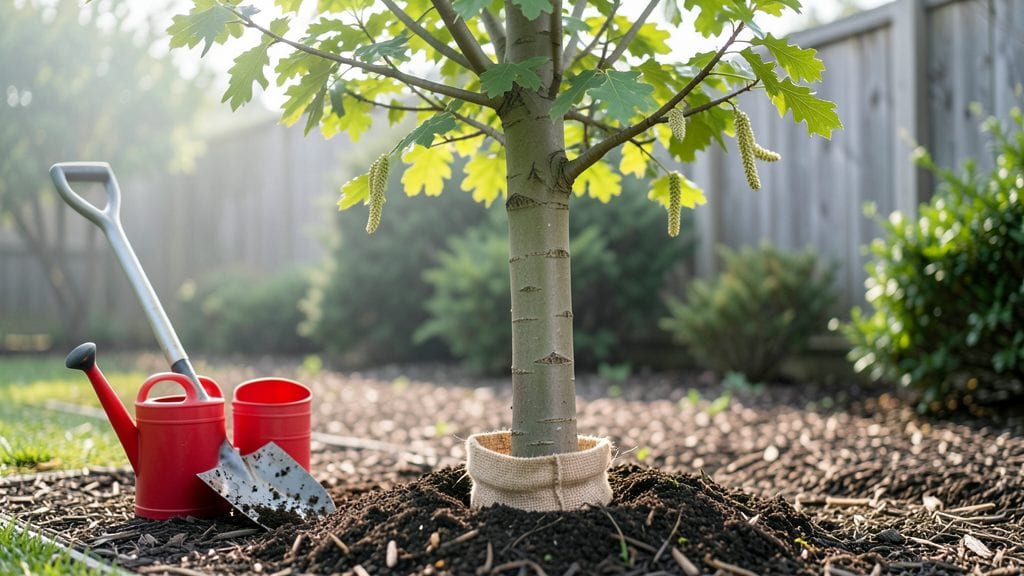
The right tree planting process can turn a bare spot into a thriving shade provider in just a few seasons. I’ve planted over 20 trees—some thrived, others struggled—and the difference always came down to these key steps.
The secret isn’t just digging a hole; it’s about soil, depth, and how you support the roots right from day one.
You’ll need a few basics: gloves, a shovel, mulch, and a hose. For the hole, aim for twice as wide as the root ball but only as deep as the roots themselves.
Evergreens and deciduous trees both need proper drainage, but evergreens hate soggy roots, so test your soil first. Most mistakes happen here—planting too deep or not staking properly.
Within weeks, you’ll see new growth as roots spread into the surrounding soil. The first year is critical: water deeply once a week (not just a quick sprinkle) and keep mulch 2-3 inches thick but away from the trunk.
By spring, your tree will be stronger than if you’d bought it from a nursery and planted it haphazardly.
This method works for shade trees, fruit trees, and even small ornamentals. Whether you’re fixing a bare yard or adding to an established landscape, these steps ensure your tree grows fast and strong. Let’s get started with the exact technique that’s worked for me every time.
📚 In This Guide
- What you need
- Instructions
- Tips and common mistakes
- Wrapping up and next steps
What you need
- ● Tree(s): Choose species native to your climate (e.g., oak, maple, or fruit trees). Quantity depends on your project—start with 1-5 for beginners.
- ● High-quality soil: 5-10 gallons of native topsoil or compost-amended soil (avoid garden soil with weeds or pests).
- ● Organic mulch: 2-3 cubic feet (wood chips, straw, or pine needles). Pro tip: 💡 Keep mulch 3-4 inches deep and 3 inches away from the tree trunk to prevent rot.
- ● Slow-release fertilizer: 1-2 lbs (look for balanced NPK ratios like 10-10-10 or organic options like bone meal).
- ● Shovel or spade: A round-point shovel (for digging) or flat-edged spade (for slicing roots).
- ● Garden fork or trowel: For loosening compacted soil around roots.
- ● Wheelbarrow or bucket: 5-gallon capacity for mixing soil and mulch.
- ● Measuring tape: To ensure proper planting depth (root flare should sit 1-2 inches above ground).
- ● Gloves and knee pads: For comfort and hygiene while working.
- ● Watering can or hose with nozzle: 1-2 gallons of water per tree initially, plus ongoing hydration.
- ● Site selection: Choose a spot with 6+ hours of sunlight (varies by tree species), 6+ feet of clearance from structures, and well-draining soil. Avoid low-lying areas prone to flooding.
- ● Permits or approvals: Check local regulations—some areas require permits for large trees or urban planting.
- ● Weather check: Plant on a cool, cloudy day (avoid extreme heat or frost) to reduce transplant shock.
- ○ Optional but helpful: Soil test kit ($10-$20) to check pH and nutrient levels.
- ● Tree stake and ties (if planting in windy areas).
- ● Post-planting care guide (for watering schedules and pruning tips).
Instructions: planting trees for fast, healthy establishment
Here’s how to plant trees the right way—so they grow strong and thrive from day one.
Choose the Right Location and Dig the Hole
Pick a spot with 6+ hours of sunlight daily, unless your tree is shade-tolerant. Avoid low areas where water pools—roots need oxygen, not soggy soil. Use a shovel or auger to dig a hole twice as wide as the root ball but no deeper. This encourages roots to spread outward instead of circling downward, which weakens the tree.
Loosen the sides of the hole with a fork or your shovel to reduce compaction. If your soil is heavy clay, mix in 2-3 inches of compost into the backfill soil—this improves drainage and gives roots a nutrient boost right away. I always check the hole’s depth by placing the root ball inside; it should sit 1-2 inches above ground level when finished.
Prepare the Root Ball and Position the Tree
Remove the tree from its container and gently tease the roots at the edges if they’re circling. Soak the root ball in 5 gallons of water for 10-15 minutes before planting—this prevents transplant shock by keeping roots hydrated. If planting a balled-and-burlapped tree, cut away any twine or wire that could girdle the trunk as it grows.
Place the tree in the hole so the top of the root ball sits level with the surrounding soil. Use a level to double-check—tilting the tree can cause uneven growth or stress. If the hole is too deep, add a 2-inch layer of backfill soil to raise the root ball. Step back and visualize how the tree will fill its space; mature height and spread matter for long-term spacing.
Backfill and Water Thoroughly
Fill the hole with the native soil you removed, tamping down lightly every 2 inches to eliminate air pockets. Avoid compacting too hard—roots need loose soil to grow into. If you mixed compost into the backfill, sprinkle a 1-inch layer around the edges of the hole before adding more soil. This creates a nutrient-rich zone where new roots will form.
Water the tree deeply—about 10 gallons—right after planting. Let the water soak in, then add another 5 gallons to settle the soil around the roots. You’ll see the soil surface sink slightly as it compacts naturally. Mulch with 2-3 inches of organic mulch (like wood chips) in a 3-foot radius, keeping it 6 inches away from the trunk to prevent rot.
Stake Only If Necessary and Protect Young Trees
Staking is only needed for windy sites or young, top-heavy trees like willows or poplars. If you must stake, use two stakes placed 6-12 inches from the trunk and tie the tree loosely with soft fabric strips—never wire, which can cut into the bark. Check the ties every 2-3 weeks and loosen them as the tree grows stronger.
Install a tree guard (like a wire cage or commercial protector) to shield the trunk from rabbits, deer, or lawnmower damage. For extra protection, wrap the lower trunk with tree wrap if your climate has harsh winters or extreme sun. Water the tree once a week for the first month, then every 2 weeks once established, adjusting for rain. Deep watering—10-15 gallons—encourages roots to grow downward for stability.
Tips & tricks for perfect tree planting
These simple but game-changing tips will help your newly planted trees establish faster and grow stronger from the start.
Soil Preparation Matters: In Step 1, when you're digging the hole, take an extra minute to break up the sides with a fork. Compacted soil can strangle new roots trying to grow outward. If your soil is heavy clay, mix in that 2-3 inches of compost right into the backfill soil—not just around the edges. This creates a nutrient-rich zone that encourages roots to spread quickly, which is key for fast establishment.
Root Ball Hydration is Critical: That 10-15 minute soak in Step 2 isn't just about hydration—it's about preventing transplant shock. I've seen trees wilt dramatically because their roots weren't properly hydrated before planting. Use a bucket with a spout to control the water flow and ensure the entire root ball is evenly saturated. This step makes all the difference in how quickly your tree recovers from the stress of transplanting.
Level Matters More Than You Think: When positioning your tree in Step 2, that level check isn't just about looks—it's about long-term health. A tree planted even slightly tilted will grow unevenly, creating structural weaknesses. I recommend using a small carpenter's level or even a smartphone level app. This small investment prevents years of potential problems down the road.
Watering Wisdom: The 10 gallons right after planting in Step 3 should create a visible puddle that slowly drains away. This ensures water reaches all the way down to the roots. Then that second 5 gallons helps settle the soil around the roots. Pro tip: Water slowly over 15-20 minutes rather than dumping it all at once. This gives the soil time to absorb properly without running off.
Pro Tips for Tree Planting Process
- These simple but game-changing tips will help your newly planted trees establish faster and grow stronger from the start.
- Soil Preparation Matters: In Step 1, when you're digging the hole, take an extra minute to break up the sides with a fork.
- Root Ball Hydration is Critical: That 10-15 minute soak in Step 2 isn't just about hydration—it's about preventing transplant shock.
Frequently asked questions
Got questions about tree planting?
You’re not alone! Here are answers to the most common queries to help you plant with confidence—and avoid costly mistakes.
When is the best time to plant a tree?
The ideal window is early spring or fall—when soil is workable but not frozen, and temperatures are mild. Avoid extreme heat (summer) or cold (winter), as these stress young roots. If you’re in a warm climate, plant during the coolest months (e.g., late fall to early spring).
How long does it take for a tree to establish itself?
Establishment varies by species, but most trees take 1–3 years to fully root in. Young trees need consistent watering (deep soaks, not frequent light sprinkles) and mulch to retain moisture. Signs of success? New growth in spring and sturdy stems that don’t wilt in dry spells.
How often should I water a newly planted tree?
Water deeply 2–3 times per week for the first year, aiming for 1–1.5 inches of water per session. Use a soaker hose or drip irrigation to avoid wasting water. After the first year, reduce to once a week (unless drought strikes). Pro tip: Check soil moisture 2–3 inches down—if it’s dry, water again!
Can I plant a tree in a small yard or container?
Yes! Dwarf or semi-dwarf varieties (like Japanese maples or columnar evergreens) thrive in tight spaces. For containers, choose 5-gallon pots or larger with drainage holes, and replant every 2–3 years. Just ensure the pot gets 6+ hours of sunlight daily and you’re ready to water regularly.
What should I do if my tree’s leaves turn yellow or wilt?
Yellowing leaves often signal overwatering or root rot—check soil moisture and ensure the area drains well. Wilting could mean underwatering or transplant shock. Trim damaged leaves, adjust watering, and apply mulch to retain moisture. If issues persist, test soil pH or consult a local arborist.
Wrapping up and next steps
Planting a tree is more than just a green-thumb project—it’s an investment in our planet’s future! 🌱 By following the right steps—from choosing the perfect spot to nurturing young roots—you’re giving your tree the best chance to thrive.
Whether you’re a gardening pro or a curious beginner, every tree you plant makes a difference.
Ready to take action? Start small—even one tree can transform your space and the environment. Grab your tools, pick a seedling, and get planting! For even better results, join a local reforestation effort or share your newfound knowledge with friends.
Together, we can grow a greener world, one root at a time. 🌍✨