Transplanting
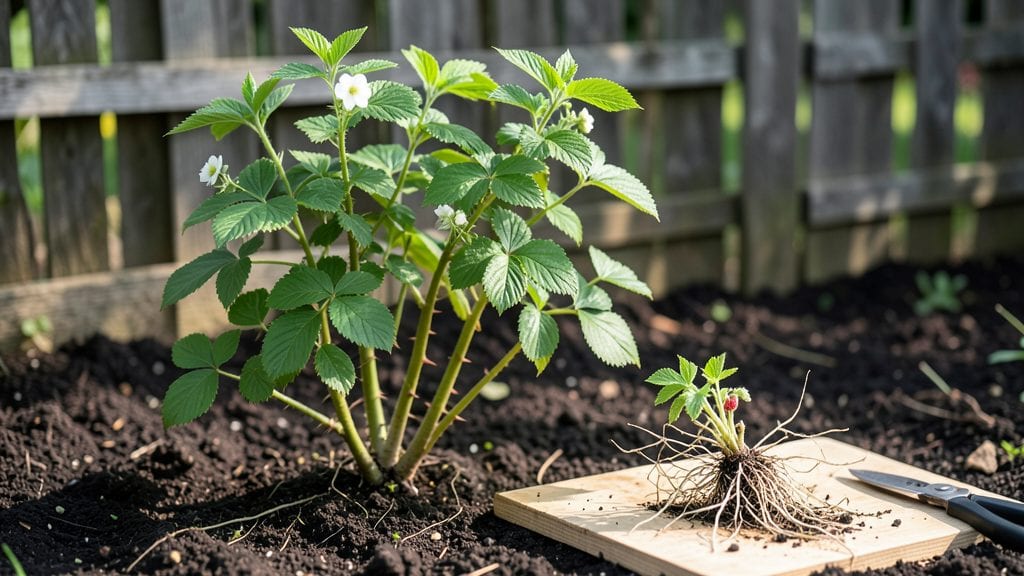
Planting Willamette raspberries means fast roots and a harvest that stretches from summer through fall—if you nail the first few weeks. I’ve planted these thornless beauties three times now, and the difference between a struggling patch and a productive thicket comes down to soil, spacing, and a little patience.
The key is getting those canes in the ground when they’re ready to grow, not when it’s convenient for you.
Start with well-draining soil mixed with compost—Willamettes hate soggy feet. Space the canes 24 inches apart in rows 6 feet apart to give them room to spread without competing for sunlight. Plant the roots just below the soil line, firming the dirt gently to eliminate air pockets.
These raspberries thrive in full sun, so pick a spot where they’ll get at least 6-8 hours of light daily, or they’ll produce fewer berries and more leaves.
Water deeply once a week for the first month, keeping the soil moist but not waterlogged. A 3-inch layer of mulch around the base locks in moisture and keeps weeds at bay.
The first year is all about root growth, so resist the urge to harvest—let those canes focus on establishing themselves. By next spring, you’ll see strong, disease-resistant canes ready to fruit like crazy.
Here’s the secret weapon: prune lightly in early spring to shape the plant, and avoid heavy pruning until after the first harvest. Willamettes reward good care with year-round production—summer fruit on second-year canes and fall fruit on new growth. Now grab those canes and let’s get them growing!
📚 In This Guide
- What you need
- Instructions
- Tips and common mistakes
- Wrapping up and next steps
What you need
- ● Willamette raspberry plants: 3–5 bare-root or potted plants (ensure they’re disease-free and from a reputable nursery).
- ● Well-draining soil: A mix of 60% topsoil, 30% compost, and 10% perlite or coarse sand (for loose, nutrient-rich beds).
- ● Organic mulch: 2–3 inches of straw, wood chips, or pine needles (to retain moisture and suppress weeds).
- ● Balanced fertilizer: 10-10-10 or organic options like composted manure (apply at planting and mid-season).
- ● Support system: T-posts or stakes: 6–8 ft tall, spaced 6 ft apart.
- ● Wire or trellis: 16–18 gauge galvanized wire (3–4 strands for strong support).
- ● Drip irrigation or soaker hose: For consistent moisture (raspberries hate soggy roots!).
- ● Garden trowel or transplanting spade.
- ● Pruning shears (sterilized with rubbing alcohol).
- ● Measuring tape or ruler (for spacing).
- ● Gloves (to protect hands from thorns!).
- ● Wheelbarrow (for mixing soil amendments).
- ● Epsom salt: A handful mixed into planting holes for magnesium boost.
- ● Row cover: Lightweight fabric to protect young plants from pests or late frosts.
- ● Soil pH test kit: Willamette raspberries thrive in slightly acidic soil (pH 5.5–6.5).
- ● Compost tea: For a nutrient-rich soil drench post-planting.
Instructions for planting Willamette raspberries
Here's how to get these productive berries established quickly and thriving for years.
Choose the Perfect Planting Site
Willamette raspberries demand full sun exposure—at least 8 hours of direct sunlight daily—for optimal fruit production. I select a location with morning sun and afternoon shade if temperatures exceed 85°F, as the delicate canes appreciate some relief from intense afternoon heat. The soil must drain exceptionally well; these plants rot quickly in soggy conditions.
Test your soil's drainage by digging a 12-inch hole, filling it with water, and timing how long it takes to drain. If water remains after 30 minutes, amend the soil with 2-3 inches of coarse sand or perlite mixed into the top 12 inches of soil. Willamette raspberries thrive in soil with a pH between 5.5 and 6.5, so test your soil and adjust with sulfur or lime if needed.
Prepare the Soil and Planting Bed
Two weeks before planting, till the soil to a depth of 12 inches, removing any weeds or grass. Incorporate 3-4 inches of well-aged compost into the top 6 inches of soil to enrich it without overwhelming the plants. I avoid fresh manure—it can burn tender roots and attract pests. For 4 plants, spread 1 cup of 10-10-10 slow-release fertilizer evenly over the bed and work it into the soil.
Create planting holes 18 inches apart in rows spaced 6 feet apart. This spacing ensures adequate airflow, reducing the risk of fungal diseases like cane blight. If planting in an urban garden with limited space, you can reduce row spacing to 4 feet, but be prepared for slightly less yield. Water the holes deeply 24 hours before planting to settle the soil and prevent air pockets around the roots.
Plant Bare-Root Canes Correctly
Soak bare-root canes in lukewarm water for 2-3 hours before planting to rehydrate the roots. This step is critical—dry roots take longer to establish and are more susceptible to transplant shock. Plant canes in early spring, just as new growth begins, or in fall, allowing 6-8 weeks for roots to establish before winter.
Position each cane so the crown (the swollen area where roots and canes meet) sits 1 inch below the soil surface. This depth ensures stability while preventing the crown from rotting if soil levels shift. Space canes 18 inches apart within the row, and spread the roots outward in the hole, ensuring they make good contact with the soil. Backfill the hole with soil, firming gently to eliminate air pockets.
Water and Mulch for Fast Establishment
Water the newly planted canes deeply immediately after planting, ensuring the soil is thoroughly moistened to a depth of 12 inches. Use a soaker hose or drip irrigation to deliver water slowly and evenly, avoiding runoff. Over the next 2 weeks, water every 2-3 days to keep the soil consistently moist but not waterlogged. Willamette raspberries establish roots quickly, but consistent moisture is key during the first 30 days.
Apply a 3-inch layer of organic mulch, such as straw or wood chips, around each plant, keeping it 6 inches away from the cane base to prevent rot. Mulch conserves soil moisture, regulates temperature, and suppresses weeds. Replenish the mulch as it decomposes, maintaining the 3-inch layer throughout the growing season. Avoid synthetic mulches—they can smother the soil and disrupt microbial activity.
Prune and Support for Year-Round Productivity
In the first year, focus on establishing strong canes. Remove any weak or damaged canes at planting, and trim the remaining canes back to 4-5 buds to encourage bushier growth. Willamette raspberries produce fruit on floricanes (second-year canes), so avoid harvesting in the first year—this ensures the plant directs energy into root and cane development.
Install T-posts or sturdy stakes at planting to support the canes as they grow. Use soft ties or cloth strips to secure the canes to the support, avoiding wire or anything that can cut into the bark. By late summer, the canes will need additional support—add a second row of stakes or a trellis system to keep the canes upright and organized. This support system makes harvesting easier and reduces disease risk by improving airflow.
Tips & tricks for perfect Willamette raspberry planting
Fast establishment is everything with Willamette raspberries, and these proven techniques will help you skip the common pitfalls that slow down root growth.
Soil Drainage Test: The 30-minute drainage test in Step 1 is non-negotiable for these raspberries. If water lingers beyond this time, you're risking root rot which can kill your plants before they even establish. I've found that amending with coarse sand or perlite creates the ideal loose structure that mimics their native volcanic soil conditions. For faster results, consider adding 10% horticultural grit to your amended soil mix—this improves drainage while maintaining moisture retention.
Root Rehydration Strategy: That 2-3 hour soak for bare-root canes in lukewarm water isn't just recommended—it's essential. Cold water shocks the roots while hot water can damage them. I use a bucket of water with a few drops of seaweed extract (optional) to boost root growth hormones. After soaking, gently shake off excess water before planting to prevent waterlogging around the roots.
Mulch Timing: Applying that 3-inch organic mulch layer immediately after planting creates a microclimate that maintains consistent moisture while preventing soil temperature fluctuations. I've noticed that straw mulch actually breaks down slightly faster than wood chips, so I replenish it every 4-6 weeks during peak summer months. The key is keeping that mulch 6 inches away from the cane base—too close and you'll invite rot.
Support System Pro Tip: When installing your T-posts or stakes in Step 5, bury them 12 inches deep for maximum stability. I've seen many gardeners skip this and end up with flopping canes that break under fruit weight. For urban gardens where space is tight, consider a vertical trellis system that allows you to grow multiple rows in the same footprint while improving airflow between canes.
Pro Tips for Willamette Raspberry Planting
- Fast establishment is everything with Willamette raspberries, and these proven techniques will help you skip the common pitfalls that slow down root growth.
- Soil Drainage Test: The 30-minute drainage test in Step 1 is non-negotiable for these raspberries.
- Root Rehydration Strategy: That 2-3 hour soak for bare-root canes in lukewarm water isn't just recommended—it's essential.
Frequently asked questions
Frequently Asked Questions
Got questions about planting Willamette raspberries? You’re not alone! Here are some of the most common queries—plus quick, practical answers to get you growing with confidence.
When is the best time to plant Willamette raspberries?
The ideal window is early spring (March–April) or early fall (September–October). Planting in spring gives roots time to establish before summer heat, while fall planting allows them to settle before winter dormancy. Avoid planting in extreme heat or frost—roots need stable conditions to thrive!
How long does it take for Willamette raspberries to produce fruit?
Patience pays off! Primocanes (first-year canes) won’t bear fruit, but floricanes (second-year canes) will produce berries 12–18 months after planting. With proper care, you’ll see your first harvest in late summer or early fall. Prune strategically to encourage more canes and bigger yields!
Can I grow Willamette raspberries in containers?
Containers work well if they’re at least 18–24 inches deep with drainage holes. Use a high-quality potting mix with compost, and place them in a spot with 6+ hours of sunlight daily. Just remember: container-grown plants may need more frequent watering and fertilizing to match in-ground berries.
What should I do if my raspberries develop yellow leaves?
Yellow leaves can signal overwatering, nutrient deficiency, or disease. First, check soil moisture—raspberries hate soggy roots. If leaves are pale, amend soil with balanced fertilizer (high in nitrogen early in the season). For fungal issues (like rust), remove affected leaves and treat with neem oil or copper fungicide.
Do Willamette raspberries need a trellis or support?
Yes! Raspberries thrive with support to improve air circulation, reduce disease, and make harvesting easier. Use a 4–6 foot tall trellis or wire system. Train canes to grow upward, and prune old canes annually to keep the plant healthy and productive. No trellis? Expect tangled, hard-to-reach berries!
Wrapping up and next steps
Planting Willamette raspberries is a rewarding journey that yields sweet, juicy berries with minimal fuss—especially in the Pacific Northwest’s climate! 🌱 With the right soil prep, spacing, and care, you’ll enjoy year-round harvests and fast-growing roots that make maintenance a breeze.
Whether you’re a seasoned gardener or a beginner, these berries are a fantastic choice for both flavor and productivity.
Now that you’re armed with the know-how, roll up your sleeves and get planting! Start by marking your garden bed, then follow the steps to give your Willamette raspberries the best possible start.
Before you know it, you’ll be savoring homegrown berries straight from the vine—what’s next? Why not plan a delicious recipe or share your progress with fellow gardening enthusiasts? Happy growing! 🍓✨